Windows 11 users may sometimes encounter an error called "Critical Process Died". This error often causes system crashes, leading to a Blue Screen of Death (BSOD), which severely impacts the user experience. This article will introduce several effective solutions to help you quickly fix this error and restore system stability.
What Is the "Critical Process Died" Error
The "Critical Process Died" error is a common issue in the Windows operating system. It typically indicates that a critical process failed or was lost during system startup. This error can be caused by various factors, including corrupted system files, hardware problems, driver conflicts, and third-party software issues.
1. Check for Driver Updates
Outdated or incompatible drivers may trigger the "Critical Process Died" error. Ensuring that all drivers are up to date can effectively prevent this issue. It is recommended to use Driver Sentry for automatic driver detection and updates, saving time and effort while avoiding the risk of downloading or installing incorrect drivers.
Click the download button to get the latest version of Driver Sentry. After installation, open the software and click "Scan".

Once the scan is complete, a list of missing or outdated drivers will be displayed. Locate the drivers that need updating and click the "Update" button.
After the update is complete, restart your computer to ensure that the new drivers take effect properly.
2. Check and Repair System Files
Search for "Command Prompt" and select "Run as administrator".
In the Command Prompt window, type the following command and press Enter: sfc /scannow

This command will begin scanning all protected system files. If any corrupted files are found, SFC will attempt to repair them automatically. This process may take a few minutes, so please be patient.
Once the scan is complete, the system will display the repair results. If corrupted files were found and fixed, you will see a confirmation message.
After the repair is finished, restart your computer to apply the changes and check if the issue is resolved.
3. Run the CHKDSK Command
Search for "Command Prompt" and select "Run as administrator".
In the Command Prompt window, type the following command and press Enter: chkdsk C: /f /r
If prompted to restart your computer, type "Y" and press Enter. Then, restart your computer, and the system will automatically scan and repair any detected disk errors.
4. Disable Fast Startup
Press Win + S to open the search bar, type "Control Panel", and open it.
In the Control Panel, select "Power Options".
Click "Choose what the power buttons do" from the left menu.
Click "Change settings that are currently unavailable" at the top of the page.
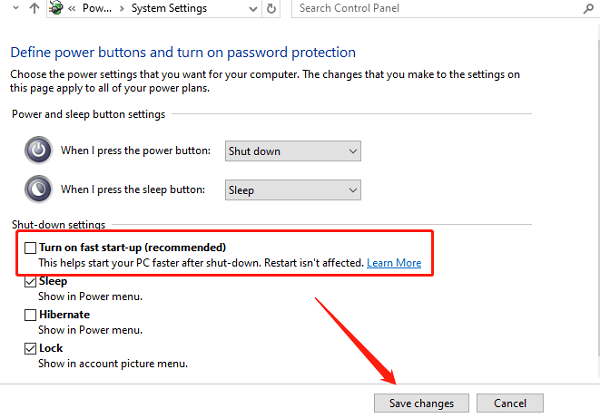
Under the "Shutdown settings" section, uncheck "Turn on fast start-up (recommended)", then click "Save changes".

Restart your computer to apply the settings.
5. Run Windows Defender
Press Win + S, type "Windows Security", and open it.
Click "Virus & threat protection" and select "Scan options".
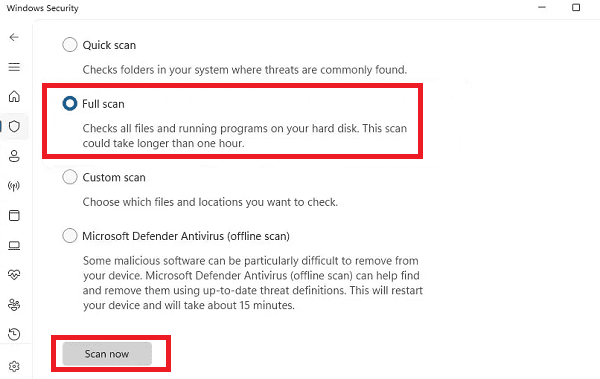
Choose "Quick scan" or "Full scan", then click the "Scan Now" button.

Wait for the scan to complete and follow any prompts to remove detected threats.
6. Reset Windows 11
Press Win + I to open "Settings".
Select "System" and click "Recovery".
Under the "Recovery options" section, find "Reset this PC" and click "Reset PC".
Choose either "Keep my files" or "Remove everything".
Select "Cloud download" or "Local reinstall" as the reset method, then follow the on-screen instructions to complete the reset.
Note: Choosing "Remove everything" will erase all your data. Make sure to back up important files beforehand.
By following these methods, you can effectively resolve the "Critical Process Died" error in Windows 11. If the problem persists, consider contacting professional technical support for further assistance.
See also:
Quick Fix for Windows 10 Can't Connect to WiFi
How to Fix No Internet Access but Connected
How to Fix a Disappearing Mouse Cursor
Quick Fix Guide for Keyboard Typing Wrong Letters on Windows 10