Many users may encounter the issue where their headphones are plugged in but produce no sound, significantly affecting their audio experience. This article will introduce several effective solutions to help you quickly fix this problem.
1. Check Basic Connections
Ensure the headphones are properly inserted: Try unplugging and reinserting them into the correct audio jack.
Try a different jack: If your computer has multiple headphone ports, test another one.
Test the headphones: Connect them to another device (such as a phone or tablet) to see if they work.
Adjust the volume: Make sure the system volume is not muted and try increasing it.
2. Update Audio Drivers
Outdated or corrupted drivers are a common cause of headphone audio issues. Keeping your audio drivers updated can effectively resolve this problem. Using Driver Sentry for automatic driver detection and updates can save time and prevent installation errors.
Download and install the latest version of Driver Sentry. Open the software and click "Scan".

After scanning, find the audio driver in the list and click "Upgrade".
Restart your computer to apply the changes.
3. Check Realtek Audio Manager Settings
Search for "Realtek Audio Console" or "Realtek HD Audio Manager" in Windows and open it.
Go to "Playback Devices", ensure your headphones are enabled, and set them as the default device.
Click "Advanced Settings", enable or disable "Front Panel Jack Detection", and test the sound.
4. Set Default Audio Device
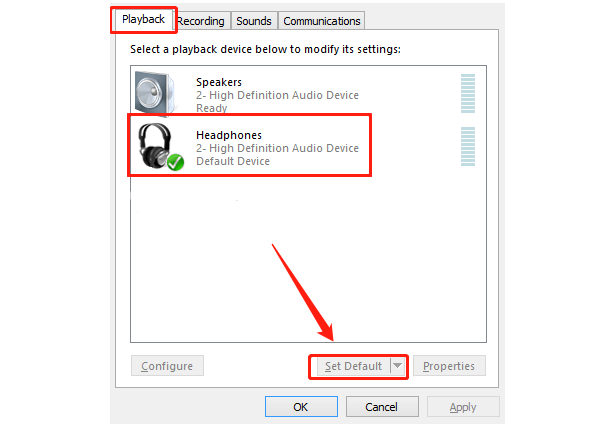
Right-click the volume icon in the taskbar and select "Sounds".
Under the "Playback" tab, find your headphones and click "Set Default".

If the headphones are already set as the default device, click "OK" to save the settings.
5. Run Windows Troubleshooter
Open Settings, go to "Update & Security".
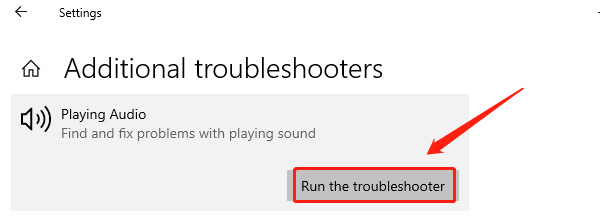
Select "Troubleshoot", then click "Additional troubleshooters".
Find "Playing Audio", then click "Run the troubleshooter".

Follow the on-screen instructions to diagnose and resolve the issue.
6. Restart Windows Audio Service
Press Win + R, type "services.msc", and press Enter.
Locate "Windows Audio" in the services list.
Right-click the service and select "Restart".
If the service is not running, right-click it, select "Start", and set "Startup Type" to "Automatic".
These solutions should effectively fix the issue of headphones being plugged in but producing no sound, ensuring a smooth audio experience. If the problem persists, consider seeking professional technical support or checking for hardware damage.
See also:
How to Fix Dying Light 2 Stuttering and FPS Drops
Fix the Error Occurred While Updating Steam