"I have M585 and K580 combo. The cursor moving on the screen is delayed when I move the mouse. I believe it uses Microsoft driver. I wonder if the issue can be fixed by installing Logitech driver, however I spent a couple of hours but couldn't find the drive on their website." --A Reddit User
If you're unsure how to download Logitech mouse drivers, this guide will walk you through the steps and offer some helpful tips.

Part 1. Does Logitech Mouse Need a Driver?
Generally, a Logitech mouse does not always need a driver to function. Most Logitech mice are plug-and-play. They will work immediately when connected to your computer using the default drivers provided by your operating system. However, if your mouse doesn't work well or if you need some advanced features, especially wireless features, you might need to download a driver.
Part 2. How to Download Logitech Mouse Driver?
In this part, we have collected two effective methods to help you find and download drivers for your Logitech mouse.
Method 1. Download Mouse Driver from Logitech Official
Logitech offers official drivers for their mice, typically through the Logitech Support website. You can visit their support page, where you'll find drivers and software for specific Logitech mouse models.
Following are the steps to find and download Logitech mouse driver from it's official website.
Step 1. Visit Logitech Official Website
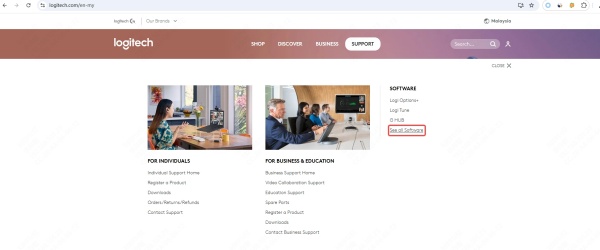
Go to www.logitech.com, then choose SUPPORT from the top menu bar. Click See all Software from the drop-down menu.
Step 2. Find the Mouse Driver
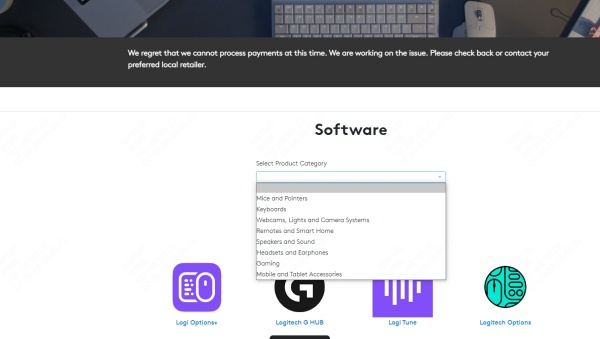
On the Logitech Software Download page, choose your product category and model.
Tips: If you're unsure about the model, check the product label on the bottom of the mouse. The model number can also be found on the original packaging if you still have it.
Step 3. Download the Driver
Then you will get the results of the software you could download for your mouse. Choose the one you need to download.
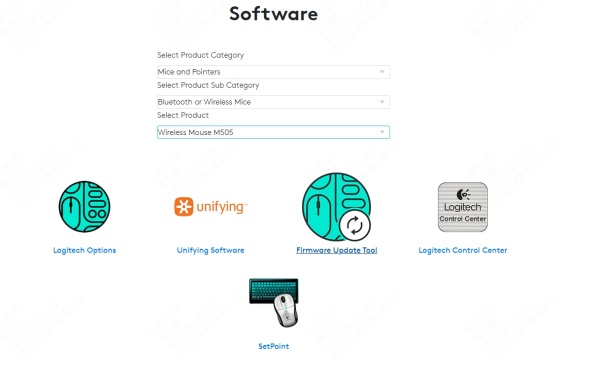
Tips: If there are several results and you are unsure about which one to download, you can click it to see the detailed information.
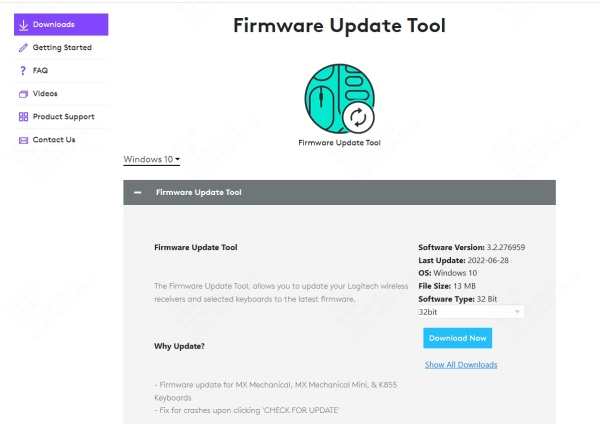
Now, you can find the driver for your Logitech mouse and make it work well. Moreover, Logitech official offer software like Logitech Options or Logitech G Hub to customize mouse settings, update firmware, and enable features like additional button assignments or DPI adjustments. You need to download Logitech options and register a Logitech account. Then it will automatically detect your Logitech devices and recommend drivers to download or update.

Method 2. Download the Right Logitech Mouse Driver in One-click
Feel difficult to find the right driver for your Logitech mouse? Don't worry. There is a reliable driver management tool which can scan and find the right driver for your devices automatically.
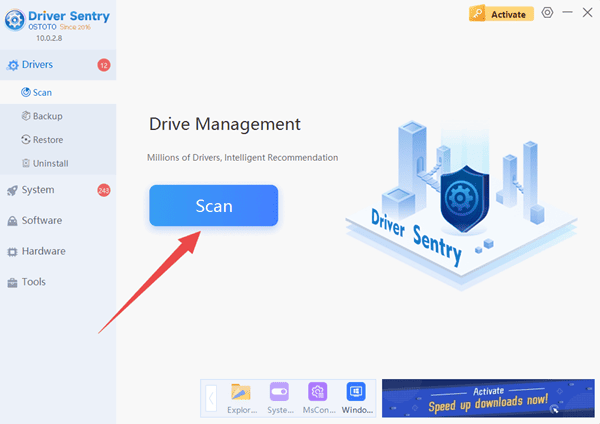
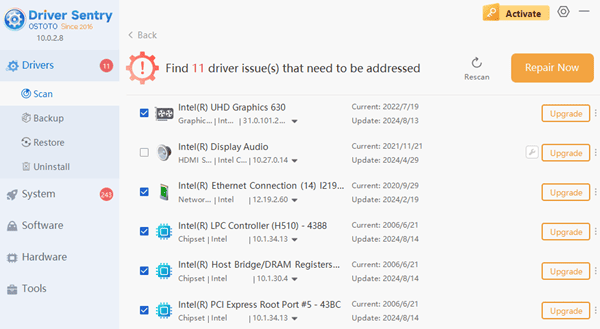
PcGoGo Driver Sentry is a powerful PC driver management tool. It provides downloads or updates for motherboard drivers, graphic cards drivers, network drivers, audio drivers and so on.
You just need to install and launch the software. It will automatically scan the drivers that can be downloaded. You will then be able to download all the drivers in one-click or just choose one or some of the drivers to download. For the user who want to download Logitech mouse drivers, it can be a great help. Just download and start the free trial!
Conclusion
In summary, there are some reliable and easy ways to find and download Logitech mouse driver. We hope you have solved the problem after reading this guide.
And don't forget to download and try the PcGoGo Driver Sentry for free now!
See also:
How to Fix the Issue of a Spinning Mouse
Steps to Connect a Wireless Mouse to a Computer
2 Methods to Adjust Mouse Sensitivity in Windows 10
7 Methods to Fix Computer Bluetooth Connection Issues