The "Audio Service Not Responding" issue in Windows can prevent sound playback or audio device detection. This guide offers solutions to quickly restore audio functionality.
1. Update Audio Drivers
Outdated or corrupted drivers can cause the "Audio Service Not Responding" issue on Windows. Updating the audio drivers is a crucial step to address this problem. Using Driver Sentry for automatic driver updates saves time and ensures you avoid errors in downloading or installing incorrect drivers.
Download and install the latest version of Driver Sentry. Open the software and click "Scan" to identify outdated or missing drivers.

Locate the audio driver in the results and click "Upgrade".
Restart your computer to apply the updated driver.
2. Restart Audio Services
Press Win + R, type "services.msc", and press Enter.
Locate the following services in the list:
Windows Audio Endpoint Builder
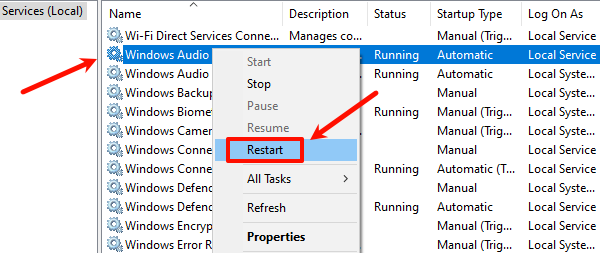
Right-click "Windows Audio" and select "Restart".

If the Restart option is unavailable, choose "Stop" first, then right-click and select "Start".
Check service dependencies:
Ensure the "Remote Procedure Call" (RPC) service is running.
If not, right-click and select "Start".
Test audio functionality after completing these steps.
3. Check Audio Device Settings
Select the Default Audio Device:
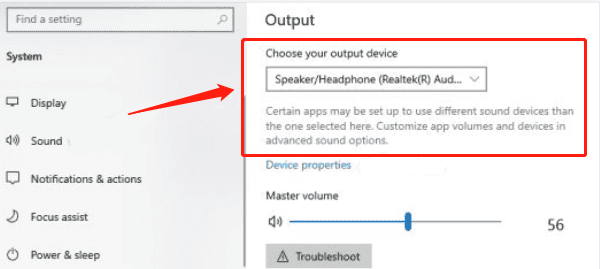
Right-click the volume icon in the taskbar and select "Open Sound Settings".
Under the "Output" section, choose the correct audio device (e.g., speakers or headphones).

Check Disabled Devices:
Click "Manage Sound Devices" and ensure the target device is not disabled.
If the device is disabled, click "Enable".
Test Audio Output:
In the "Playback" tab, right-click the device and select "Test" to check for sound output.
4. Verify System File Integrity
Press Win + S and search for "cmd". Right-click Command Prompt and select "Run as Administrator".
Enter the following command and press Enter: sfc /scannow

The system will scan and repair corrupted system files.
Restart the computer after the scan completes and test the audio functionality.
5. Run Audio Troubleshooter
Press Win + I to open "Settings", then go to "Update & Security" > "Troubleshoot".
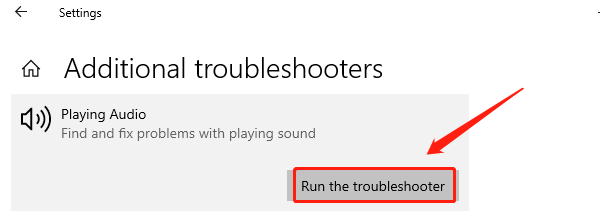
Click "Additional Troubleshooters", find "Playing Audio", and select "Run the Troubleshooter".

Follow the on-screen instructions to diagnose and resolve the issue.
Test the audio functionality after completing the troubleshooting process.
6. Check Audio Components
Press Win + X and select "Device Manager".
Expand "Sound, Video and Game Controllers", right-click the audio device (e.g., Realtek High Definition Audio), and select "Properties".
Check the driver status. If errors are detected, update or reinstall the driver.
Restart Audio Services via Command Prompt:
Press Win + R, type "cmd", and run Command Prompt as Administrator.
Enter the following commands to restart the audio service:
net stop audiosrv
net start audiosrv
Check the audio jack connections and try alternate ports if needed.
Follow these steps to resolve the "Audio Service Not Responding" issue in Windows. If the problem persists, seek professional technical support or check for hardware issues.
See also:
HP Printer Driver Unavailable Fix Guide
How to Fix Brother Printer Not Printing on Windows 10