When installing a new operating system, running system repair tools, or performing data recovery, knowing how to boot your computer from external devices such as a USB drive, DVD, or CD is an essential skill. This guide provides detailed steps to help you easily boot from external media.
Part 1: Why Boot from USB, DVD, or CD?
To install or reinstall operating systems like Windows or Linux.
To run bootable tools for system repair or virus removal.
To access a PE (Preinstallation Environment) system for disk partitioning or backup/restore.
To launch cloning tools for system migration to a new hard drive.
Part 2: Preparations
1. Create a Bootable Drive (USB or DVD/CD)
Before starting, make sure your USB drive or disc has been properly created as a bootable device.
Use a reliable tool to create a Windows or Linux bootable USB drive.
For DVDs/CDs, burn the ISO image to the disc correctly.
You can also use multi-boot tools to integrate several boot images into a single USB drive.
2. Connect the Boot Device Properly
While your PC is powered off, insert the USB drive into a USB port or insert the DVD/CD into the optical drive.
Part 3: How to Boot from USB or DVD/CD
Method 1: Use Boot Menu Shortcut Key (Recommended)
Press the power button to turn on your PC.
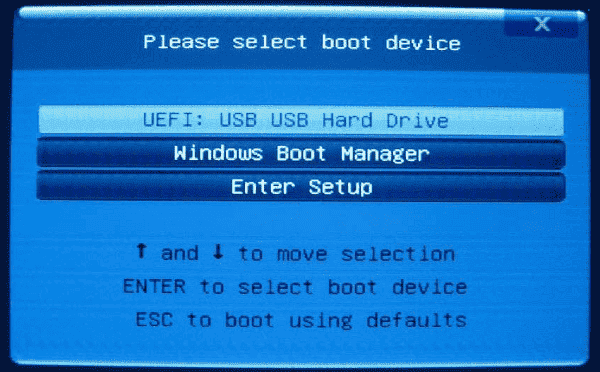
When the manufacturer's logo appears, you'll usually see a prompt like "Press F12 to choose boot device". Press the indicated key to access the boot menu.
From the boot menu, follow the on-screen instructions to select your bootable USB drive or DVD/CD.

If you don't see a boot menu prompt, move on to the next method to configure boot options through the BIOS.
Don't know which key to press? Refer to this common list of boot menu keys:
| Brand | Boot Menu Key |
| ASUS | F8 or ESC |
| GIGABYTE | F12 |
| MSI | F11 |
| Lenovo | F12 or Fn+F12 |
| HP | ESC or F9 |
| DELL | F12 |
| Acer | F12 |
Steps:
Immediately after turning on the PC, repeatedly press the shortcut key to enter the boot menu.
Use the arrow keys to select the USB or DVD/CD option, then press Enter to boot.
Method 2: Change Boot Order in BIOS/UEFI
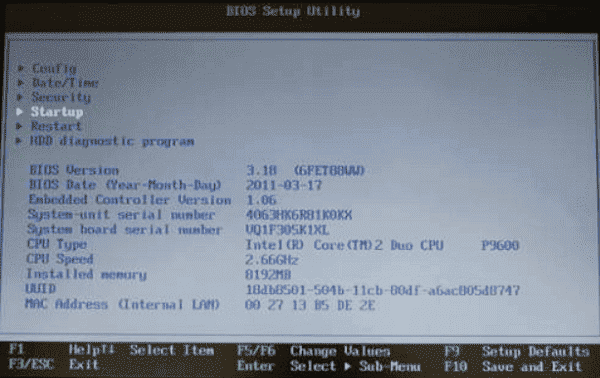
During startup, press DEL, ESC, or your brand's designated BIOS key.
In the BIOS setup screen, use the arrow keys and Enter to navigate through the settings.
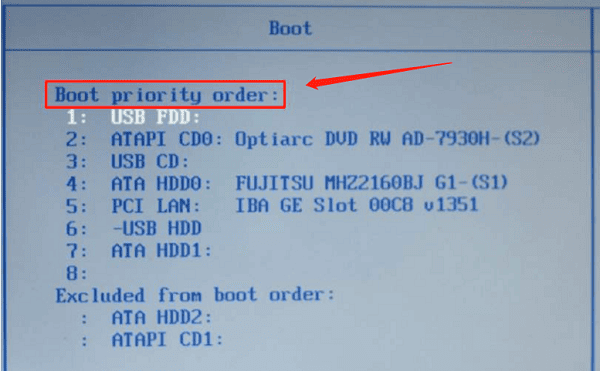
Look for a tab named "Startup" or "Boot".

Set USB HDD or CD/DVD Drive as the first boot option.

Save and exit (usually by pressing F10).
Part 4: Troubleshooting
Issue 1: USB/DVD not detected?
Make sure the drive was properly created as a bootable device.
Try a different USB port (USB 2.0 is recommended).
Check if Legacy or UEFI mode is enabled in BIOS.
Issue 2: USB option not visible?
Enter BIOS and disable Secure Boot.
Enable Legacy Boot.
Disable Fast Boot if available.
Following the steps in this guide, you should be able to successfully configure your system to boot from external devices and quickly access the required environment. To keep your Windows system running smoothly, it's recommend to use Drive Sentry to regularly scan and update your drivers—ensuring optimal performance and a seamless user experience.
See also:
Solutions to Fix the Windows 11 Unidentified Network Issue
Solutions to Fix WiFi Connected but No Internet Issue