
Brother printers are widely used in both office and home environments, but to ensure proper functionality, you must install a compatible driver. This guide will provide detailed instructions on how to download and install the correct Brother printer driver, improving printing performance.
Why Install Brother Printer Drivers?
Printer drivers act as a bridge between your computer and printer, ensuring the system can properly recognize and control the device. If the driver is missing or incompatible, you may encounter the following issues:
The computer cannot detect the printer
Printing errors or inability to print
Decreased print quality, such as blurry text or color distortion
Limited printer functionality, such as missing scan or duplex printing features
How to Download Brother Printer Drivers
Method 1: Use a Driver Management Tool
Outdated or corrupted drivers may cause printing issues. Ensuring that your driver is up to date can effectively prevent such problems. It's recommend to use Driver Sentry to automatically detect and update your drivers, saving time and reducing the risk of downloading incorrect drivers.
Click the download button to get the latest version of Driver Sentry. Install and open the software.
Click "Scan" to check for missing or outdated drivers.
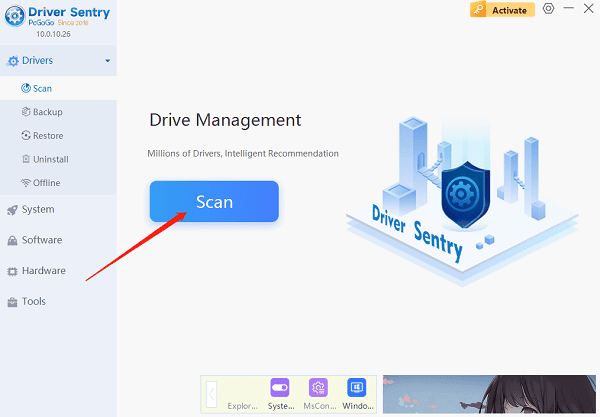
Locate the Brother printer driver in the results and click "Upgrade".
After the update is complete, restart your computer to ensure the driver functions properly.
Method 2: Download from the Official Brother Website
Step 1: Check Your Printer Model
Before downloading the driver, confirm your Brother printer model. The model is usually displayed on the front or top of the printer, such as "Brother HL-L2350DW".
Step 2: Confirm Your Operating System
Right-click "This PC" or "My Computer", then select "Properties".
Under the "System" section, check your Windows version.
Step 3: Visit the Brother Official Website
Open your browser and go to the Brother official website.
Navigate to the "Support" or "Driver Downloads" section.
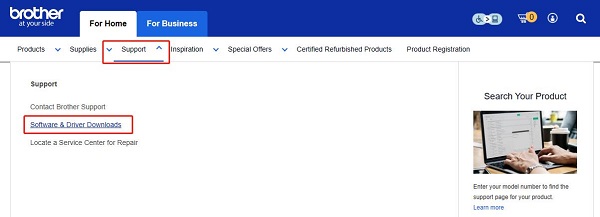
Step 4: Search for Your Printer Model
Enter your printer model in the search box and click "Search".
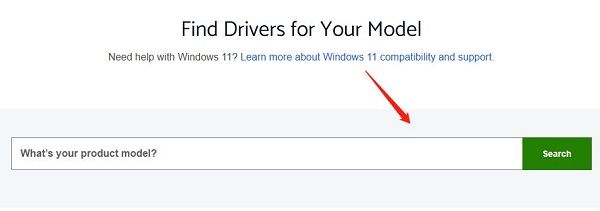
The system will display the corresponding driver for your printer.
Step 5: Select Your Operating System
Choose the correct driver based on your operating system (Windows, macOS, etc.) to ensure compatibility.
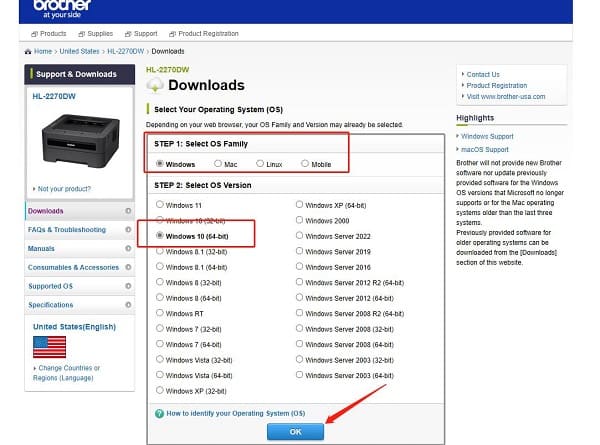
Step 6: Download the Driver
Click the Download button. The file will usually be in ".exe" format for Windows or ".dmg" for macOS.
Step 7: Open the Installation File
Once the download is complete:
Windows users: Double-click the .exe file to start the installation wizard.
Mac users: Open the .dmg file and double-click the installation package.
Step 8: Follow the Installation Prompts
Accept the software license agreement.
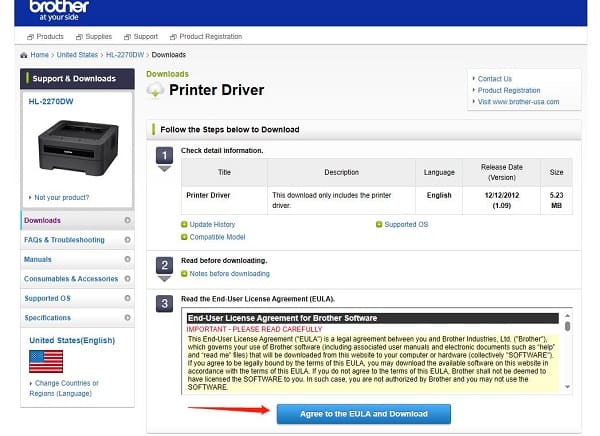
Choose the installation path (default is recommended).
Click Install and wait for the process to complete.
Step 9: Restart Your Computer
After installation, restart your computer to allow the driver to take effect.
Step 10: Connect and Test Your Printer
Reconnect your Brother printer to the computer via USB cable or Wi-Fi.
Print a test page to ensure the printer is functioning correctly.
Common Issues & Solutions
1. Printer Still Won't Print After Installation?
Ensure the printer is properly connected via USB or Wi-Fi.
Check the Device Manager to confirm the driver is installed correctly.
If issues persist, reinstall the Brother printer driver.
2. Unable to Find Your Printer Model?
Enter the exact model name on the Brother official website.
Check the printer body for the model label (e.g., HL-L2365DW).
Use Driver Sentry to automatically detect and install the correct driver.
A Brother printer driver is essential for ensuring your printer operates smoothly. Using Driver Sentry for automatic installation can save time and reduce errors. If you encounter issues, refer to the troubleshooting solutions to ensure successful driver installation.
See also:
Solutions to Fix the Windows 11 Unidentified Network Issue
Solutions to Fix WiFi Connected but No Internet Issue