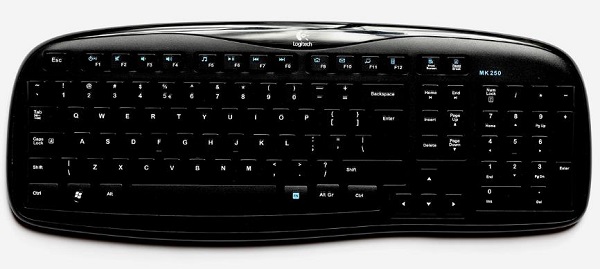
In today's digital age, wireless keyboards are a popular choice for their convenience and flexibility. This article offers a step-by-step guide to help you connect a wireless keyboard to your computer quickly.
Understanding the Types of Wireless Keyboards
1). USB Receiver Wireless Keyboard: This type of keyboard comes with a small USB receiver that, when plugged into the computer's USB port, establishes a connection.
2). Bluetooth Wireless Keyboard: This type relies on the computer's built-in Bluetooth function for connection, without the need for an additional receiver.
How to Connect a Logitech Wireless Keyboard to a Computer
Step 1: Insert the USB Receiver
Open the wireless keyboard packaging and locate the included USB receiver.
Insert the receiver into the computer's USB port. Typically, USB ports are located on the sides of laptops or on the front and back panels of desktops.

Step 2: Install Keyboard Batteries
Open the battery compartment on the bottom of the keyboard and insert the required batteries, ensuring the correct polarity.
Close the battery compartment, ensuring the batteries are securely installed.
Step 3: Turn on the Keyboard Power
Locate the power switch on the wireless keyboard, usually found on the side or bottom of the keyboard.

Slide the switch to the "On" position to activate the keyboard.
Step 4: Wait for the Computer to Recognize the Keyboard
After inserting the receiver and turning on the keyboard power, the computer will automatically recognize the new device.
You may see a system prompt indicating that the driver is being installed; wait for the installation to complete.
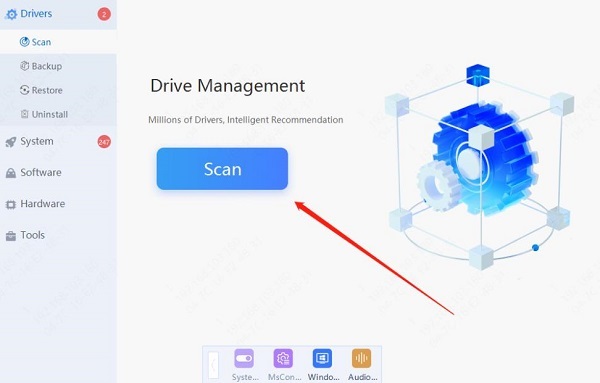
If the computer does not automatically install the driver or fails to recognize the wireless keyboard, you can use Driver Sentry to automatically detect and update the driver, saving time and avoiding downloading or installing incorrect drivers.
Click the download button to get the latest version of Driver Sentry, install it, open the software, and click "Scan".

After the scan is complete, it will show which drivers are not installed or need updating. Find the wireless keyboard driver in the results list and click the "Update" button.
After the update is complete, it is recommended to restart the computer to ensure the updated driver takes effect.
Step 5: Test the Keyboard Connection
Once the driver installation is complete, open a text editor (such as Notepad) to test the connection.
Type a few characters to ensure the keyboard is working properly.
How to Connect a Bluetooth Wireless Keyboard
Step 1: Turn on the Computer's Bluetooth Function
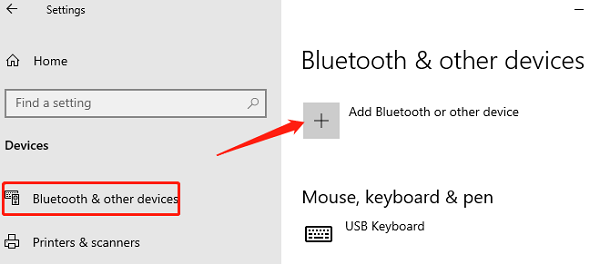
On a Windows computer, click the "Start" button, select "Settings" > "Devices" > "Bluetooth & other devices".
Turn on the Bluetooth switch. If you're using a Mac, go to "System Preferences" > "Bluetooth" and make sure Bluetooth is enabled.
Step 2: Enter Bluetooth Pairing Mode
Turn on the power of the Bluetooth wireless keyboard.
Press and hold the pairing button on the keyboard (usually a small button) until the indicator light flashes, indicating the keyboard is in pairing mode.
Step 3: Search and Connect the Keyboard
On the computer's Bluetooth settings page, click "Add Bluetooth or other device".

Select your wireless keyboard from the list. The computer will begin pairing with the keyboard.
Step 4: Complete Pairing and Test the Keyboard
Enter the pairing code as prompted, which usually appears on the screen.
After a successful pairing, you can start using the keyboard. Open Notepad or another text editor to test if the connection is normal.
Wireless Keyboard Recommendations
1). Low Latency Technology: Choose a wireless keyboard that uses low latency technology to ensure real-time key operation and avoid input lag affecting the real-time experience.
2). Stable Connection: Prioritize keyboards with stable connection technologies, such as 2.4GHz RF or Bluetooth, to ensure connection stability and reliability.
3). Keyboard Type: Choose between a mechanical or membrane keyboard based on personal preference and gaming needs. Mechanical keyboards typically provide better tactile feedback and durability, while membrane keyboards may be lighter.
4). Key Performance: Pay attention to key actuation time, actuation force, and feel, choosing key performance that suits your habits to improve typing accuracy and comfort.

5). Backlight and Additional Features: If you like gaming in low-light environments, consider a keyboard with a backlight function. Additionally, some keyboards offer extra customization options or macro keys, which can be tailored to personal preferences.
6). Brand and Reviews: Choose keyboards from reputable brands and check user reviews and professional evaluations to understand the keyboard's quality and performance.
7). Price and Warranty: Choose a keyboard within your budget and ensure it has good after-sales service and warranty policies.
Follow these steps to easily set up and enjoy your wireless keyboard. If you face any issues, refer to the troubleshooting steps above or the keyboard's manual. Hope this guide ensures a smooth wireless keyboard experience!
See also:
How to Fix No Sound on Your Computer
How to Quickly Check Your Computer's Graphics Card Configuration
6 Ways to Restore Computer Audio
7 Ways to Fix Windows Screen Flickering