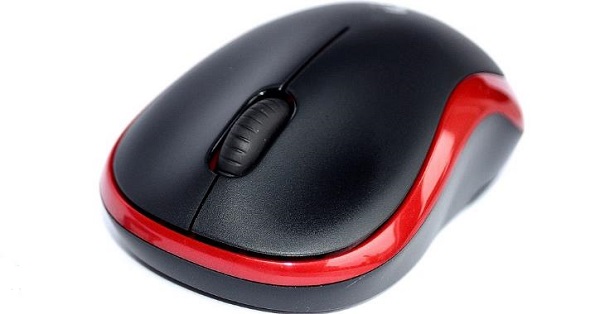
Wireless mouse are favored by many users for their portability and flexibility. If you've just acquired a wireless mouse, this article will detail the steps to connect it to your computer, ensuring smooth operation.
Step 1: Preparation
Make sure the wireless mouse is equipped with batteries and check that they have sufficient charge; the batteries are usually AA or AAA, so pay attention to polarity.
Ensure the computer is powered on and choose a convenient USB port for the connection.
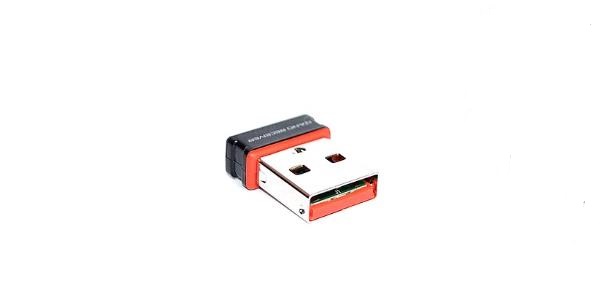
Locate the small USB receiver that came with the wireless mouse and keep it in an easily accessible place.
Step 2: Insert the USB Receiver
Find the USB port on the computer's main unit or the side of a laptop. USB ports are usually marked with the USB symbol and are quite prominent.

Insert the wireless mouse's USB receiver into the computer's USB port, ensuring it is securely connected.
Step 3: Turn On the Wireless Mouse
Check the bottom or side of the mouse to find the power switch. Most wireless mouse have a clearly marked switch.
Slide the switch to the "On" position, the indicator light will usually illuminate, indicating that the mouse is powered on.
Step 4: Connect the Mouse
Most wireless mouse will automatically pair with the USB receiver. If the connection is successful, the mouse's indicator light will remain steady, and you should see the cursor on the screen.
If the mouse does not connect automatically, press the connection button on the bottom of the mouse (typically a small round or square button) while operating near the USB receiver until the mouse's indicator light flashes and then stays on.
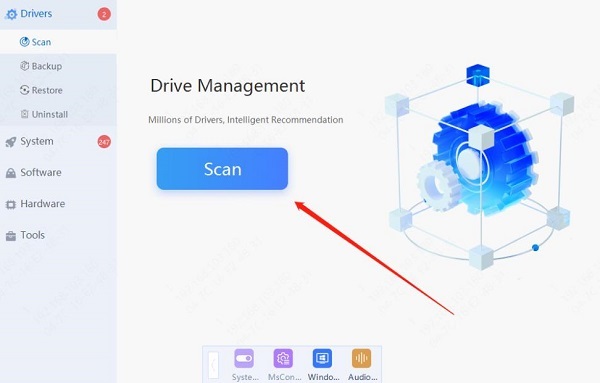
In some cases, you may need to install mouse drivers. It's recommended to use Driver Sentry to automatically detect and update drivers, saving time and avoiding the risks of downloading or installing incorrect drivers.
Click the download button to get the latest version of Driver Sentry, install it, and open the software, then click "Scan".

After scanning, it will display any drivers that are not installed or need updating. Find the mouse driver in the results list and click the "Update" button.
After updating, it's advisable to restart the computer to ensure the updated drivers work correctly.
Step 5: Test the Mouse
Place the mouse on a flat surface, move it around, and check if the cursor moves smoothly.
Click on icons on the desktop to confirm you can open files or applications.

Test the scroll wheel functionality to see if you can scroll up and down pages.
If the mouse has additional function buttons, test to ensure they work properly.
Step 6: Adjust Mouse Settings (Optional)
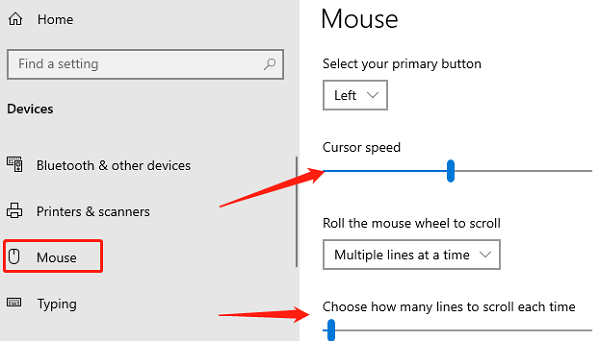
Click the "Start" button in the lower-left corner of the computer, and select "Settings".
In the settings window, choose "Devices".
Click on "Mouse" on the left to enter the mouse settings interface.
Adjust the pointer speed for more comfortable operation.

Choose between single-page or multi-page scrolling methods, and adjust according to personal preference.
Set the double-click speed for more accurate double-click recognition.
After making all adjustments, click "Apply" or "OK" to save the settings.
Common Issues
1. What to do if the wireless mouse won't connect?
Ensure the USB receiver is properly inserted and the mouse is powered on. If the issue persists, try changing the USB port or restarting the computer.
2. How to handle a sluggish mouse response?
Check if the mouse batteries are sufficiently charged and ensure the surface is suitable for optical mouse.
3. Is driver installation necessary?
Most wireless mouse will automatically install drivers upon insertion, but some advanced features may require additional installation.
By following these steps, you can quickly connect a wireless mouse to your computer for a smooth experience. If you run into any issues, consult the mouse's user manual or the manufacturer's support website for help.
See also:
7 Ways to Maximize GPU Performance
How to Fix Wireless Mouse Connection Failure