
In today's connected world, accessing Wi-Fi on your Windows 10 device is essential for productivity, entertainment, and communication. However, some users face challenges when trying to connect to wireless networks. This guide will walk you through several methods to help you connect to Wi-Fi smoothly.
Method 1: Using the Wi-Fi Icon on the Taskbar
The simplest way to connect to a Wi-Fi network on Windows 10 is through the taskbar.
1. Locate the Wi-Fi Icon
Look for the Wi-Fi icon in the bottom-right corner of your screen.
2. Select a Network
Click the Wi-Fi icon, and a list of available networks will appear. Select the one you wish to connect to.
3. Enter the Password
If the network is secured, you'll be prompted to enter a password. Type the correct password and click "Connect".
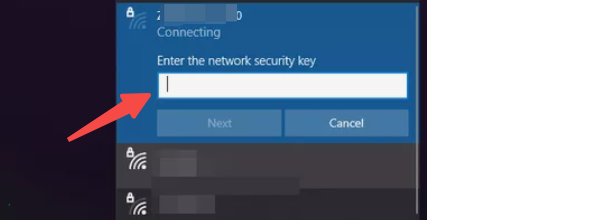
4. Verify the Connection
Once connected, the Wi-Fi icon will show a signal strength indicator.
Method 2: Connect via Network Settings
If the taskbar method isn't working, you can use the Network Settings menu.
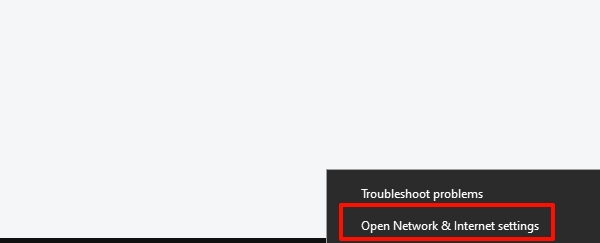
1. Open Network & Internet Settings
Right-click the Wi-Fi icon in the taskbar and select "Open Network & Internet settings".
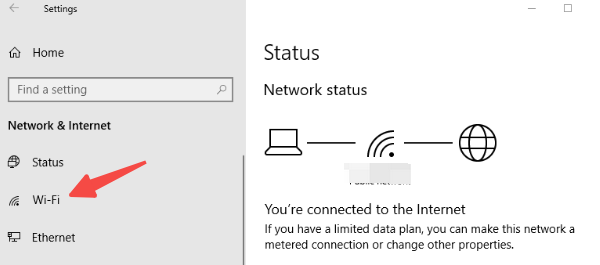
2. Access the Wi-Fi Tab
In the left-hand menu, click on "Wi-Fi".
3. Select a Network
Under the "Show available networks" section, click the network you want to connect to.
4. Enter the Password
Type the password and press "Next" to establish the connection.
5. Verify
Ensure the Wi-Fi status shows "Connected".
Method 3: Use Driver Sentry to Upgrade Your Network Driver
Sometimes, connectivity issues arise due to outdated or faulty network drivers. Driver Sentry simplifies the process of identifying and updating drivers to fix Wi-Fi problems.
1. Download and Install Driver Sentry
Click here to download Driver Sentry and follow the installation instructions.
2. Run a Scan
Open Driver Sentry and click "Scan". The tool will automatically detect outdated or missing network drivers.
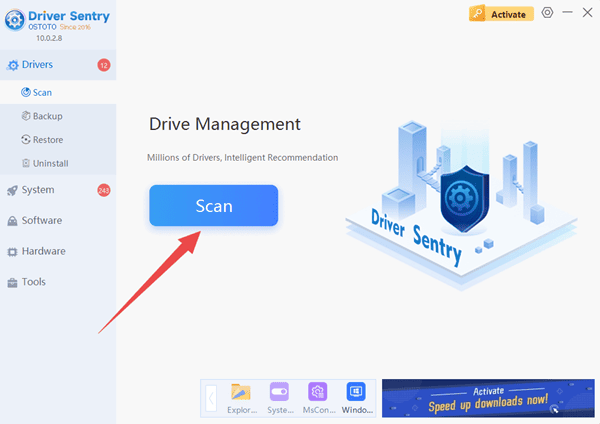
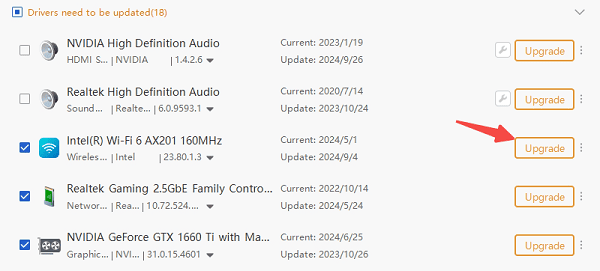
3. Upgrade the Driver
Locate your network adapter in the scan results and click "Upgrade". Driver Sentry will download and install the latest driver version.
4. Restart Your Computer
After the update, restart your computer to ensure the changes take effect.
5. Reconnect to Wi-Fi
Follow Method 1 or Method 2 to connect to your Wi-Fi network again.
Method 4: Troubleshoot Wi-Fi Issues via the Windows Troubleshooter
Windows 10 comes with a built-in troubleshooter to resolve network issues.
1. Open the Troubleshooter
Press Windows + I to open Settings. Go to "Update & Security" and click "Troubleshoot" in the left-hand menu.
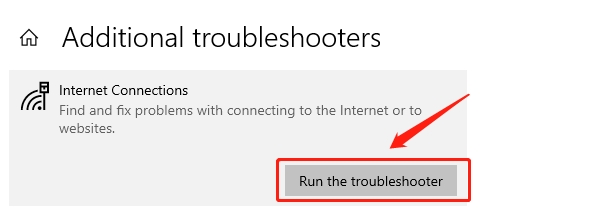
2. Run the Network Troubleshooter
Select "Internet Connections" and click "Run the troubleshooter".
3. Follow the Prompts
The troubleshooter will detect and attempt to fix any network-related issues.
4. Reconnect to Wi-Fi
Once the process is complete, try reconnecting to your Wi-Fi network.
This article can help you easily connect to Wi-Fi on Windows 10. Using Driver Sentry to update your network drivers is a reliable way to solve complex issues. If you still encounter problems, consider seeking professional support.
See also:
Fix 100% Disk Usage in Task Manager on Windows 10
7 Ways to Fix Skyrim Not Launching