
Encountering the "Critical Process Died" error in Windows 11 can be a real nightmare. This error can bring your computer to a standstill, leaving you frustrated and worried about your data. But don't worry, we've got you covered. In this blog, we'll explore what causes this error and, more importantly, how you can fix it. We'll also introduce you to a helpful tool that can make the process a breeze.
What is the "Critical Process Died" Error?
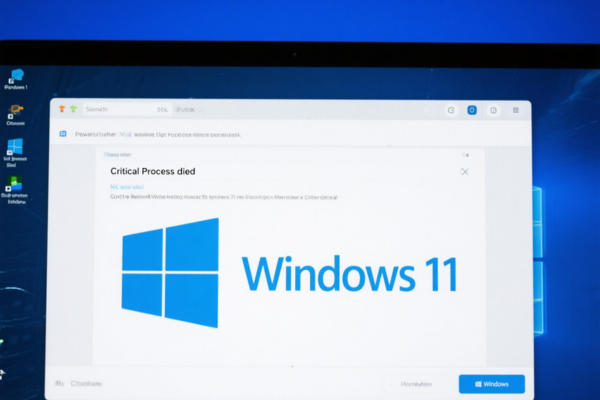
The "critical process died windows 11" error is a serious system-level issue. When Windows 11 detects that a crucial process, one that's essential for the operating system to function properly, has crashed or stopped working, it throws this error. This can result in your computer freezing, rebooting unexpectedly, or showing a blue screen with the dreaded stop code. It's a major problem because it disrupts the normal operation of your system.
Why Does the "Critical Process Died" Error Occur?
1. Driver Issues
Outdated, corrupted, or incompatible drivers are a common culprit behind the "critical process died" error. Drivers act as a link between your hardware and the operating system. If a driver, especially one related to key components like the motherboard, graphics card, or storage device, isn't working correctly, it can cause critical processes to fail. For example, if the driver for your hard drive malfunctions, Windows might not be able to access important system files, leading to the "critical process died windows 11" error. That's why keeping your drivers up-to-date is so important.
2. Hardware Problems
Faulty hardware can also trigger this error. A failing hard drive, for instance, can cause data read-write errors. If Windows can't access critical system files due to a hard drive problem, it may lead to the "critical process died" error. Similarly, issues with the RAM, such as bad memory modules, can cause system instability. When the system tries to access data from faulty RAM, critical processes may crash. Overheating hardware can also be a problem. If your CPU or graphics card overheats, it can cause the system to throttle or even crash, sometimes resulting in the "stop code critical process died."

3. Malware Infections
Malicious software can wreak havoc on your system. Some malware is designed to target and disrupt critical system processes. It can modify or delete important system files, or consume system resources, causing critical processes to fail. A virus or a trojan horse might interfere with the normal operation of Windows 11, leading to the "critical process died" error. This is why having a good antivirus program and keeping it updated is crucial.
6 Steps to Solve the "Critical Process Died" Error
1. Update Your Drivers
Updating your drivers is often the first step in resolving the "critical process died" error. This is where Driver Sentry comes in handy. Driver Sentry is a powerful tool that can scan your system for outdated, corrupted, or missing drivers. It then automatically downloads and installs the latest versions. To use it, simply download Driver Sentry from the pcgogo website. Once installed, open the program and click the "Scan" button. Driver Sentry will quickly analyze your system and show you a list of drivers that need updating. Select the drivers you want to update, including those related to your motherboard, graphics card, and storage devices, and click "Update". After the update is complete, restart your computer. This simple step can often fix issues related to the "critical process died windows 11" error.

2. Run a Malware Scan
Since malware can cause the "critical process died" error, it's important to run a thorough malware scan. Use a reliable antivirus program. Windows 11 comes with Windows Defender, which is a good starting point. Open Windows Defender and select "Full Scan". This will scan your entire system for any malicious software. If any threats are detected, follow the prompts to quarantine or remove them. If you prefer a third-party antivirus, there are many great options available. Make sure your antivirus program is up-to-date before running the scan. After the scan is complete, check if the "stop code critical process died" error still occurs.
3. Check for Hardware Issues
Inspect your hardware for any visible signs of damage. For the hard drive, check the cables for any loose connections or signs of wear. If possible, use a diagnostic tool to check the health of your hard drive. For RAM, you can run a memory diagnostic. On Windows 11, you can search for "Windows Memory Diagnostic" in the Start menu and run the tool. It will check your RAM for any errors. If you find any faulty hardware components, such as a bad hard drive or RAM module, consider replacing them. Overheating can also be a problem. Make sure your computer's fans are working properly and that there is good ventilation around your computer. You can use a hardware monitoring tool to check the temperatures of your CPU and graphics card.
4. Perform a System File Check
Windows 11 has a built-in tool called System File Checker (SFC) that can scan for and repair corrupted system files. To run SFC, open the Command Prompt as an administrator. You can do this by searching for "Command Prompt" in the Start menu, right-clicking on it, and selecting "Run as administrator". In the Command Prompt window, type "sfc /scannow" and press Enter. The SFC will then scan your system for any corrupted system files. If it finds any, it will attempt to repair them. This process may take some time. Once it's complete, restart your computer and see if the "critical process died" error has been resolved.

5. Restore Your System
If the "critical process died" error started occurring after a recent system change, such as an update or the installation of new software, you can try restoring your system to a previous point. To do this, open the Control Panel and search for "Recovery". In the Recovery options, select "Open System Restore". Follow the prompts to select a restore point that was created before the error started. System Restore will then revert your system back to that point, undoing any recent changes. Note that this will not affect your personal files, but it will uninstall any software that was installed after the restore point was created.
6. Reinstall Windows 11
As a last resort, if none of the above methods work, you may need to reinstall Windows 11. Before you do this, make sure to back up all your important data. You can use an external hard drive or a cloud storage service to back up your files. To reinstall Windows 11, you'll need a USB drive with the Windows 11 installation files. You can create this using the Windows 11 Installation Assistant from the Microsoft website. Insert the USB drive into your computer and restart. Boot from the USB drive and follow the on-screen instructions to reinstall Windows 11. This will completely wipe your system and install a fresh copy of Windows 11, which should fix the "critical process died" error.
Conclusion
The "critical process died" error in Windows 11 can be a major headache, but with the right steps, you can solve it. Whether it's updating your drivers with Driver Sentry, running a malware scan, checking your hardware, or performing a system restore, there are several ways to get your system back up and running smoothly. If all else fails, reinstalling Windows 11 can be a solution. Remember to always back up your data before attempting any major system changes. So, the next time you encounter the "stop code critical process died," don't despair. Follow the steps in this blog, and you'll be on your way to a fully functional Windows 11 system again.
