Some Windows users may encounter the "DirectX 12 Not Supported" issue, preventing them from accessing its powerful features. This article provides solutions to help restore your graphics and gaming experience.
1. Check for Driver Updates
Outdated graphics drivers may limit DirectX 12 functionality. Updating your drivers ensures compatibility. Using Driver Sentry can help automatically detect and update drivers, saving time and reducing the risk of installing incorrect versions.
Download the latest version of Driver Sentry, install, and open the software. Click "Scan".

The scan results will show outdated or missing drivers. Locate the graphics driver and click "Upgrade".
After updating, restart your computer to apply the changes.
2. Check GPU Compatibility
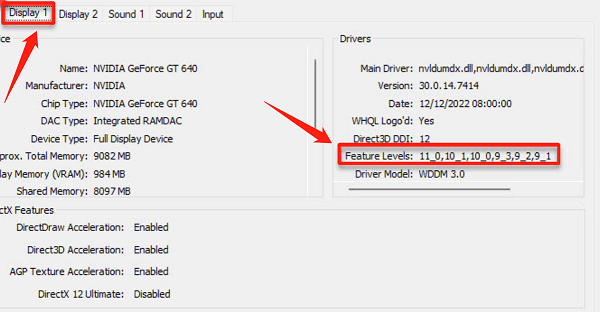
Press Win + R, type "dxdiag", and press Enter to open the DirectX Diagnostic Tool.
Go to the "Display 1" tab and check "Feature Levels".

If "12_0" or higher is listed, your GPU supports DirectX 12. If only "11_1" or lower appears, your GPU may not be fully compatible with DX12, requiring an upgrade to a newer model.
3. Modify Game Launch Options
Open the game launcher or settings and look for Graphics or Display options.
If available, select DirectX 12.
If the option is missing, try adding a launch parameter:
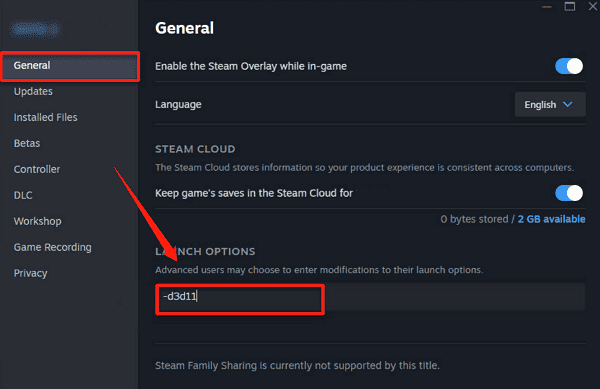
For Steam games, right-click the game, select "Properties", and go to "General".
In the "Launch Options" box, enter one of the following commands:
-d3d11 (for DirectX 11)
-vulkan (for Vulkan API)
If using both, separate them with a space: -d3d11 -vulkan

Save the settings and restart the game to see if DirectX 12 is enabled.
4. Enable Windows Features
Press Win + I to open Settings and go to "System".
In the Display tab, find and enable "Hardware-Accelerated GPU Scheduling" to improve DirectX 12 performance.
5. Install Windows Updates
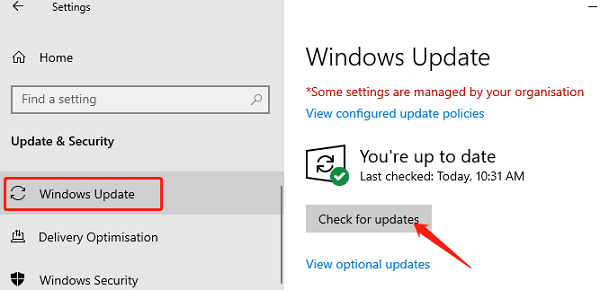
Press Win + I, go to "Update & Security", and click "Check for Updates".
If updates are available, Windows will automatically download and install them.

Install the Latest DirectX Version:
Sometimes, DirectX updates are not installed automatically.
Visit the official DirectX download page, download the latest package, and install it manually.
Restart your computer to apply all updates.
By following these steps, you should be able to enable DirectX 12 and enjoy an improved gaming and graphics experience. If issues persist, try troubleshooting step by step to find the best solution for your system.
See also:
How to Fix Windows 11 Unable to Enter Sleep Mode
Methods to Fix 'HP Printer Driver Is Unavailable'