
Windows 10's automatic update feature keeps systems secure and performing well, but some users prefer manual control to avoid interruptions. This article explains how to disable automatic updates and offers common solutions.
Preparation
Drivers act as the bridge between hardware devices and the operating system. Without proper drivers, many hardware devices may not function correctly. It's recommended to use Driver Sentry to automatically detect and update drivers, saving time and avoiding the risk of downloading or installing incorrect drivers.
Click the download button to get the latest version of Driver Sentry. After installation, open the software and click "Scan".
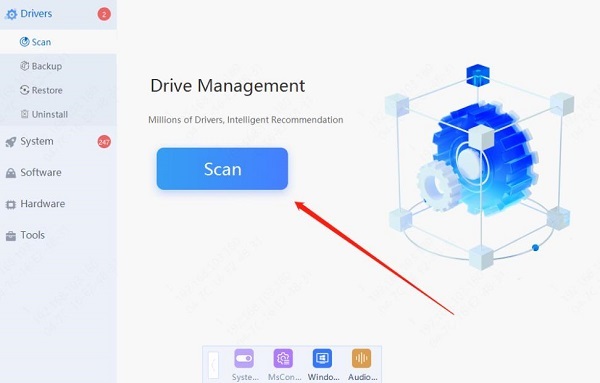
After scanning, it will show which drivers are not installed or need updating. Find the required drivers in the results list and click the "Update" button.
After updating, it's recommended to restart the computer to ensure the updated drivers are working properly.
Method 1: Disable Updates via Registry
Press the Windows + R keys, type "regedit", and click "OK".
In the Registry Editor, navigate to: HKEY_LOCAL_MACHINE\SOFTWARE\Policies\Microsoft\Windows\WindowsUpdate\AU.
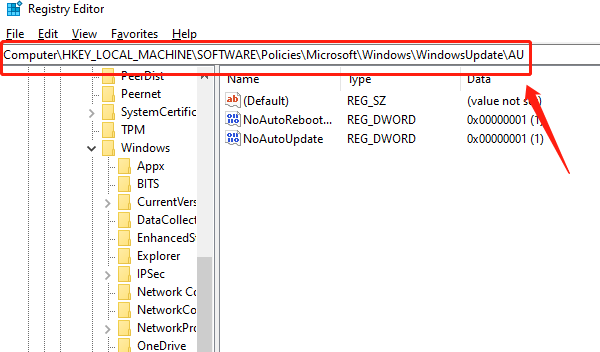
If the "AU" folder doesn't exist, right-click "WindowsUpdate", select "New" > "Key", and name it "AU".
In the right pane, right-click to create a new "DWORD (32-bit) Value" and name it "NoAutoUpdate".
Double-click "NoAutoUpdate", set the value to 1, and click "OK".
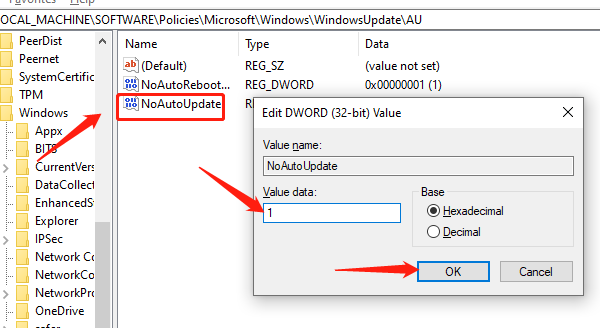
This method gives you full control over system updates.
Method 2: Disable Windows Update via Services
Press the Windows + R keys, type "services.msc", and click "OK".
In the "Services" window, scroll down to find "Windows Update".
Double-click "Windows Update", and in the "Startup type" dropdown, select "Disabled".
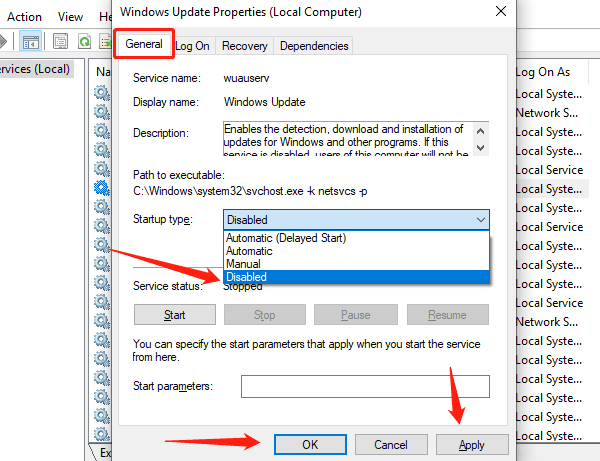
Click "Apply", then "OK".
This completely disables Windows automatic update services but requires manual reactivation to restore automatic updates.
Method 3: Limit Updates via Network Settings
Press the Windows + I keys to open "Settings".
Select "Network & Internet", then choose "Wi-Fi" or "Ethernet" based on your network type.
Click the current network connection and turn on the "Metered connection" option.
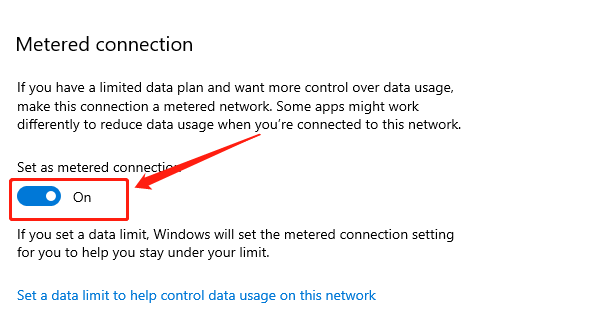
This method prevents Windows from automatically downloading updates over that network.
Method 4: Disable Updates via Group Policy Editor
Press the Windows + R keys, type "gpedit.msc", and click "OK".
In the Group Policy Editor, navigate to Computer Configuration > Administrative Templates > Windows Components > Windows Update.
Find and double-click the "Configure Automatic Updates" option.
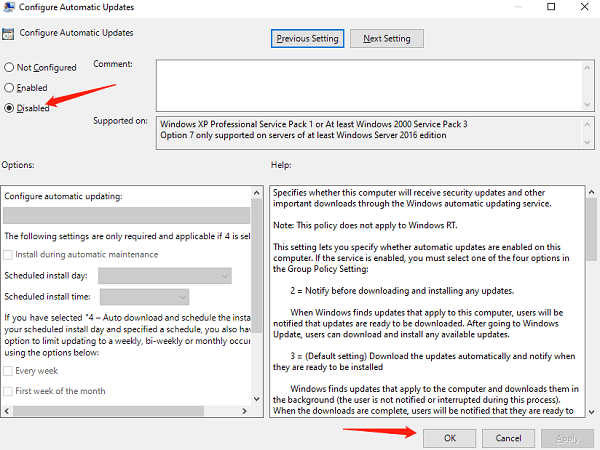
Select "Disabled", then click "Apply" and "OK".
Using this method, the system will no longer automatically download or install updates, allowing you to check for updates manually as needed.
Method 5: Pause Updates
Press the Windows + I keys to open "Settings".
Select "Update & Security".
On the "Windows Update" page, click the "Pause updates for 7 days" button.
For longer pauses, click "Advanced options" and choose a pause date in the "Pause updates" section.
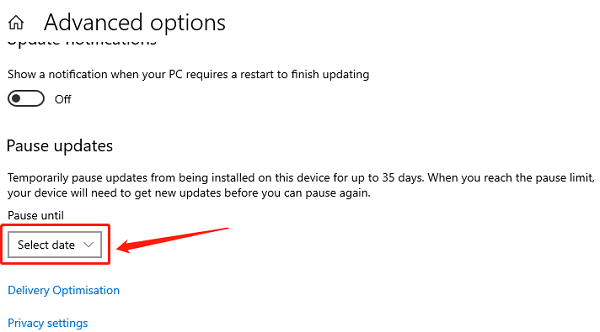
This method allows you to temporarily stop updates without fully disabling them.
It's essential to regularly check and install security updates for system safety and stability. To re-enable automatic updates, reverse the steps. Even with updates disabled, regular maintenance protects against cyberattacks and vulnerabilities.
See also:
Common Causes and Solutions for Windows Blue Screen of Death
Top 10 Ways to Fix Computer Sound Issues
How to Fix Sound Card Driver Installation Failure in Windows