The sound card is vital for a computer's audio, and its driver is key to its proper function. This guide will explain how to reinstall your sound card driver to ensure your computer's audio works correctly.
Why Reinstall the Sound Card Driver
No sound from the computer, poor audio quality, or malfunctioning speakers.
The sound card driver is corrupted, missing, or incompatible with the operating system.
After upgrading or changing hardware, you need to install a new driver to ensure compatibility.
1. Using a Driver Management Tool
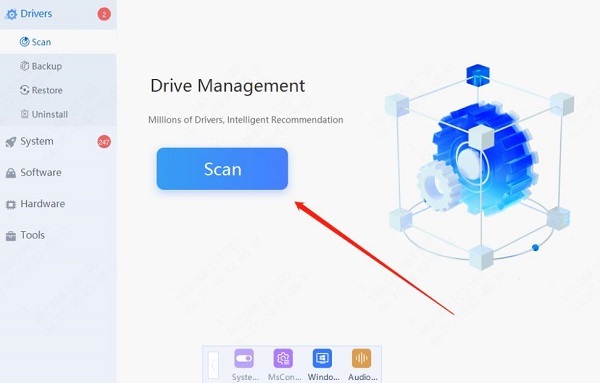
Driver Sentry is a professional driver management software designed to help users install, update, and upgrade their computer drivers. With Driver Sentry, you can automatically detect and update drivers, saving time and effort while avoiding the risk of downloading or installing the wrong drivers.
Click the download button to get the latest version of Driver Sentry. After installation, open the software and click "Scan".

After scanning, it will show which drivers are missing or need updating. Find the sound card driver in the results list and click the "Update" button.
Once updated, it's recommended to restart your computer to ensure the new driver is fully functional.
2. Manual Installation
1). Check the Sound Card Status
Press Windows + X and select Device Manager.
Expand the "Sound, video, and game controllers" section to check if the sound card is listed correctly or if there's a yellow exclamation mark.
If there is a yellow exclamation mark, it means there is a problem with the sound card driver, and it needs to be reinstalled.
2). Uninstall the Old Driver
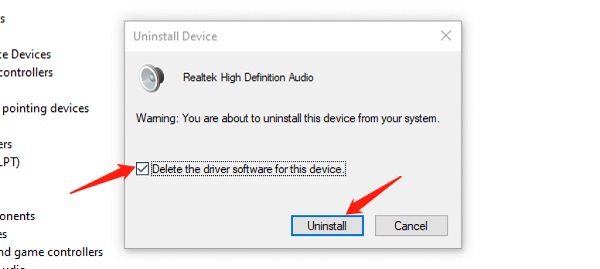
In Device Manager, right-click the problematic sound card and select "Uninstall Device".
Check the box for "Delete the driver software for this device", then click Uninstall.

After uninstalling, restart your computer.
3). Download the Latest Sound Card Driver
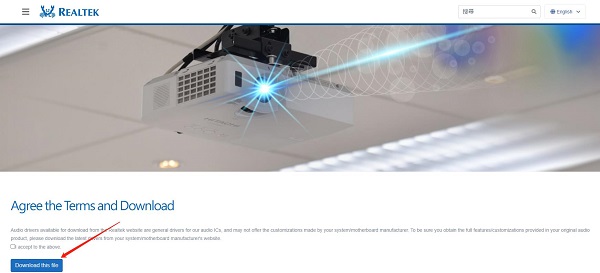
Open your browser and go to the official website of your computer brand or sound card manufacturer.
Enter your computer or sound card model in the search box and find the latest driver compatible with your operating system.

Click the download button and save the driver to your computer.
4). Install the Sound Card Driver
Locate the downloaded driver installation file and double-click to run it.
Follow the on-screen instructions and choose the recommended settings during installation.
Once installed, restart your computer to activate the new driver.
3. Using Windows Automatic Installation
Press Windows + I to open the Settings window, and click "Update & Security".
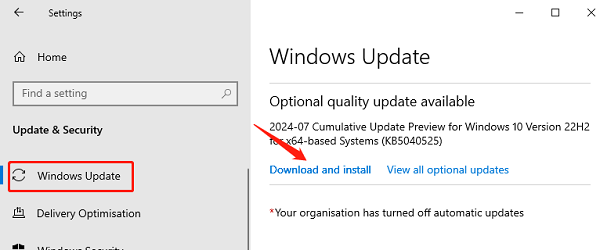
On the left-side menu, click "Windows Update", then click "Check for updates".
If updates are available, click "Download and install", and the system will begin downloading.

You may be prompted to restart your computer. Click the restart button or follow the prompts to complete the update process.
4. Common Issues and Solutions
1). Unable to Find the Sound Card Driver
If you cannot find the appropriate driver on the official website, try using third-party driver software (such as Driver Sentry) to automatically scan and install the driver.
2). Errors During Installation
If you encounter errors during installation, check the compatibility between your system version and the driver. You can also try running the installer as an administrator.
3). No Sound After Installation
Check if the sound card is set as the default device. Right-click the volume icon in the bottom right corner of the taskbar, select "Sound Settings", and ensure that the sound card is set as the default output device.
By following this guide, you can easily fix sound card driver issues and restore your computer's audio. If problems persist, contact the hardware manufacturer's support. Hopefully, this helps you resolve sound card issues and regain great audio performance!
See also:
How to Fix No Sound Issues on Windows 11 Computer
How to Fix Graphics Driver Installation Issues