
You might occasionally face an issue where your computer can't record audio, affecting both work and entertainment. This article offers effective methods to help you resolve this common problem.
Method 1: Update Drivers
Outdated or corrupted audio drivers can cause recording functions to malfunction. We recommend using Driver Sentry to automatically detect and update drivers, saving time and effort while avoiding the risk of downloading or installing incorrect drivers.
Click the download button to get the latest version of Driver Sentry. After installation, open the software and click "Scan".
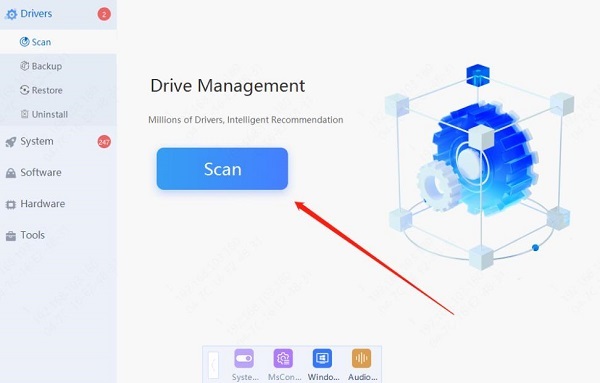
Once the scan is complete, it will display drivers that are not installed or need updating. Find the audio driver in the list and click the "Update" button.
After the update is complete, restart your computer to ensure the new driver is working correctly.
Method 2: Check Audio Device Settings
Right-click on the speaker icon in the taskbar and select "Sound settings".
In the "Input" section, select the correct recording device. If there are multiple devices, make sure to select the one you want to use.
Click "Device properties" to ensure the device is not disabled and that the volume is set at an appropriate level.
In the "Device properties" window, click "Start test" to confirm the device is working properly.
Method 3: Adjust Audio Settings
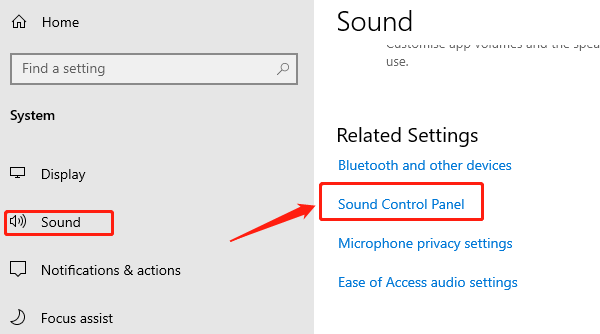
Right-click on the speaker icon in the taskbar and select "Sound settings".
Under "Related Settings", click "Sound Control Panel".
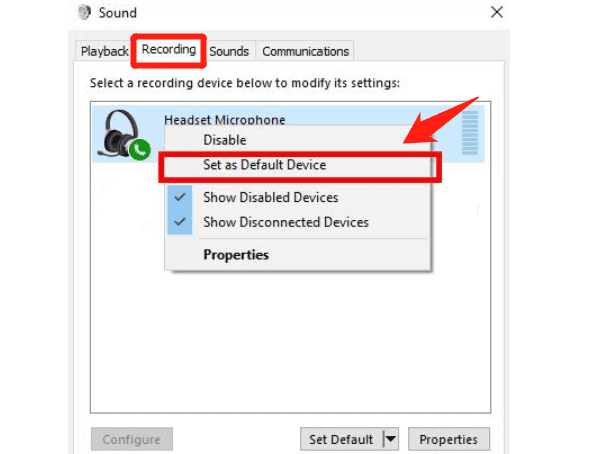
Switch to the "Recording" tab, select your recording device, and click "Properties".
In the "Levels" tab, ensure the microphone volume is set to an appropriate level.
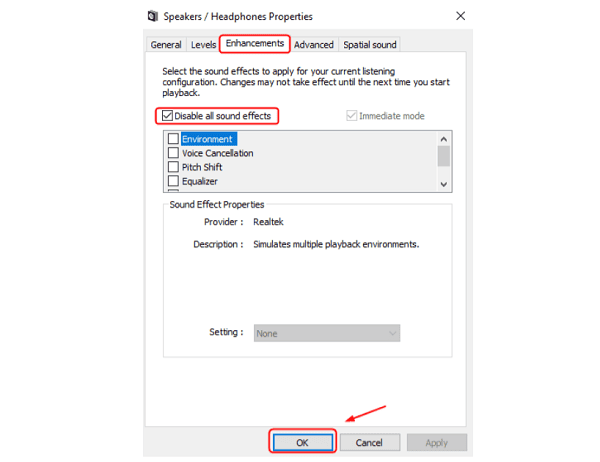
In the "Enhancements" tab, try disabling all sound effects and then click "OK".
Return to the "Advanced" tab and ensure the device is set to the highest frequency under the default format.
Method 4: Check Audio Services
Press Windows + R, type "services.msc", and press Enter.
In the "Services" window, find the Windows Audio and Windows Audio Endpoint Builder services.
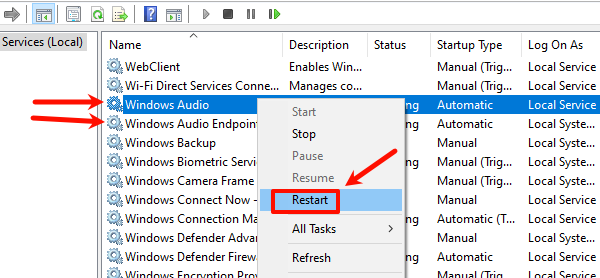
Right-click each service and select "Restart".
Ensure the startup type for both services is set to "Automatic".
Method 5: Check Application Permissions
Open "Settings" and select "Privacy".
From the left menu, select "Microphone".
Ensure that "Allow apps to access your microphone" is enabled.
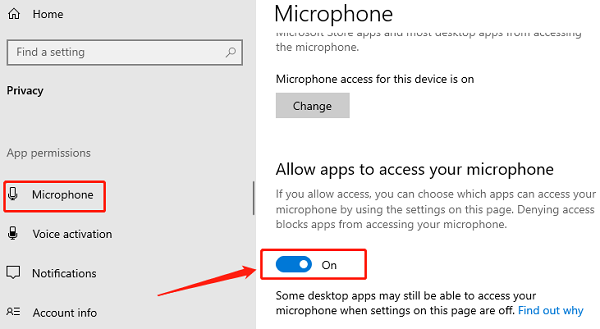
Scroll down to check that the microphone permissions are enabled for the apps that need to use it.
Method 6: Reinstall Audio Drivers
Press Windows + X and select "Device Manager".
Expand the "Sound, video and game controllers" section, right-click your audio device, and select "Uninstall device".
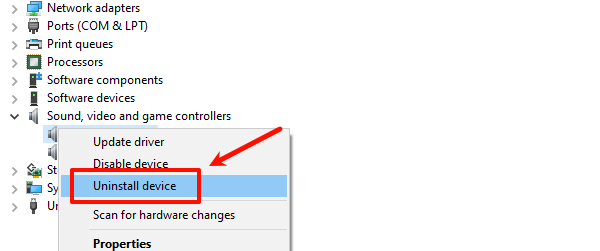
Confirm the uninstallation and restart your computer. The system will automatically reinstall the audio driver.
If the driver is not automatically installed, visit the manufacturer's website to download and manually install the latest driver.
Method 7: Check for System Updates
Click the Start button and select Settings > Update & Security.
In the "Windows Update" section, click "Check for updates".
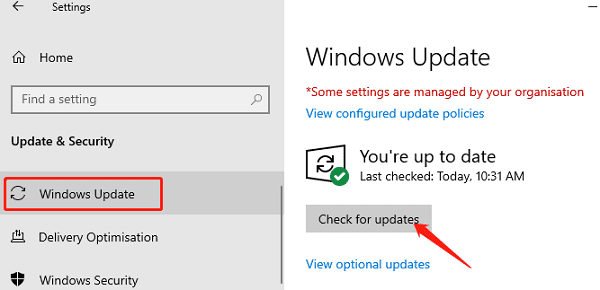
If updates are detected, click "Download and install", and the system will automatically download and install the updated drivers.
After installation is complete, restart your computer to apply the updates.
By following these steps, you should resolve the issue with your computer not recording audio. Restart your computer after making changes to ensure they take effect. If the problem continues, contact technical support for further help.
See also:
How to Quickly Resolve Logitech Keyboard Lag Issues
How to Update Sound Card Drivers on Windows 10