A non-responsive keyboard is a common issue that can affect productivity or gaming. This article offers effective solutions to restore normal keyboard functionality.
1. Check Keyboard Connection
Unplug the keyboard's USB or wireless receiver, wait a few seconds, then reconnect. For wireless keyboards, check the battery and replace if needed.
If it's a USB keyboard, try a different USB port and avoid using a USB hub.
Restart the computer to allow it to automatically detect and fix any keyboard issues.
2. Update Keyboard Driver
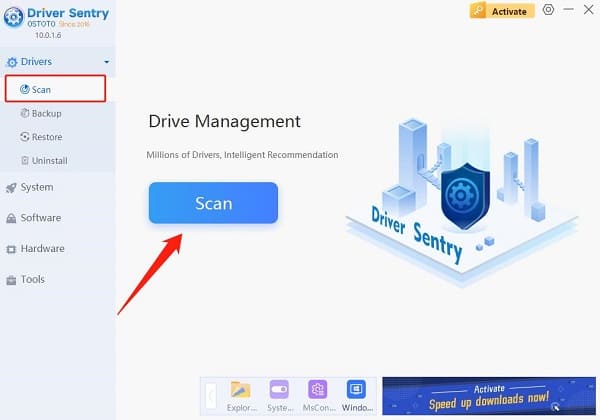
Outdated or corrupted drivers can cause keyboard malfunctions, and updating the driver can prevent these problems. Using Driver Sentry to automatically detect and update drivers is recommended to save time and avoid downloading the wrong driver.
Download the latest version of Driver Sentry, install and open the software, and click "Scan".

Once the scan is complete, check the results list for the keyboard driver and click "Update".
After updating, restart the computer to ensure the new driver takes effect.
3. Check Keyboard Language Settings
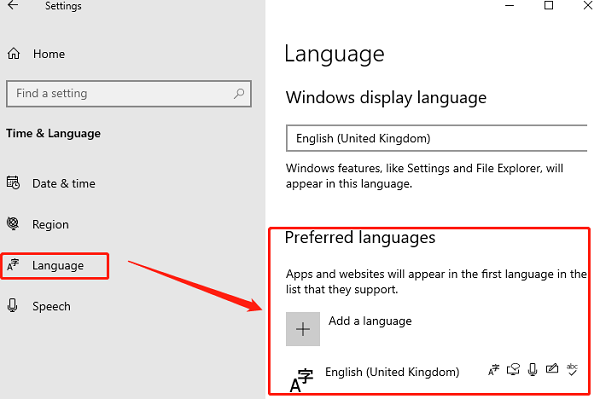
Press Win + I to open Windows settings. Select "Time & Language" and click on the "Language" option on the left side.
In the "Preferred languages" list, ensure the displayed language is the one you commonly use (such as English or Chinese). If incorrect, click "Add a language" and select the correct one.

Next to the selected language, click "Options", and ensure the keyboard layout matches your keyboard. Remove unnecessary layouts to reduce interference.
Press "Ctrl + Shift" or "Alt + Shift" to quickly switch input methods, ensuring the current input method matches your keyboard.
4. Disable Sticky Keys or Filter Keys
Quickly disable Sticky Keys
Press the Shift key five times, and the Sticky Keys settings window will appear.
In the pop-up window, click "Disable this keyboard shortcut in Ease of Access keyboard settings", ensure the "Use Sticky Keys" option is off.
Disable Sticky Keys and Filter Keys through settings
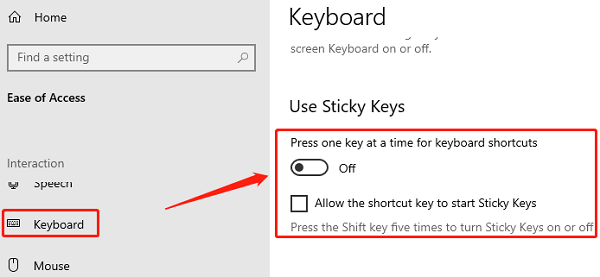
Press Win + I to open settings, and select "Ease of Access". In the left menu, click on "Keyboard".
Ensure "Turn on Sticky Keys" is unchecked in the "Sticky Keys" section. Likewise, make sure "Turn on Filter Keys" is unchecked in the "Filter Keys" section.

5. Check for Hardware Issues
Connect the keyboard to another computer or use another keyboard on your current computer to see if the problem persists. If other keyboards work fine, the original keyboard may have hardware issues.
Over time, dust or debris may accumulate inside the keyboard, causing keys to get stuck. Use compressed air to gently blow out any debris, especially between the keys, to clear any blockages.

For wireless keyboards, check if the battery has run out. If the battery is low, replace or recharge it. Ensure the wireless receiver is properly inserted and not loose.
6. Restore System
If you created a system restore point before the keyboard malfunctioned, try restoring the system to a previous working state.
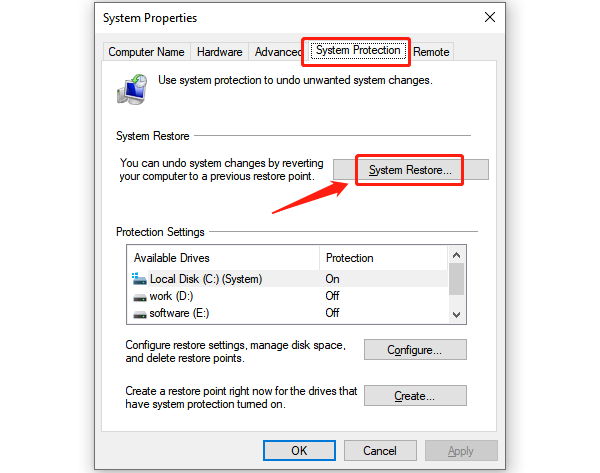
Press Win + S to open the search bar, type "System Restore", and select "Create a restore point".
Under the "System Protection" tab, click "System Restore" and choose a recent restore point to revert to.

If needed, after backing up important data, use the "Reset this PC" feature in Windows to perform a system reset.
Open settings, select "Update & Security", click "Recovery" on the left, and choose "Reset this PC", then follow the prompts.
By following these methods, you can effectively troubleshoot and fix a non-responsive keyboard. If the issue persists, it's advisable to seek professional technical support to prevent further disruptions to your work and daily life.
See also:
8 Methods to Fix Missing Sound Icon in Windows 10
How to Fix HP Webcam Not Working Issues