Windows 10 users may encounter the issue of a continuously spinning mouse pointer, which can disrupt normal usage and reduce work efficiency. This article provides several simple and effective solutions to help you quickly fix the issue and restore a smooth operating experience.
1. Update Device Drivers
Outdated or corrupted drivers are one of the most common causes of a continuously spinning mouse pointer. Ensuring that your mouse driver is up to date can effectively prevent this issue. Driver Sentry is recommended for automatically detecting and updating drivers, saving time while avoiding the risk of downloading or installing incorrect drivers.
Click the download button to get the latest version of Driver Sentry, install and open the software, then click "Scan".

Once the scan is complete, a list of outdated or missing drivers will be displayed. Locate the mouse driver and click "Update".
After updating, restart your computer to ensure the new drivers take effect.
2. Disable Mouse Pointer Precision Enhancement
Press Win + R, type "Control Panel", and press Enter.
In the Control Panel, select "Hardware and Sound", then click "Mouse".
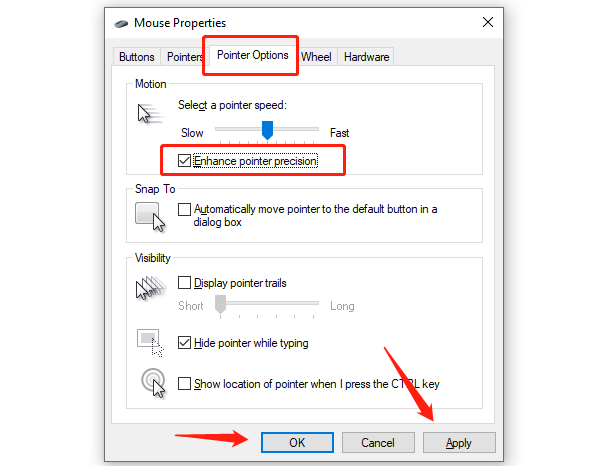
In the Mouse Properties window, navigate to the "Pointer Options" tab. Uncheck "Enhance pointer precision", then click "Apply" and "OK".

After disabling this feature, check if the mouse pointer behaves normally. If the issue persists, proceed with the following steps.
3. Run System File Checker
In the Windows search bar, type "Command Prompt", right-click the result, and select "Run as administrator".
In the Command Prompt window, type the following command and press Enter: sfc /scannow
Windows will automatically scan and repair any corrupted system files. The scanning process may take some time.
Once the scan is complete, restart your computer and check if the mouse pointer is functioning correctly.
4. Check System Resource Usage
Press Ctrl + Shift + Esc or right-click on the taskbar and select "Task Manager".
In the "Performance" tab, check the CPU and memory usage.
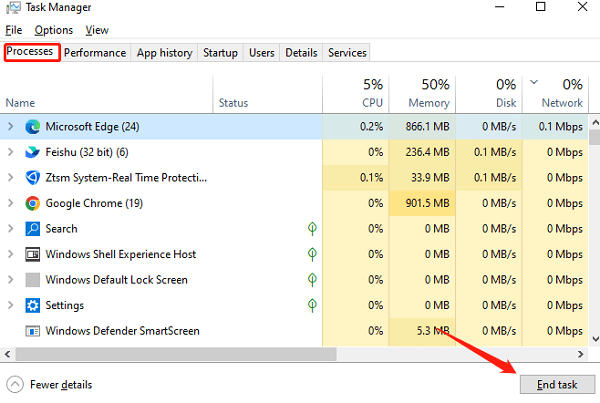
In the "Processes" tab, end processes that consume a high amount of system resources, especially unnecessary background applications.

Reducing system resource usage can improve mouse responsiveness.
If resource consumption is excessively high, restarting the computer can help free up resources and potentially resolve the spinning cursor issue.
5. Update Windows 10
Click the Start button and go to "Settings" > "Update & Security".
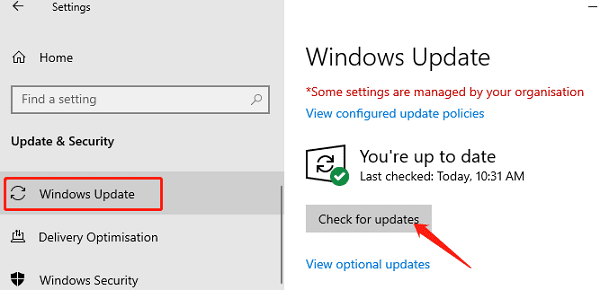
Under "Windows Update", click "Check for updates".

If updates are available, click "Download and install". Windows will automatically install the latest drivers and system updates.
Once the installation is complete, restart your computer to apply the updates.
6. Check for External Device Interference
Disconnect all unnecessary external devices, especially USB devices.
Restart your computer and check if the mouse pointer behaves normally.
If the mouse functions correctly, reconnect the external devices one by one to identify which device is causing the spinning pointer issue.
By following these steps, you should be able to successfully fix the continuously spinning mouse pointer issue and restore normal functionality. If the problem persists, consider contacting technical support or reinstalling the operating system as a last resort.
See also:
Resolve Bluetooth audio stuttering issue on Windows 10
Ways to resolve the "Audio Device is Disabled" issue
How to fix Marvel Rivals crashing on PC
Methods to resolve the "Vanguard Not Initialized" issue in Valorant