Blue Screen of Death (BSOD) is a common issue that Windows 11 users might encounter, potentially leading to loss of unsaved data. This article will introduce some practical methods to help you resolve this issue.
1. Restart the Computer
Hold down the power button to force the computer to shut down, or shut down normally through the on-screen options.
Wait a few seconds, then press the power button to restart the computer.
After restarting, observe whether the system encounters another blue screen.
2. Update Drivers
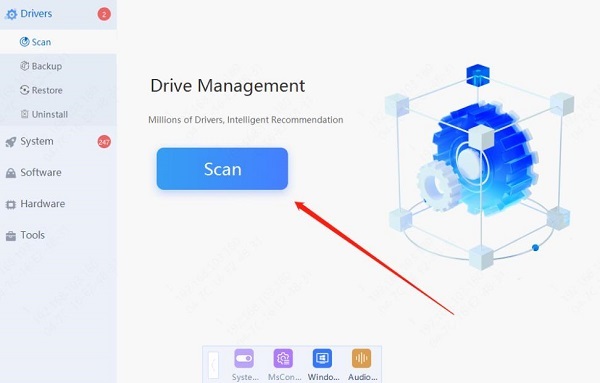
Outdated or corrupted drivers are a common cause of blue screens. It is recommended to use Driver Sentry to automatically detect and update drivers, saving time and effort while avoiding the risks of downloading or installing incorrect drivers.
Click the download button to get the latest version of Driver Sentry. Once installed, open the software and click "Scan".

After the scan is complete, it will show which drivers are not installed or need updating. Find the graphics driver in the results list and click the "Update" button.
Once the update is complete, it's recommended to restart the computer to ensure the updated drivers function correctly.
3. Check Hardware Connections
Turn off the computer and unplug the power cable to ensure all power is disconnected.
Open the computer case (desktop) or bottom cover (laptop) and check that all hardware is securely installed.
Check whether the hard drive cables are loose or damaged, and ensure the hard drive is properly connected.
Ensure that external devices (such as keyboards, mouse, printers, etc.) are properly connected and functioning without issues.

Close the case or bottom cover, reconnect the power, start the computer, and check if the blue screen issue is resolved.
4. Use Windows Memory Diagnostic Tool
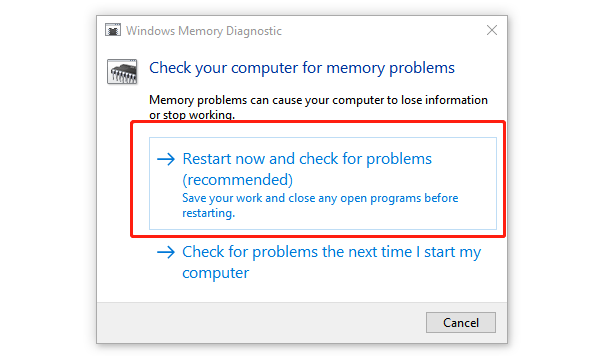
Press "Win + R" to open the Run dialog, type "mdsched.exe", and press Enter.
In the window that appears, select "Restart now and check for problems".

The computer will restart and automatically begin a memory test, which may take several minutes.
After the test is completed, the system will automatically restart and display the test results on startup. If memory problems are detected, consider replacing the RAM or contacting the hardware manufacturer.
5. Run System File Checker (SFC)
Press "Win + X" and select "Windows Terminal (Admin)" or "Command Prompt (Admin)".
In the command prompt window, type "sfc /scannow" and press Enter.

The system will start scanning all protected system files and repairing any corrupted files. This process may take some time, so please be patient.
Once completed, if issues are found and fixed, the system will indicate a successful repair. If no issues are found, other troubleshooting methods may be needed.
6. Check for Viruses and Malware
Launch the installed antivirus software and update it to the latest version to ensure the virus database is up-to-date.
Run a full system scan to detect and remove any potential viruses or malware.

If threats are detected by the antivirus software, follow the prompts to remove or quarantine them.
After completing the scan, restart the computer and check if the blue screen issue is resolved.
7. Perform a System Restore
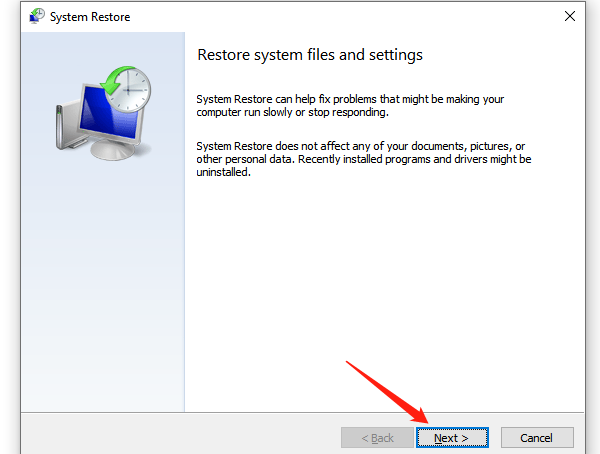
Press "Win + R", type "rstrui.exe", and press Enter to open System Restore.
Select "Next" to view available restore points. Choose a recent restore point (before the blue screen issue occurred).

Follow the prompts to complete the system restore process. The system will automatically restart and restore to the selected state.
Check if the system restore has resolved the blue screen issue. If successfully resolved, the problem may have been related to recent system changes.
8. Reinstall Windows 11
Make sure to back up all important data, as reinstalling the system will erase all files and applications.
Insert the Windows 11 installation media (such as a USB drive or DVD) and restart the computer.

During startup, press the appropriate key (usually F2, F10, F12, or Del) to enter BIOS settings and set to boot from the installation media.
In the Windows installation interface, select "Install" and follow the on-screen instructions.
After the installation is complete, reinstall the necessary drivers and applications.
Following these steps can help fix blue screen issues on your Windows 11 computer. Regular maintenance and updates will enhance stability and performance. If the issue continues, seek professional technical support for more help.
See also:
8 Common Solutions for No Internet Connection
How to Download and Install Wireless Network Card Drivers