Sudden crashes during gaming can be frustrating and may lead to data loss. This article offers solutions to improve your gaming experience and keep your computer running smoothly.
1. Update Drivers
Errors or outdated versions of core drivers, like graphics and audio drivers, can cause crashes during gameplay. Keeping drivers up-to-date can help prevent these issues. Using software like Driver Sentry to automatically detect and update drivers can save time and avoid installation errors.
Download the latest version of Driver Sentry, install and open the software, then click "Scan".

The scan will display which drivers are missing or outdated. Find the necessary updates and click "Upgrade".
After updates are complete, restart your computer to ensure the changes take effect.
2. Optimize Power Settings
In Windows, go to the Start menu, then select "Control Panel > Power Options".
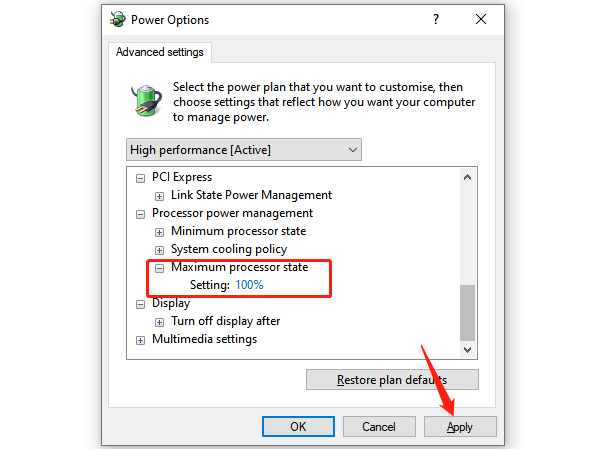
Choose the "High Performance" power plan to allow hardware like the CPU and graphics card to run at higher performance levels, ideal for gaming and graphic-intensive tasks.
Disable power-saving settings, ensuring the "Maximum Processor State" is set to 100% to prevent performance limits due to energy-saving modes.

Disable hard drive sleep in the Power Options to avoid delays and performance issues due to the hard drive going into sleep mode.
3. Run System Diagnostic Tools
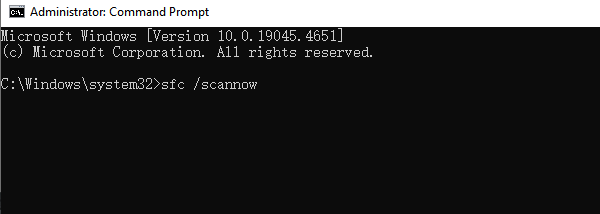
Type "Command Prompt" in the search box and open it as an administrator.
Enter "sfc /scannow" to scan and repair any corrupted system files.

Go to "Settings > Update & Security > Troubleshoot > Other Troubleshooters" and follow the prompts to run relevant troubleshooting tools, such as the "audio" or "hardware troubleshooting" tools.
4. Disable Background Programs
Press Ctrl + Shift + Esc to open Task Manager.
Go to the "Startup" tab and disable unnecessary startup programs to reduce the load at startup.
In Task Manager, check active processes and end unnecessary ones to free up memory and CPU resources.
5. Run Memory Check
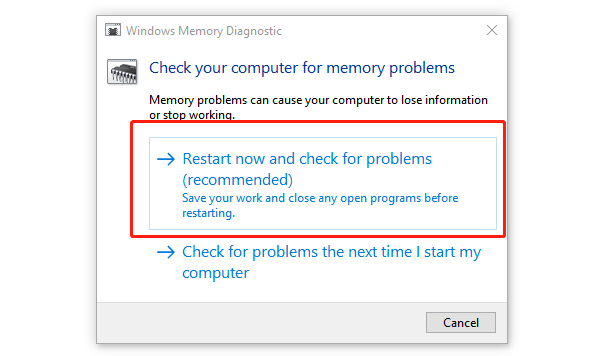
Type "Memory Diagnostic" in the search box and open the Windows Memory Diagnostic tool.
Select "Restart now and check for problems". The system will reboot and start a memory check.

Once complete, review the report for any memory errors and replace any faulty memory if necessary.
6. Check Hardware
Use the chkdsk command in Command Prompt to scan and repair hard drive errors.
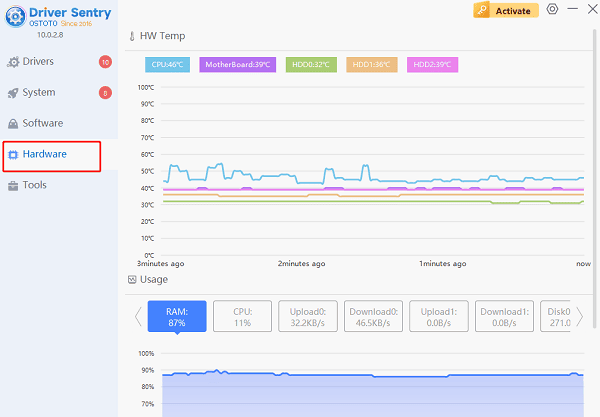
With Driver Sentry's hardware module, monitor temperatures for components like CPU, GPU, and hard drive to ensure they are within a safe range.

If temperatures are too high, clean dust from inside the computer or consider adding additional cooling fans.
7. Improve Cooling
Regularly open the computer case and remove any dust to keep fans and heat sinks working effectively.
For laptops, consider using an external cooling pad to improve cooling.
8. Scan for Malware or Viruses
Go to "Settings > Update & Security > Windows Security > Virus & Threat Protection".
Run a quick scan or choose a custom scan for specific areas.
Keep antivirus software updated to protect against new viruses or malware.
Following these steps can help improve computer performance and ensure stable system operation. If issues persist, further hardware diagnostics or a system reinstall may be needed.
See also:
8 Ways to Fix GPU Not Detected on Windows
9 Ways to Fix Critical Process Died Error in Windows 10