
When using Windows 10, users may sometimes encounter the "Critical Process Died" blue screen error. This article provides several effective solutions to help restore normal system operation.
1. Check for Driver Updates
Driver issues, especially with display, network, and audio drivers, are often the root cause of the Critical Process Died error. Updating relevant drivers can prevent this error. Using Driver Sentry for automatic driver updates can save time and reduce the risk of downloading or installing incorrect drivers.
Click the download button to get the latest version of Driver Sentry. After installation, open the software and click "Scan".

When the scan completes, find the drivers that need updating, then click "Upgrade".
After updating, restart your computer to ensure the new drivers take effect.
2. Restart in Safe Mode
Press Win + R to open the Run dialog, type "msconfig", and press Enter.
In the System Configuration window, go to the Boot tab.
Check the "Safe boot" option, select "Minimal", then click Apply and OK.
Restart your computer. At the Windows login screen, hold Shift and click the power icon, then choose Restart.
When the computer restarts, select "Troubleshoot" > "Advanced Options" > "Startup Settings" > "Restart".
After the restart, press F5 to enable Safe Mode with Networking.
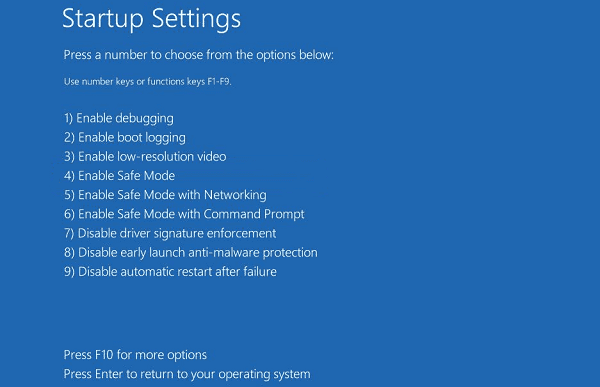
In Safe Mode, you can uninstall incompatible software, disable problematic drivers, or run diagnostic tools.
3. Run DISM Tool Repair
In the search box, type "Command Prompt", right-click it, and select Run as Administrator.
Enter the following command and press Enter:
DISM /Online /Cleanup-Image /RestoreHealth
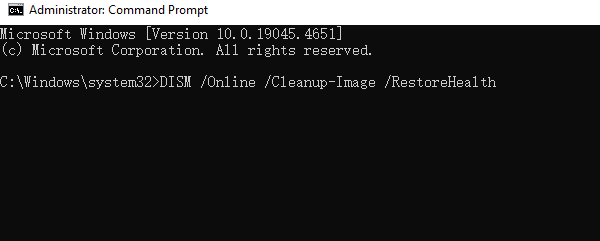
This command will scan and repair issues with the Windows image.
After it completes, restart your computer.
4. Use System File Checker
Open Command Prompt as Administrator, then enter: sfc /scannow
The system will scan and repair files. Restart your computer when the scan completes.
5. Perform a Clean Boot
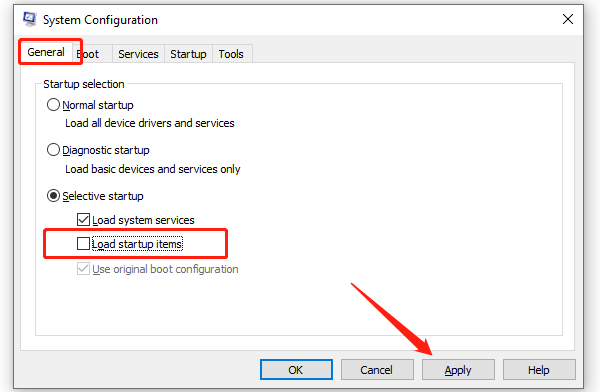
Press Win + R, type "msconfig", and press Enter to open the System Configuration window.
In the General tab, select "Selective startup".
Uncheck "Load startup items" and only keep "Load system services" selected.
Go to the Services tab, check "Hide all Microsoft services", then click "Disable all".
Click Apply and restart your computer to see if the issue is resolved.
To return to normal startup, reopen msconfig, select "Normal startup" under the General tab, and restart.
6. Run Windows Memory Diagnostic Tool
Press Win + R, type "mdsched.exe", and press Enter to open the Memory Diagnostic tool.
Select "Restart now and check for problems". Your computer will restart and run the diagnostic tool.
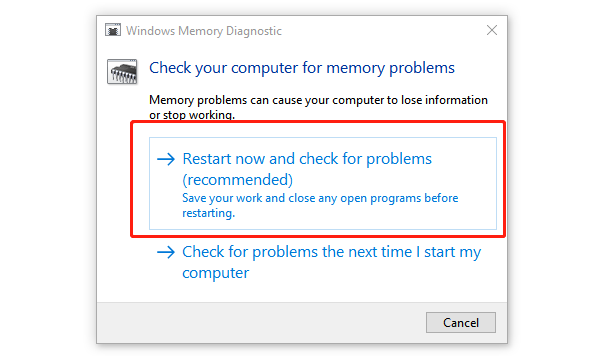
Once complete, review the results. If memory issues are found, consider replacing memory sticks or seeking repair.
7. Uninstall Problematic Windows Updates
Go to "Settings" > "Update & Security" > "Windows Update".
Click "View update history" and then select "Uninstall updates".
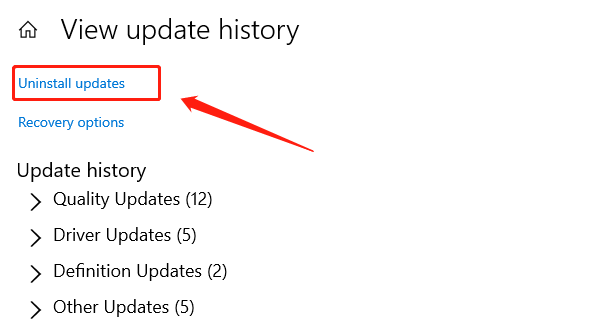
In the Installed Updates window, find recent updates, right-click them, and choose Uninstall.
Follow the prompts, then restart your computer.
8. Uninstall Recently Installed Software
Go to "Settings" > "Apps" > "Apps & features".
Find recently installed software, select it, and choose "Uninstall".
Restart your computer afterward to check if the issue is resolved.
9. Perform a System Restore
Press Win + S, search for and select "Recovery".
In the Recovery window, choose "Open System Restore".
Select a restore point from before the issue began, and click Next.
Follow the prompts to complete the restore, and restart your computer to check if the problem is resolved.
Following these steps should effectively resolve various issues within the Windows operating system and restore normal operation. If the issue persists, consider seeking professional technical support.
See also:
8 Ways to Fix Satisfactory Crashes
How to Fix Windows 10 System Crash