
Many Windows users may experience 100% disk usage, which can significantly slow down their computer and even cause crashes. This article offers effective methods to resolve this issue and enhance system performance.
1. Update Drivers
Outdated hard drive drivers could be the cause of high disk usage. You can resolve this by updating your hard drive drivers. It is recommended to use Driver Sentry to automatically detect and update drivers, saving you time and reducing the risk of downloading or installing incorrect drivers.
Click the download button to get the latest version of Driver Sentry. After installation, open the software and click "Scan".
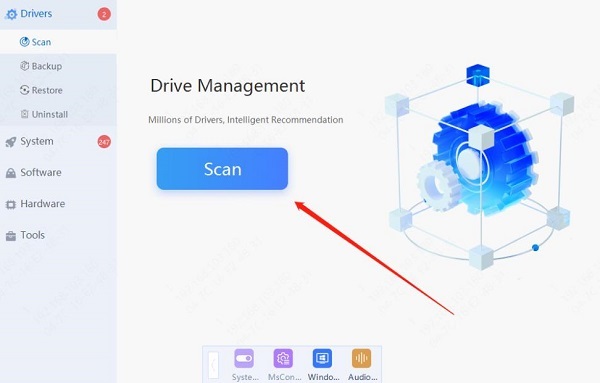
Once the scan is complete, the list will display any drivers that need to be installed or updated. Find the hard drive driver in the list and click the "Update" button.
After the update is complete, it is recommended to restart your computer to ensure that the updated driver is working properly.
2. Check Task Manager for System Resources
Press Ctrl + Shift + Esc to open Task Manager.
In Task Manager, click on the "Performance" tab and check the usage of the CPU, memory, disk, and network.
If you see disk usage close to 100%, switch to the Processes tab.
Select the high-resource-consuming process, then click "End Task" to close unnecessary programs (be cautious not to close system-critical processes).
3. Check Disk for Errors
Open File Explorer and locate the disk you want to check (e.g., C: drive).
Right-click the disk icon and select "Properties".
In the Properties window, click on the "Tools" tab. Under the Error checking section, click the "Check" button.
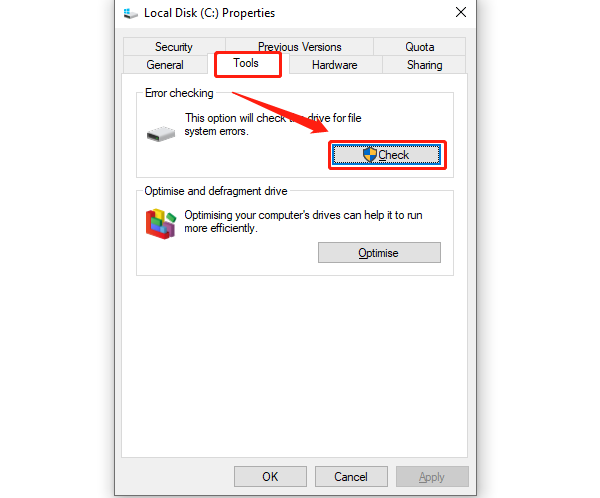
If the system indicates no errors, you can opt to run "Scan Drive" to check for potential issues.
After scanning, if any errors are found, follow the prompts to repair the disk.
4. Disable Windows Search Service
Press Win + R, type "services.msc", and press Enter to open the Services Manager.
In the list of services, find "Windows Search". Right-click on Windows Search and select "Properties".
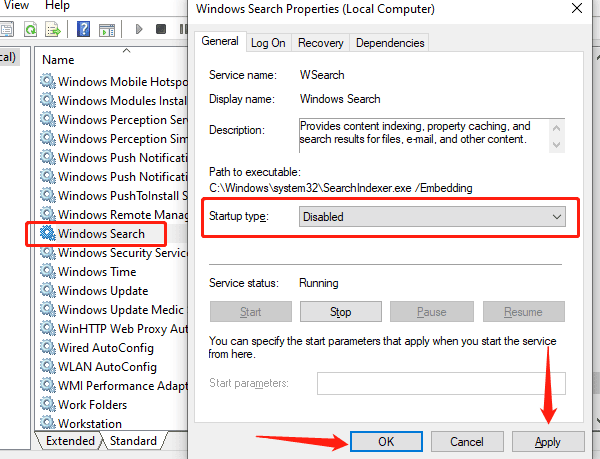
In the Startup type dropdown menu, select "Disabled". Click "Apply", then "OK" to close the Properties window.
Restart your computer to apply the changes.
5. Disable Superfetch Service
Press Win + R, type "services.msc", and press Enter.
In the Services Manager, locate "Superfetch" (in the latest versions of Windows, it may be called SysMain).
Right-click on "Superfetch" or "SysMain", and select "Properties".
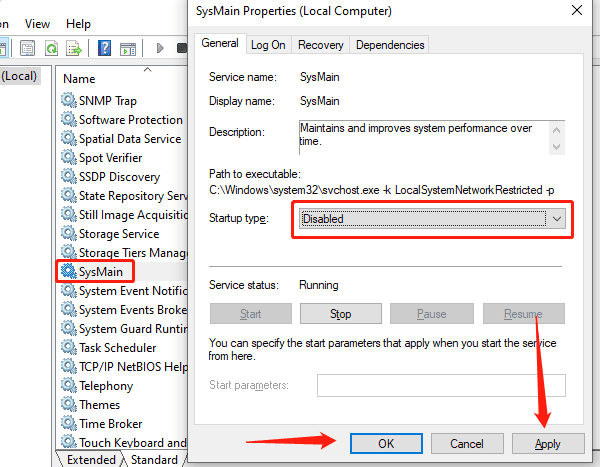
In the Startup type dropdown menu, choose "Disabled". Click "Apply" and then "OK".
Restart your computer to complete the setup.
6. Upgrade the Hard Drive
First, select the appropriate type of SSD for your computer (such as SATA or NVMe interface).
Back up all important data from your current hard drive.
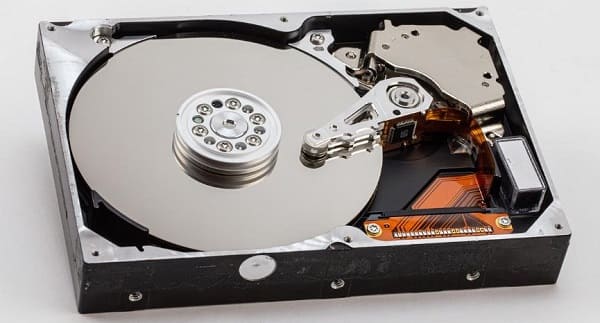
Use cloning software to migrate data from the old hard drive to the new one, ensuring the system and files remain intact.
Install the new hard drive and set it as the main boot drive (if necessary, enter the BIOS settings).
Boot up the system and enjoy improved performance and faster response times.
7. Adjust Virtual Memory Settings
Press Win + X and select System.
In the system settings, click on "Advanced System Settings".
In the pop-up window, under the Performance section, click the "Settings" button.
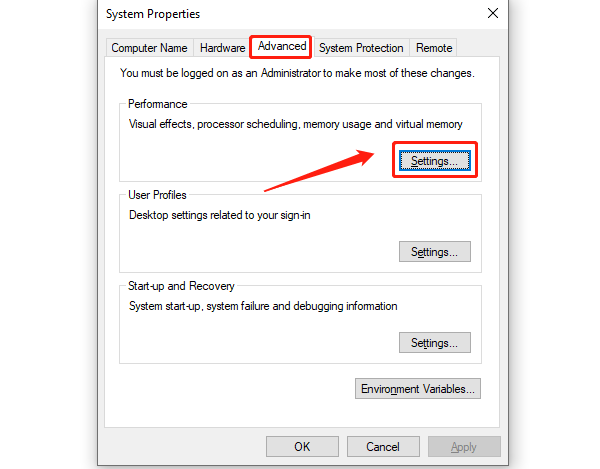
In the Performance Options window, switch to the Advanced tab, then click the "Change" button. Uncheck the option for "Automatically manage paging file size for all drives". Select the drive you want to adjust, and check "Custom size".
Enter appropriate initial and maximum values (it's recommended to set them to 1.5 to 2 times your physical memory). Click Set, then OK.
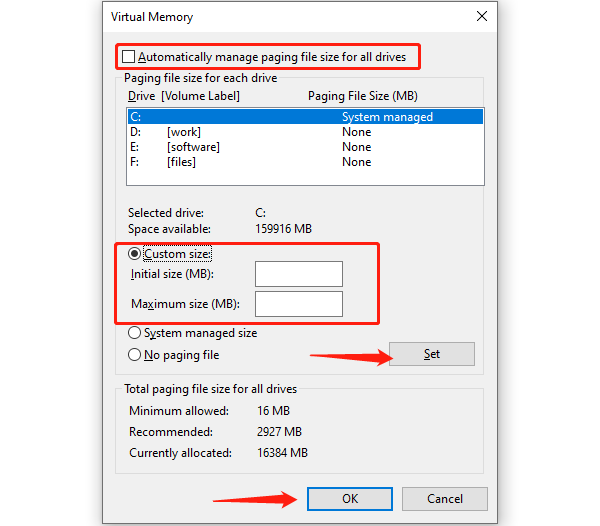
Restart your computer to apply the changes.
8. Disable Windows Update
Press Win + R, type "services.msc", and press Enter.
In the Services Manager, locate "Windows Update". Right-click on Windows Update and select "Properties".
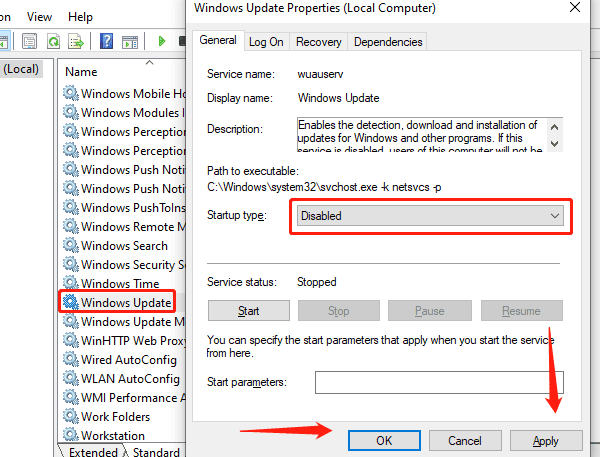
In the Startup type dropdown menu, choose "Disabled". Click "Apply", then "OK".
Restart your computer.
Following these steps can help reduce disk usage and boost your computer's performance. If the issue persists, consider professional support or hardware upgrades. We hope this article helps you fix the 100% disk usage problem.
See also:
7 Ways to Maximize GPU Performance
How to Fix Wireless Mouse Connection Failure