
When you experience an Ethernet connection issue in Windows 10, it can be frustrating and disruptive, especially if you're relying on a wired connection for your work or personal tasks. In this article, we'll explore common causes of Ethernet not working in Windows 10 and provide effective solutions to get you back online.
1. Check Physical Connections
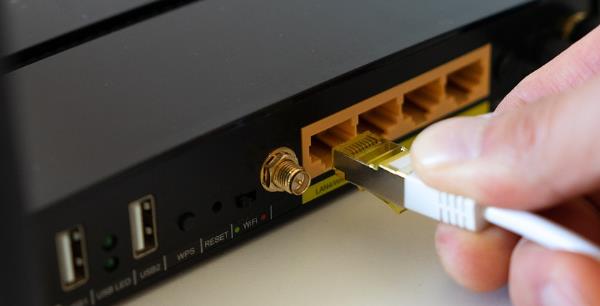
Before diving into software fixes, it's essential to ensure that the physical connection is secure. A loose or disconnected Ethernet cable is often the simplest cause of the problem.
Inspect the Ethernet Cable: Ensure that both ends of the Ethernet cable are securely plugged into the network port on your PC and the router or modem.
Try a Different Cable: If the cable looks worn or damaged, replace it with a new one to rule out any cable issues.
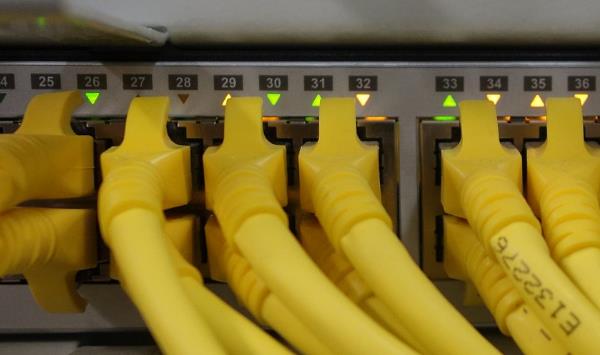
Test Another Port: If possible, try using a different port on the router or switch to rule out issues with the specific port.
Check for Indicator Lights: Most routers and Ethernet ports on PCs have indicator lights. Ensure that the light is blinking or steady, indicating a successful connection.
Once you've confirmed that all physical connections are intact, proceed to check the network settings.
2. Restart Your PC and Router
Sometimes, a simple restart can resolve network connectivity issues. This can help reset both the router and your computer's network adapter, which may fix temporary software glitches.
Restart Your PC: Click on the Start menu, select the power icon, and choose Restart.
Restart the Router: Unplug the power cable from your router, wait about 30 seconds, and then plug it back in. Wait for the router to fully restart before checking the connection again.
3. Upgrade Network Drivers
Outdated or corrupted drivers are a common cause of Ethernet issues in Windows 10. Using Driver Sentry can simplify the process of updating your network drivers, ensuring that your hardware is functioning optimally.
Download and Install Driver Sentry: Click the button below to download and install the Driver Sentry software directly.
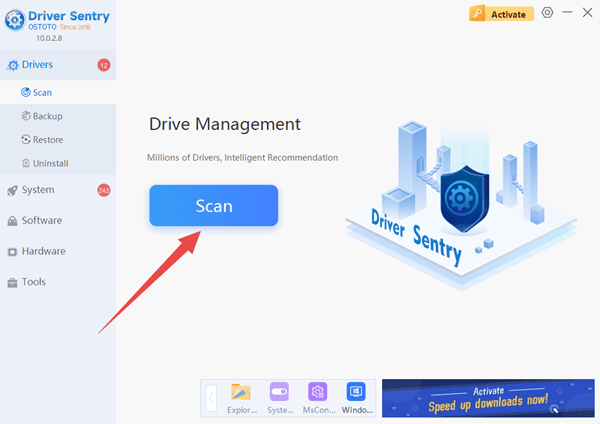
Scan for Outdated Drivers: Once installed, open Driver Sentry and click on the Scan button. The software will automatically detect outdated or missing drivers on your system.
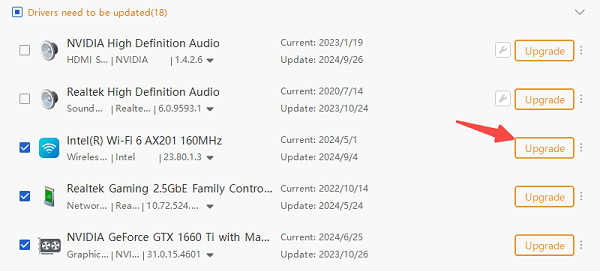
Upgrade Network Driver: After the scan completes, look for the Network Adapter driver and click Upgrade to install the latest version.
Restart Your PC: After the driver is updated, restart your PC to ensure the changes take effect.
4. Disable and Re-enable Your Ethernet Adapter
Sometimes, the Ethernet adapter in your PC might need to be reset to restore the connection. Disabling and then re-enabling the adapter can help resolve configuration issues and re-establish the connection.
Open Device Manager: Right-click on the Start button and select Device Manager.
Expand Network Adapters: In Device Manager, find and expand the Network Adapters section.
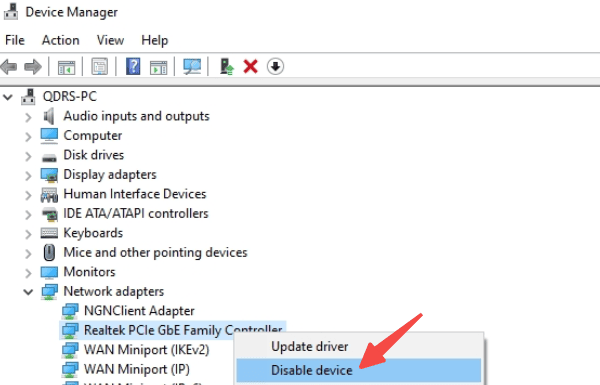
Disable the Ethernet Adapter: Right-click on your Ethernet adapter and select Disable Device.
Enable the Adapter Again: After a few seconds, right-click on the adapter again and select Enable Device.
5. Check IP Configuration
Incorrect or missing IP configurations can cause your Ethernet connection to fail. Ensuring that your IP settings are set to automatically obtain an IP address can resolve issues related to network configuration.
Open Network Connections: Right-click the Start menu and select Network Connections.
Select Ethernet: Click on your Ethernet connection and select Properties.
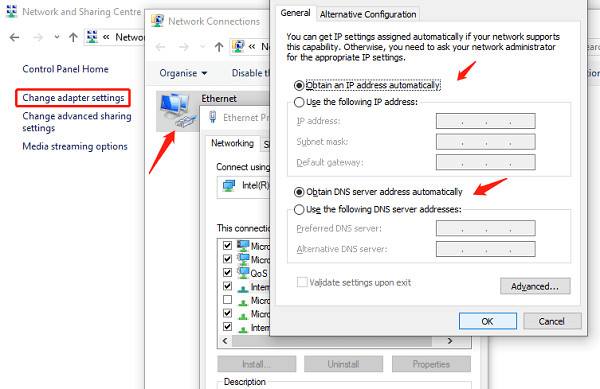
Check TCP/IPv4 Settings: In the Properties window, scroll down and double-click Internet Protocol Version 4 (TCP/IPv4).
Set to Obtain Automatically: Ensure that both Obtain an IP address automatically and Obtain DNS server address automatically are selected.
Click OK: After confirming these settings, click OK to apply the changes.
6. Reset TCP/IP Stack
A corrupted TCP/IP stack can lead to Ethernet connection issues, preventing your computer from accessing the internet. Resetting the stack can often fix issues related to network connectivity.
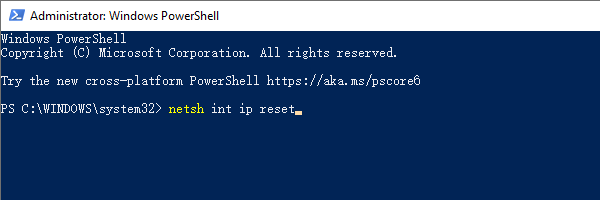
Open Command Prompt as Administrator: Press Win + X and select Windows PowerShell (Admin).
Enter the Reset Command: Type netsh int ip reset command and press Enter.
Restart Your PC: After the command runs successfully, restart your PC to complete the reset process.
7. Disable Antivirus or Firewall Temporarily
In some cases, your antivirus software or firewall settings may block the Ethernet connection. Disabling these temporarily can help diagnose if they are causing the issue.
Disable Antivirus: Open your antivirus software and turn off real-time protection or temporarily disable it.
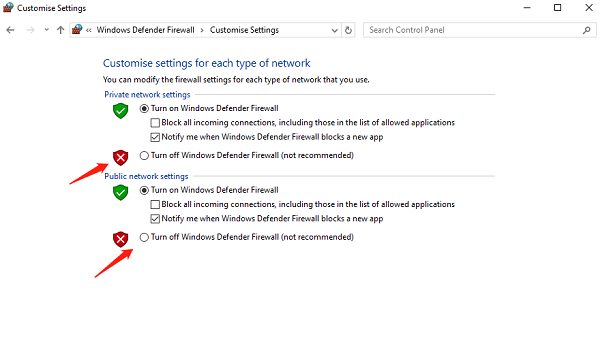
Disable Windows Firewall: Go to Control Panel > System and Security > Windows Defender Firewall, and select Turn Windows Defender Firewall on or off. Disable the firewall for both private and public networks temporarily.
Test Ethernet Connection: After disabling the antivirus and firewall, test the Ethernet connection again to see if it works.
8. Check for Windows Updates
Microsoft regularly releases updates that can address bugs and improve system stability, including network-related issues. Ensuring your system is up to date can resolve many connectivity problems.
Open Settings: Press Win + I to open the Settings window.
Go to Update & Security: Click on Update & Security, then select Windows Update.
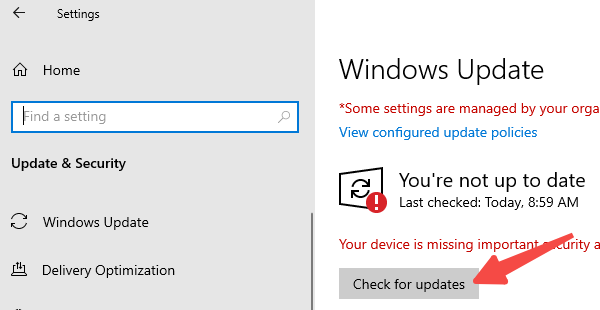
Check for Updates: Click Check for updates and allow Windows to install any available updates.
Restart Your PC: After the updates are installed, restart your PC to ensure all changes are applied.
By following the steps in this article, you can fix Ethernet issues and restore a stable internet connection, ensuring smooth online access. It is recommended to regularly use Driver Sentry to update your computer's drivers, keeping the network drivers up to date and preventing connection issues caused by outdated or incompatible drivers.
See also:
How to Fix Windows 11 Unable to Enter Sleep Mode
Methods to Fix 'HP Printer Driver Is Unavailable'