Frequent disconnections while browsing the web can be frustrating and may result in lost data. This article presents effective methods to help you restore a stable network connection.
1. Check Network Connection
Ensure that the WiFi switch on your computer or router is turned on. Some devices have physical switches or function keys (like F2 or F3) to control WiFi.
Try connecting another device, like your phone, to the same WiFi network. If it can't access the internet either, the issue may be with the router or network service.
Try restarting both the router and the computer by unplugging the router's power, waiting about 10 seconds, then plugging it back in and restarting the computer.
2. Update Network Drivers
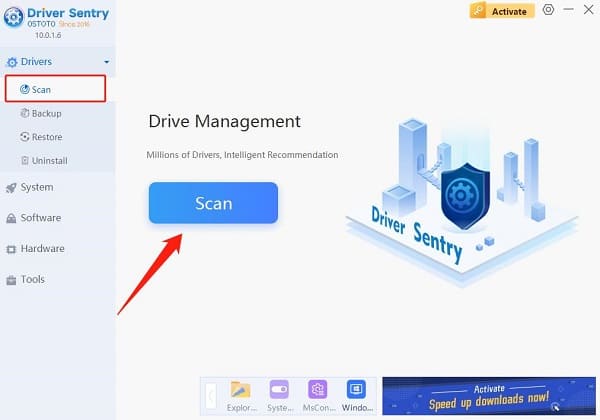
Outdated or corrupted network drivers can lead to frequent disconnections. Timely updating the network drivers can effectively improve connection stability and network performance. It is recommended to use Driver Sentry to automatically detect and update drivers, saving time and avoiding the risks of downloading or installing incorrect drivers.
Click the download button to get the latest version of Driver Sentry, install it, and then open the software to click "Scan".

After scanning, it will show which drivers are not installed or need updates. Find the network driver in the results list and click the "Update" button.
After the update is complete, it is advisable to restart your computer to ensure the updated drivers take effect.
3. Check Firewall and Security Software
Press "Win + R", type "control", and press Enter to open the Control Panel.
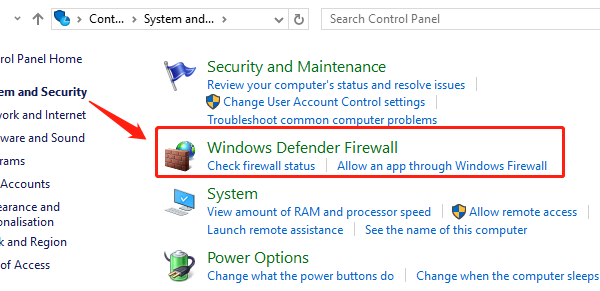
Select "System and Security", then click "Windows Defender Firewall".

In the left menu, select "Turn Windows Defender Firewall on or off", and try temporarily disabling the firewall to see if the connection is restored.
If you are using other antivirus software, open it and check its network settings to ensure it is not blocking the connection.
4. Adjust DNS Settings
Press "Win + R" type "ncpa.cpl", and press Enter.
Right-click the network connection you are using and select "Properties".
Double-click "Internet Protocol Version 4 (TCP/IPv4)".
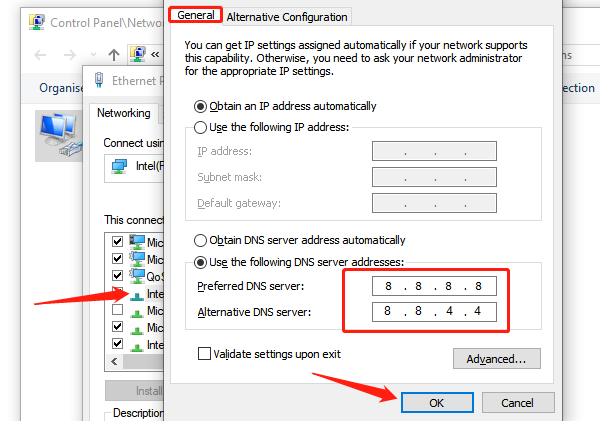
Choose "Use the following DNS server addresses" and enter the following DNS addresses:
Preferred DNS server: 8.8.8.8
Alternate DNS server: 8.8.4.4

Click "OK" and restart the network connection.
5. Close Unnecessary Background Applications
Press "Ctrl + Shift + Esc" to open Task Manager.
Switch to the "Processes" tab and see which applications are consuming a large amount of network resources.
Right-click the applications using a lot of bandwidth and select "End Task" to close unnecessary background applications and free up network bandwidth.
6. Hardware Troubleshooting
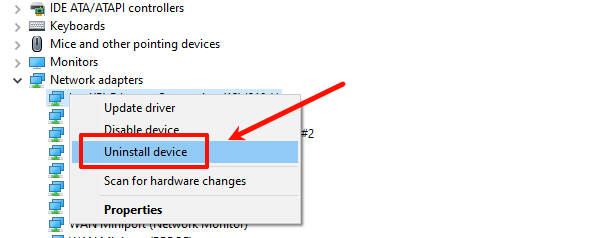
Right-click the "Start" button, select "Device Manager", and look for the WiFi adapter under "Network Adapters".
Ensure there are no error signs (like a yellow exclamation mark) on the WiFi adapter. If the adapter shows problems, right-click it and select "Uninstall device", then use Driver Sentry to download and install the appropriate drivers.

If the built-in WiFi adapter is faulty, try using an external USB WiFi adapter to confirm if the issue is hardware-related.
For wired connections, check if the Ethernet cable is damaged and ensure the plug is securely connected. If possible, try replacing the cable for testing.
By using these methods, you can likely fix frequent disconnections while browsing. If the issue continues, consider contacting your Internet Service Provider or technical support for help. A stable network connection will improve your online experience.
See also:
How to Fix Monitor Color Distortion
How to Force Delete Files in Windows That Cannot Be Deleted