It's common for headphones to suddenly stop working on computers or mobile devices. This article offers effective methods to help you resolve the issue and enjoy music and games smoothly.
1. Check Headphone and Jack Connection
Ensure that the headphone plug is fully inserted into the jack. A loose connection may cause audio signals to be unstable.
Try plugging the headphones into another device (such as a phone or tablet) to confirm if the headphones themselves are functioning properly.
Check if the jack is dirty or dusty; if so, gently clean it with a soft tool.
2. Update Audio Drivers
Outdated or corrupted audio drivers may prevent headphones from functioning properly, so it's advisable to regularly check and update drivers to ensure the stability and compatibility of audio devices. We recommend using Driver Sentry to automatically detect driver updates, saving time and avoiding the risk of downloading or installing incorrect drivers.
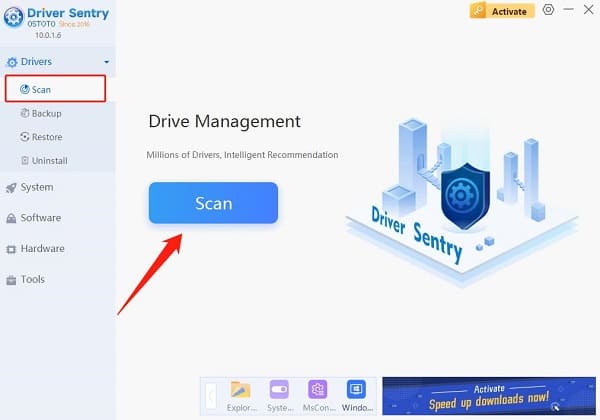
Click the download button to get the latest version of Driver Sentry, install it, and open the software, then click "Scan".

After scanning, it will show which drivers are not installed or need updating. Find the audio driver in the results list and click the "Upgrade" button.
After the update is complete, it's recommended to restart the computer to ensure the updated driver functions correctly.
3. Check Volume Settings
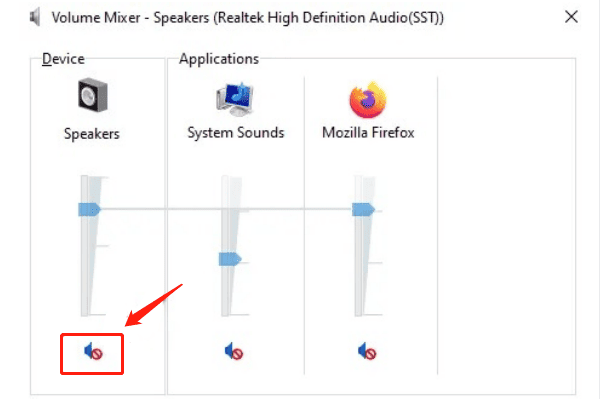
Click the volume icon in the taskbar at the bottom right to ensure the volume is not muted and is at an appropriate level.
Open the application you are using and ensure that the volume settings within the app are not muted.
Right-click the volume icon in the taskbar, select "Volume Mixer", and check if any applications are muted.

4. Set Default Audio Device
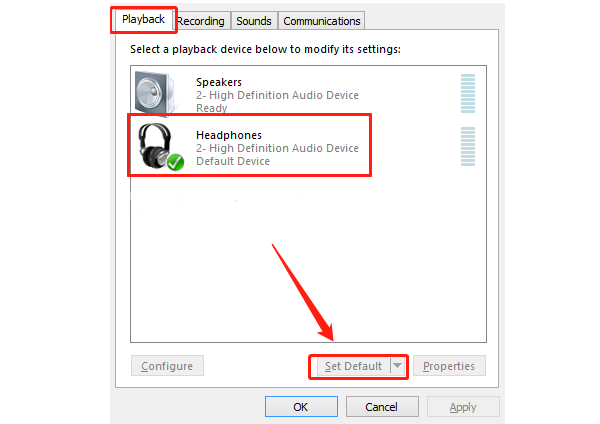
Right-click the volume icon in the taskbar and select "Sounds".
In the "Playback" tab, find your headphones, right-click, and select "Set as Default Device".

Ensure the headphones are marked as the default device in the device list, then click "Apply" and "OK" to save the settings.
5. Run Audio Troubleshooter
Press "Win + I" to open Windows Settings, then select "Update & Security".
In the left menu, select "Troubleshoot", then click "Additional troubleshooters".
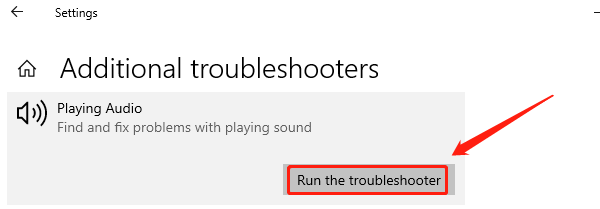
Under "Playing Audio", click "Run the troubleshooter", and the system will automatically detect and attempt to fix audio issues.

6. Check for Hardware Issues
If the above steps do not work, try using another pair of headphones to see if the issue persists.
Ensure that the sound card driver is updated, and reinstall it if necessary.
If your device has multiple audio jacks, try plugging the headphones into different jacks to check for sound.
By following these steps, you should be able to fix the issue of headphones not producing sound when plugged in. If the problem persists, consider contacting technical support or checking your device's warranty.
See also:
How to Fix Black Screen of Death in Windows 10
7 Ways to Fix Helldivers 2 Black Screen on Startup