Some players have encountered stuttering issues while playing Hogwarts Legacy, affecting their gaming experience. This guide provides effective solutions to help you enjoy smoother gameplay.
Method 1: Check Minimum System Requirements
OS: 64-bit Windows 10
Processor: Intel Core i5-6600 (3.3GHz) or AMD Ryzen 5 1400 (3.2GHz)
Memory: 16 GB RAM
Graphics: NVIDIA GeForce GTX 960 4GB or AMD Radeon RX 470 4GB
DirectX: Version 12
Storage: 85 GB available space
Additional Notes: SSD preferred, HDD supported, 720p/30 fps, Low Quality Settings
Method 2: Update Graphics Drivers
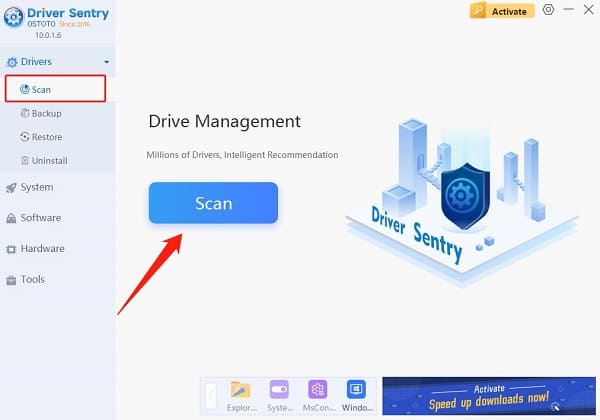
Updating graphics drivers can improve game compatibility and performance. Use Driver Sentry to automatically detect and update drivers, saving time and avoiding incorrect driver installations.
Download and install the latest version of Driver Sentry, open it, and click "Scan".

After scanning, find the graphics driver in the list and click "Upgrade".
Restart your computer after updating to ensure the new drivers take effect.
Method 3: Optimize Game Settings
In the game's settings menu, find the "Video" or "Graphics Settings" section and choose a lower resolution (e.g., 1920x1080 or lower) to improve performance.
Set "Texture Quality" to medium or low, and disable "Anti-Aliasing" and "Dynamic Shadows" for significant performance boosts.
If the game offers a "Performance Mode" for optimized graphics rendering, enable it.
Consider disabling advanced graphics options, such as lighting effects, reflections, and particle effects if hardware performance is limited.
Method 4: Verify Game Integrity
On Steam:
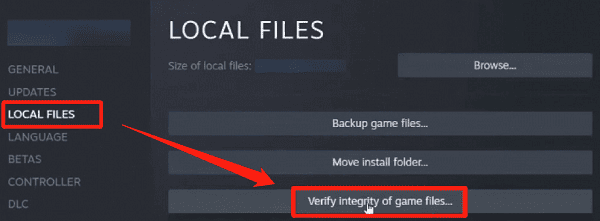
Open the Steam client, right-click on the game title, and select "Properties".
Under the "Local Files" tab, click "Verify Integrity of Game Files".

Steam will check and repair missing or damaged files.
On Epic Games:
Open the Epic Games Launcher, go to your "Library".
Find the game, click on the icon, and select "Manage" > "Verify".
Method 5: Disable Ray Tracing
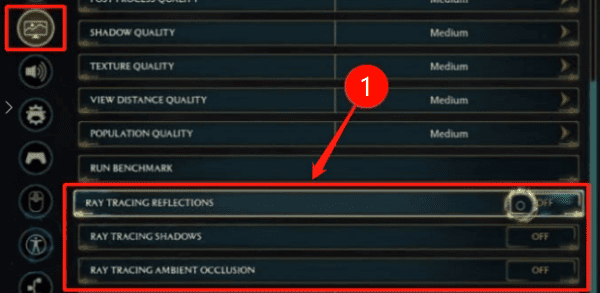
Go to the game's main menu and select "Settings".
In the "Graphics Options" tab, turn off "Ray Tracing Reflections", "Ray Tracing Shadows", and "Ray Tracing Ambient Occlusion".

Adjust "Ray Tracing Quality" from "Ultra" to "High", "Medium", or "Low" based on your PC specs and preferences.
Click "Apply Settings" and restart the game to see if performance improves. If not, continue with other fixes.
Method 6: Close Unnecessary Programs
Press "Ctrl + Shift + Esc" to open Task Manager, go to the "Processes" tab, and find programs that are using high CPU, memory, and disk resources.
Right-click on unnecessary programs and select "End Task" to close them. Avoid running large applications (e.g., browsers, video players) to save system resources.
Method 7: Clean Up Disk Space
Using Disk Cleanup Tool:
In Windows, open "This PC", right-click the drive where the game is installed, and select "Properties" > "Disk Cleanup".
Choose items to clean (e.g., temporary files, system cache, browser cache) and click "OK" to start cleaning.
Delete Unnecessary Files and Applications:
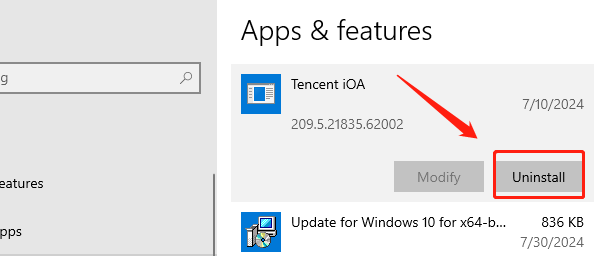
Regularly delete games, applications, and files you no longer use. Go to "Settings" > "Apps" > "Apps & features" to uninstall unneeded programs.

Run Disk Defragmentation:
For HDDs, run disk defragmentation regularly. Open "This PC", right-click the drive, and select "Properties" > "Tools" > "Optimize and Defragment Drive".
Method 8: Adjust Virtual Memory
Right-click "This PC" > "Properties" > "Advanced system settings" > "Performance Settings" > "Advanced".
In the "Virtual Memory" section, click "Change".
Uncheck "Automatically manage paging file size for all drives" and manually set virtual memory size, typically 1.5 to 3 times the physical RAM.
If multiple drives are available, choose a high-performance drive (e.g., SSD) for virtual memory storage to improve read/write speeds and reduce stuttering in-game.
Following these steps can optimize game performance in Hogwarts Legacy. If issues continue, consider upgrading hardware or adjusting system settings.
See also:
8 Ways to Fix GPU Not Detected on Windows
9 Ways to Fix Critical Process Died Error in Windows 10