Many Windows users may encounter the kernelbase.dll error. This article offers effective solutions to easily fix it.
1. Update Device Drivers
Outdated or corrupted drivers can sometimes cause the kernelbase.dll error. Checking for hardware driver updates is one of the important steps in fixing this issue. We recommend using Driver Sentry to automatically detect and update drivers, saving time and avoiding the risk of downloading or installing incorrect drivers.
Click the download button to get the latest version of Driver Sentry. After installation, open the software and click "Scan".

Once scanning is complete, it will show which drivers are missing or need to be updated. Find the driver you need to update in the list and click the "Upgrade" button.
After the update is complete, it is recommended to restart your computer to ensure the updated drivers take effect.
2. Run System File Checker (SFC)
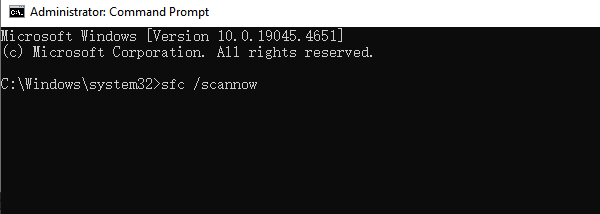
Press Win + S, type "Command Prompt", right-click the search result, and select "Run as Administrator".
In the Command Prompt window, type the following command and press Enter: sfc /scannow

Wait for the SFC tool to scan and repair corrupted files in the system. This process may take a few minutes.
Once the scan is complete, restart your computer and check if the kernelbase.dll error has been fixed.
3. Restore KernelBase.dll File
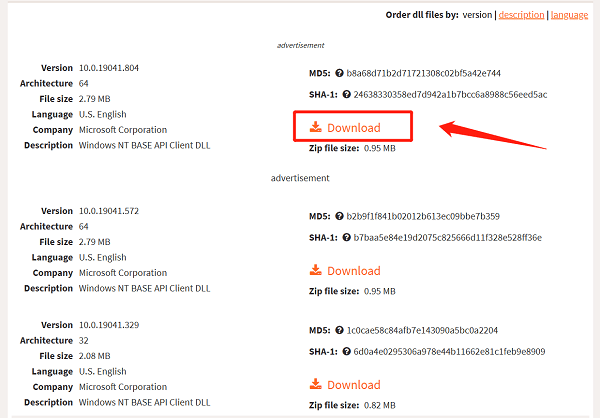
Go to a DLL file download website, type "KernelBase.dll" in the search bar, and click to search for the DLL file.
Click on the "KernelBase.dll file".
Select the correct version of the KernelBase.dll file and click the download button.

Note that you may find multiple available files. Usually, the latest version is the best choice.
If the version numbers are the same, it may mean that the file is compatible with different architectures. To confirm your system architecture (64-bit or 32-bit), you can open Windows Settings and check the system type.
After downloading the KernelBase.dll file, extract it and move the KernelBase.dll file to:
C:\Windows\SysWOW64 folder (for 64-bit systems)
C:\Windows\System32 folder (for 32-bit systems)
Restart your computer and check if the issue is resolved.
4. Perform Memory Diagnostics
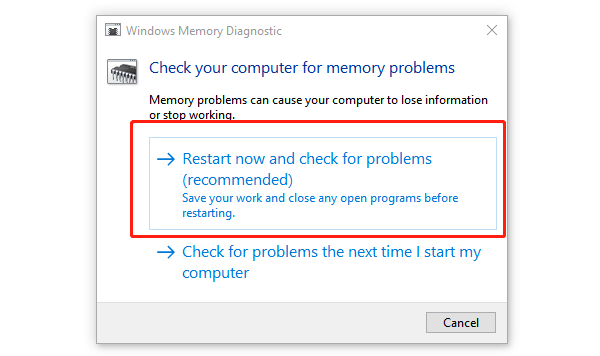
Press Win + R, type "mdsched.exe", and press Enter.
In the pop-up window, select "Restart now and check for problems". The computer will automatically restart and begin the memory test.

Once the diagnostic process is complete, Windows will display the results. If memory issues are found, you may need to replace or repair the memory modules.
After checking the memory, restart your computer and check if the kernelbase.dll error is fixed.
5. Scan for Viruses and Malware
Press Win + I to open "Settings".
Go to "Update & Security" > "Windows Security" > "Virus & Threat Protection".
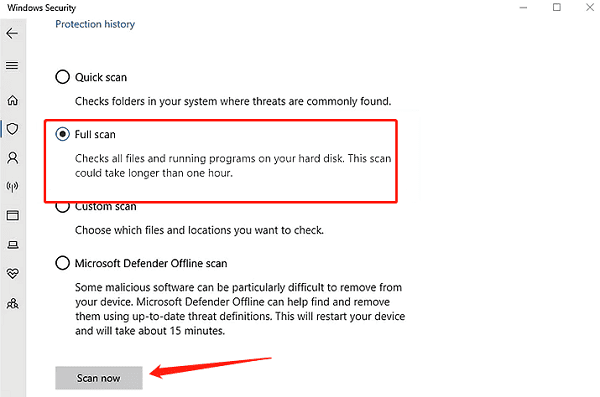
Click on "Quick Scan" or "Full Scan" to let Windows Security scan your computer.

If Windows Security detects viruses or malware, follow the prompts to fix the issues. You can also use third-party security software for a deeper scan.
Once the scan is complete, restart your computer and check if the kernelbase.dll error is fixed.
6. Check for Windows Updates
Press Win + I to open "Settings".
Go to "Update & Security" > "Windows Update".
Click "Check for Updates". If updates are available, click "Download" and install them.
Once the installation is complete, restart your computer and check if the kernelbase.dll error is resolved.
You can easily fix the kernelbase.dll error in Windows by following these methods. If the issue persists, contact technical support for further assistance.
See also:
Fix the Realtek High Definition Audio Not Plugged In Error
6 Ways to Fix the Audio Service Not Responding Error