A keyboard backlight improves visibility and productivity in low-light settings. If your keyboard backlight isn't working, here are some effective solutions to fix the issue.
1. Check Keyboard Connection
Ensure the keyboard is securely connected to the USB port. Try a different port to see if that fixes the issue.
For wireless keyboards, check if the batteries need replacing or charging, and confirm the wireless receiver is properly connected.
2. Update Keyboard Drivers
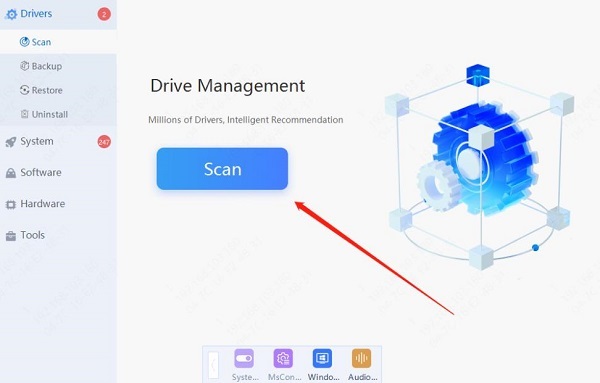
Outdated or corrupted drivers may cause the keyboard backlight to malfunction. It is recommended to use Driver Sentry to automatically detect and update drivers, saving time and avoiding the risk of downloading or installing incorrect drivers.
Click the download button to get the latest version of Driver Sentry. After installation, open the software and click "Scan".

Once the scan is complete, it will show which drivers are missing or need updating. Find the keyboard driver in the results list and click the "Update" button.
After the update is complete, it is recommended to restart your computer to ensure the updated driver takes effect.
3. Check Keyboard Light Switch
Some keyboards have a physical switch for controlling the backlight. Ensure it is set to "On".
Certain keyboards require pressing the Fn key in combination with function keys (such as F3 or F4) to toggle the backlight. Try these combinations to activate the lights.

4. Check Keyboard Lighting Settings
If your keyboard has dedicated software (like Razer Synapse or Corsair iCUE), open it and check the lighting settings to ensure the backlight is turned on and configured correctly.
Make sure there are no misconfigurations or setting errors causing the issue.
5. Reinstall Keyboard Drivers
Press Windows + X, select "Device Manager".
Find your keyboard device under the "Keyboards" section, right-click it, and select "Uninstall device". If prompted, check "Delete the driver software for this device" and then click "Uninstall device".

After uninstalling, restart your computer. The system will automatically detect and reinstall the default keyboard drivers.
6. Check System Settings
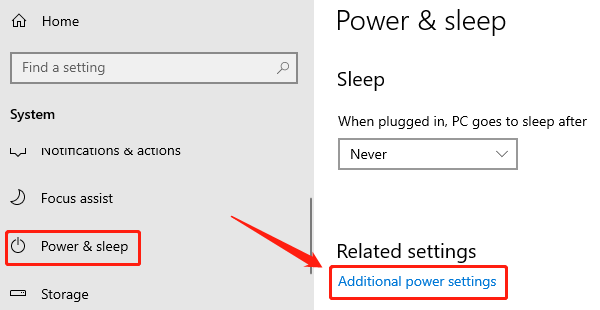
Press Windows + I to open Settings and choose "System".
Select "Power & sleep" and then click "Additional power settings".

Click "Change plan settings" > "Change advanced power settings".
Make sure there is no setting that disables the keyboard backlight.
7. System and Software Updates
Ensure your operating system and all related software are up to date.
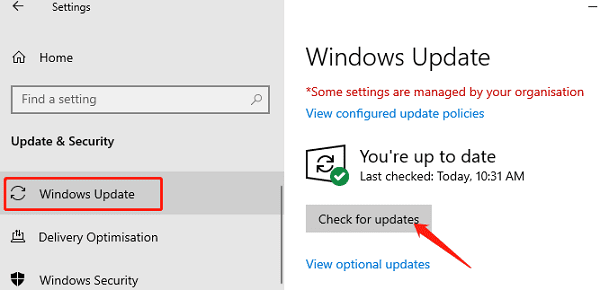
Press Windows + I, go to "Settings" > "Update & security", and click "Check for updates".

Install any available updates and patches to ensure compatibility between your system and hardware.
After updating, check if the keyboard backlight issue is resolved.
8. Check for Hardware Issues
If none of the above steps work, there may be a hardware issue with the keyboard.
Inspect the keyboard for visible physical damage or internal connection problems.
Connect the keyboard to another computer to see if it works properly.
If the issue persists, contact the manufacturer's technical support or consider replacing the keyboard.
Following these steps should help resolve the keyboard backlight issue. If the problem persists, contact the manufacturer for support or consider replacing the keyboard. Keeping your system and drivers updated can help prevent future problems.
See also:
Star Wars: Outlaws PC Configuration Guide
How to Fix Monitor Color Distortion