When using a laptop, network connection failures are a common issue that may result in no internet access, Wi-Fi disconnection, or slow network speed. This article provides effective solutions to help you quickly restore a stable network connection.
1. Check for Driver Updates
Outdated or corrupted drivers are one of the most common reasons why a laptop cannot connect to the network. Checking for network adapter driver updates can effectively resolve this issue. It is recommended to use Driver Sentry to automatically detect and update drivers, saving time while avoiding the risk of downloading or installing incorrect drivers.
Click the download button to get the latest version of Driver Sentry. Install and open the software, then click "Scan".

Once the scan is complete, a list of drivers that need to be installed or updated will be displayed. Locate the network adapter driver and click "Upgrade".
After the update is completed, restart your laptop to ensure the updated driver works properly.
2. Restart the Router and Modem
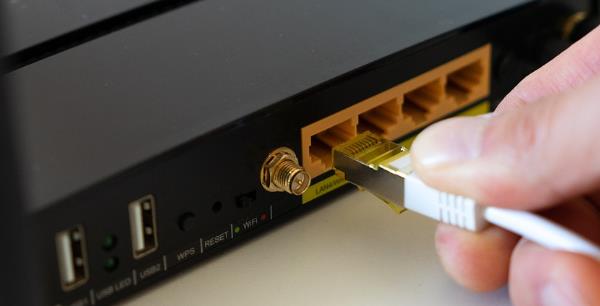
Disconnect your laptop from Wi-Fi or Ethernet and turn off the router and modem.
Allow the devices to power off completely to clear cache and error data.

Wait for 2-3 minutes, then turn on the modem first and wait for it to fully boot.
Next, turn on the router and wait until all indicator lights stabilize.
Reconnect your laptop to Wi-Fi, or if using a wired connection, ensure the Ethernet cable is securely plugged in and check for network access.
3. Forget and Reconnect to the Network
Press Win + I to open Settings.
Go to "Network & Internet" > "Wi-Fi".
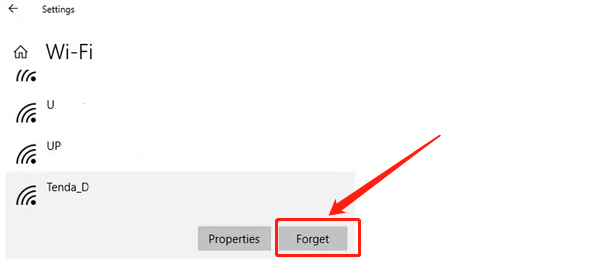
In the Wi-Fi list, find your current network and click "Forget".

Return to the Wi-Fi list and select your network.
Enter the Wi-Fi password (make sure it is correct).
Once connected, open a browser to test if the network is working.
4. Change DNS Server Address
Press Win + R, type "ncpa.cpl", and press Enter to open Network Connections.
Right-click on your active network (Wi-Fi or Ethernet) and select "Properties".
Modify the IPv4 DNS settings:
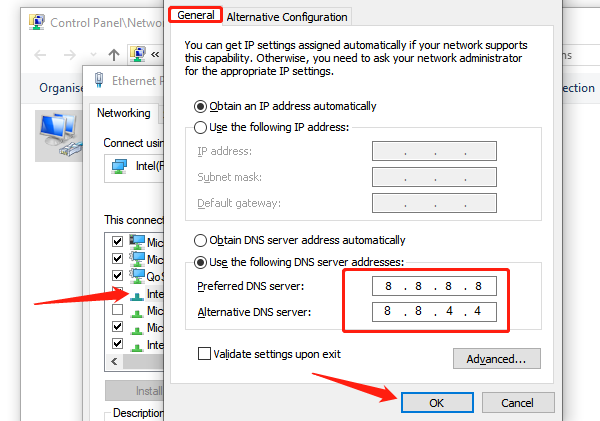
Find "Internet Protocol Version 4 (TCP/IPv4)" and double-click to open Properties.
Select "Use the following DNS server addresses" and enter:
Preferred DNS: 8.8.8.8
Alternate DNS: 8.8.4.4

Click "OK" and close all windows.
Disconnect and reconnect to Wi-Fi or restart your laptop to apply the changes.
5. Run Network Troubleshooter
Press Win + I to open Settings.
Navigate to "Update & Security" > "Troubleshoot".
Under Additional troubleshooters, find "Internet Connections" and click "Run the troubleshooter".
If Windows detects issues, follow the on-screen instructions to fix them. Once completed, try reconnecting to the network.
6. Reset Network Settings (Last Resort)
Press Win + I to open Settings.
Go to "Network & Internet" > "Status".
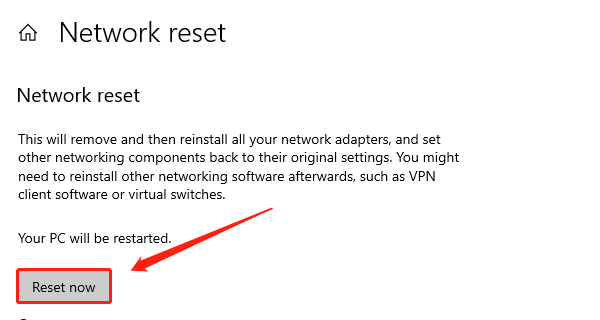
Scroll down and click "Network Reset" > "Reset now".

Windows will prompt "This action will remove all network adapters". Click "Yes" to confirm and wait for the system to restart automatically.
After restarting, reconnect to Wi-Fi and enter the password.
If using a wired connection, ensure the Ethernet cable is properly inserted and check for network access.
By following these steps, you should be able to fix your laptop's network connection failure. If the issue persists after trying all the above solutions, consider seeking help from technical support.
See also:
Ways to Fix NVIDIA Driver Installation Failure
Troubleshooting DirectX 12 Unsupported on Windows Systems