Windows 10 users may encounter the "Memory Management" blue screen error, causing crashes and reboots. This guide offers methods to quickly resolve the issue and restore normal operation.
1. Update Graphics Drivers
Outdated or corrupted graphics drivers can trigger the "Memory Management" blue screen error. Updating your drivers ensures compatibility with the Windows 10 system. Using tools like Driver Sentry can automate this process and reduce the risk of downloading or installing incorrect drivers.
Download and install the latest version of Driver Sentry. Open the software and click "Scan".

The scan will display a list of missing or outdated drivers. Locate the graphics driver in the results and click "Upgrade".
After updating, restart your computer to ensure the new driver functions properly.
2. Repair System Files
Using the System File Checker (SFC):
Press Win + S, type "cmd", right-click Command Prompt, and select "Run as administrator".
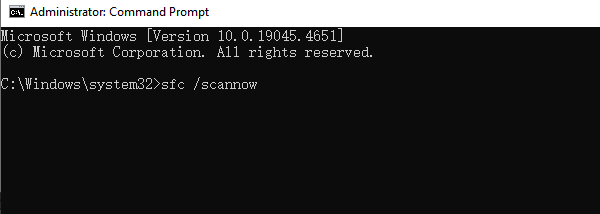
In the Command Prompt window, enter the following command: sfc /scannow

Press Enter and wait for the system to scan and repair corrupted files. This process may take some time, and the results will display upon completion.
Restart your computer to apply the fixes.
Using the DISM Tool (if SFC doesn't resolve the issue):
In the administrator Command Prompt, enter: DISM /Online /Cleanup-Image /RestoreHealth
Press Enter and wait for the tool to repair the system image.
Restart your computer and check if the memory management issue is resolved.
3. Run the Windows Memory Diagnostic Tool
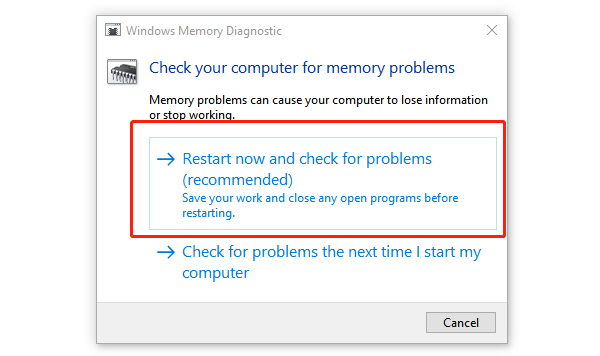
Press Win + R, type "mdsched.exe", and press Enter.
In the dialog box, select "Restart now and check for problems". Your computer will restart and perform a memory diagnostic.

Wait for the diagnostic to complete and review the results for any detected memory issues. If problems are found, consider replacing faulty RAM modules.
4. Check Hard Drive for Errors
Press Win + S, type "cmd", right-click Command Prompt, and select "Run as administrator".
Enter the following command to check the hard drive: chkdsk C: /f /r

Replace C: with the appropriate drive letter if your Windows installation is on a different partition.
Press Enter and confirm the system prompt with Y to schedule a disk check on the next restart.
Restart your computer, and let the check complete to identify and repair any hard drive errors.
5. Scan for Malware or Viruses
Open your installed antivirus software.
Run a Full Scan to check for viruses, malware, or other threats on your system.
If any malicious files are detected, follow the antivirus software's instructions to remove them.
Restart your computer and check if the blue screen error is resolved.
6. Check for System Updates
Press Win + I to open Settings.
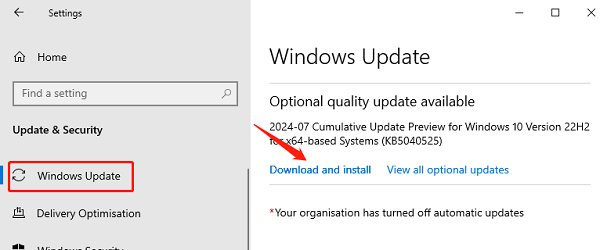
Navigate to "Update & Security > Windows Update".
Click "Check for updates". If updates are available, select "Download and install".

Restart your computer after the updates are installed to see if the issue is resolved.
7. Uninstall Recently Installed Software
Open Settings and go to "Apps".
In "Apps & Features", locate and uninstall any recently installed software.
If uninstalling resolves the issue, consider reinstalling the latest version of the software or finding an alternative.
Restart your computer to confirm the error is resolved.
These steps can help resolve the "Memory Management" blue screen error. If the issue persists, contact technical support or consider reinstalling the system.
See also:
Guide to Fix Low Volume in Windows 10