Many Windows 10 users may experience microphone latency during voice chats, recordings, or online meetings. This article outlines common methods to fix the issue and restore normal microphone performance.
1. Update Audio Drivers
Audio drivers are a crucial link between your microphone and the system. If the drivers are outdated or corrupt, they may cause audio transmission delays. Therefore, it's important to ensure that your audio drivers are up-to-date. It's recommended to use Driver Sentry to automatically detect and update your drivers, saving time and avoiding incorrect driver installations.
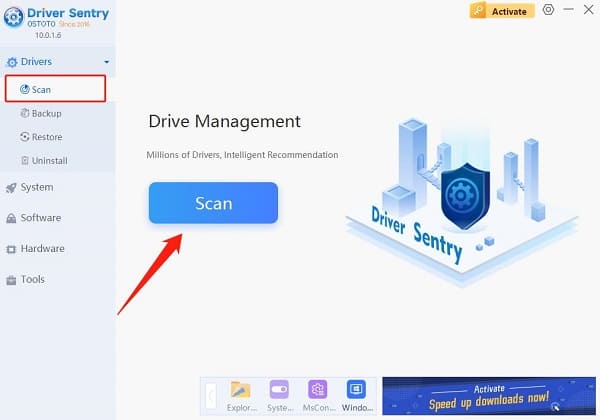
Click the download button to get the latest version of Driver Sentry, install it, and open the software. Then, click "Scan".

After the scan is complete, it will show which drivers need to be installed or updated. Find the audio driver in the results list and click the "Update" button.
After updating, it's recommended to restart your computer to ensure the updated drivers take effect.
2. Disable Audio Enhancements
Right-click the volume icon in the taskbar and select "Sounds".
In the pop-up window, click the "Recording" tab.
Find your microphone device, right-click it, and choose "Properties".
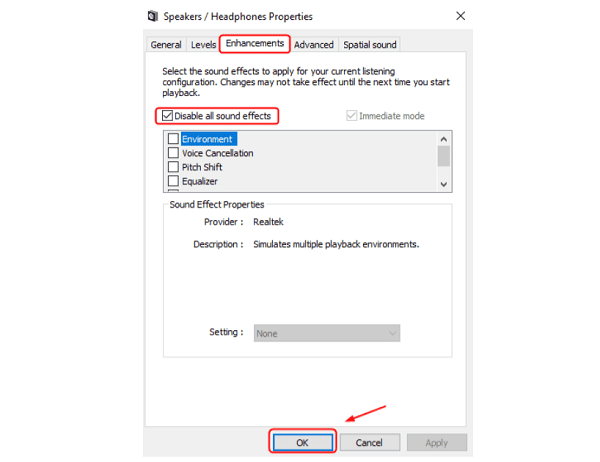
Switch to the "Enhancements" tab and check the box for "Disable all sound effects" to turn off any audio enhancements.

Click "OK" to save the changes. Then restart your computer to ensure the new settings take effect.
3. Adjust Microphone Settings
Right-click the volume icon in the taskbar and select "Sounds".
Under the "Recording" tab, find your microphone device, right-click it, and select "Properties".
In the "Levels" tab, make sure the microphone volume is set appropriately (usually between 75%-100%). Ensure the microphone is not muted.
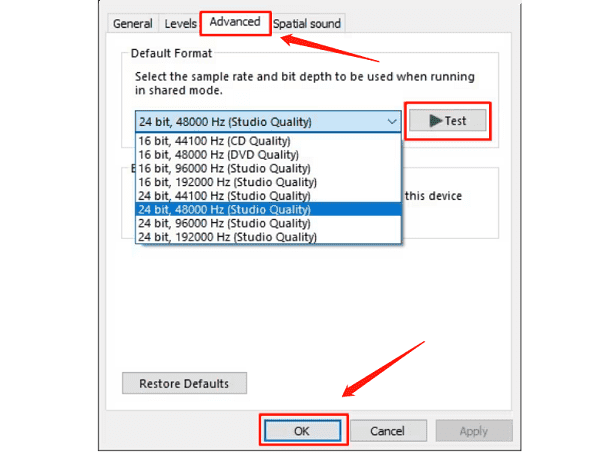
Switch to the "Advanced" tab, and under "Default Format", select "16-bit, 44100 Hz (CD Quality)" or a higher format. This will improve audio quality and reduce latency.

Check the box for "Allow applications to take exclusive control of this device" in the "Advanced" tab. This ensures that only one app is managing the microphone input, avoiding conflicts.
Click "OK" to save the changes. After completing these steps, test whether the microphone is working properly.
4. Reduce System Audio Latency
Press "Win + X" and select "Power Options".
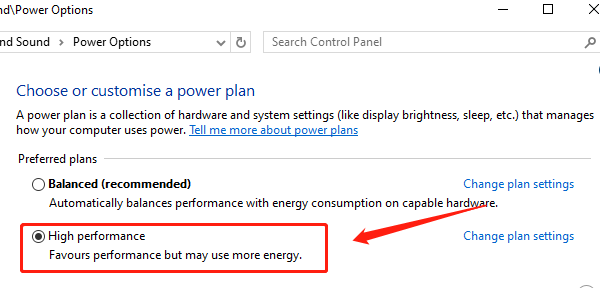
In the "Power & Sleep" settings, choose "Additional Power Settings" and switch to the "High Performance" power plan. This optimizes system resource allocation to reduce audio latency.

Press "Win + I" to open the "Settings" menu, then click "System".
Select "Sound", click "Device Properties", and then click "Additional Device Properties".
In both the "Playback" and "Recording" device settings, disable unnecessary sound effects and enhancements to reduce processing load.
5. Check for Hardware Issues
If you're using an external microphone, make sure it's correctly plugged into the audio input or USB port. Try using a different port or another USB interface to see if the latency persists.
Connect the microphone to another computer or device to test its performance there. If it works fine on other devices, the issue might lie with the current computer.
Check the microphone and cables for any obvious physical damage. If you find any signs of damage or poor connections, you may need to replace the microphone or audio cables.
By following these methods, you can effectively fix microphone latency issues in Windows 10 and ensure smooth voice communication. If the problem persists, further hardware checks or professional technical support may be required.
See also:
7 Ways to Fix Windows 11 Monitor Not Full Screen
Solutions for 0x0000001A Blue Screen Error and System Crash