Users of Windows 10 may sometimes see errors like "MSVCR120.dll is missing" or "MSVCR120.dll not found". This article offers effective solutions to fix the issue and restore system functionality.
1. Update Drivers
Outdated or damaged drivers can lead to errors like "MSVCR120.dll not found". Using a tool like Driver Sentry to automatically detect and update drivers can save time and reduce the risk of installing incorrect drivers.
Download the latest version of Driver Sentry, install it, and launch the software. Click "Scan" to detect outdated or missing drivers.

In the results list, locate the drivers that need updating and click "Upgrade".
Restart your computer to ensure the updated drivers take effect.
2. Run the System File Checker Tool
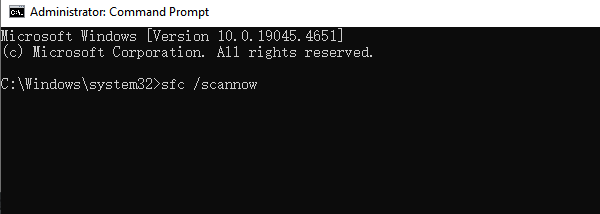
Press Win + S, type "Command Prompt", and select "Run as Administrator".
In the Command Prompt window, type and press Enter: sfc /scannow

The system will scan for and repair damaged system files. This process may take a few minutes.
Restart your computer and check if the MSVCR120.dll error is resolved.
3. Repair Microsoft Visual C++ Redistributable
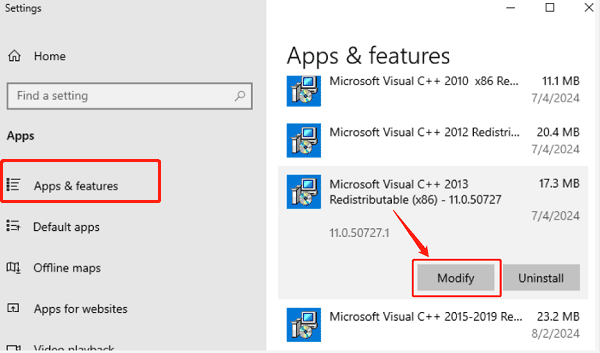
Press Win + X and select "Apps and Features".
In the Apps and Features window, locate "Microsoft Visual C++ 2013 Redistributable (x64)" or "Microsoft Visual C++ 2013 Redistributable (x86)".
Click "Modify", then select "Repair" to initiate the repair process.

After the repair is complete, restart your computer and verify if the MSVCR120.dll file is restored.
4. Reinstall Microsoft Visual C++ Redistributable
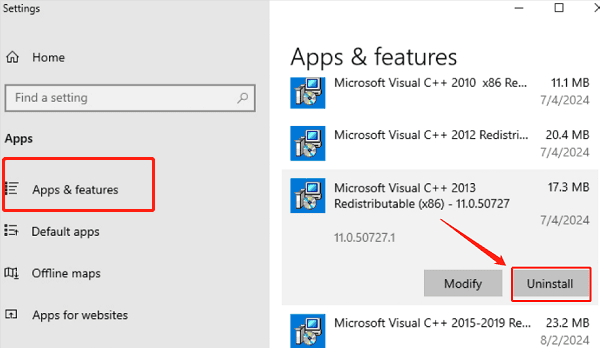
Press Win + X and select "Apps and Features".
Locate "Microsoft Visual C++ 2013 Redistributable (x64)" or "Microsoft Visual C++ 2013 Redistributable (x86)" and click "Uninstall".

Visit the Microsoft official website to download and install the latest version of Microsoft Visual C++ 2013 Redistributable.
Restart your computer and check if the error persists.
5. Check for Viruses or Malware
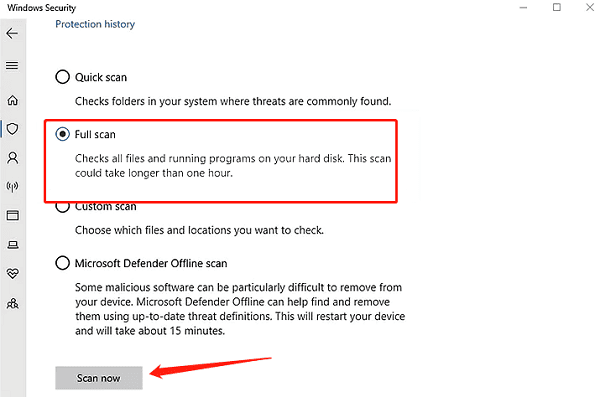
Open "Windows Defender" or your installed third-party antivirus software.
Perform a full system scan to detect and remove any viruses or malware.

If threats are found, follow the antivirus software's instructions to remove them.
Restart your computer and check if the MSVCR120.dll file is restored.
6. Perform a System Restore
Press Win + R, type "rstrui", and press Enter.
In the "System Restore" window, select a restore point created before the MSVCR120.dll error occurred.
Click "Next", follow the on-screen instructions to complete the restoration process.
After the system restore, check if the issue is resolved.
Follow these steps to resolve missing or damaged MSVCR120.dll issues. If the problem persists, seek professional technical support for further assistance.
See also:
HP Printer Driver Unavailable Fix Guide
How to Fix Brother Printer Not Printing on Windows 10