Top 7 Easy Ways to Fix a Mouse Cursor Moving on Its Own

The issue of a mouse cursor moving on its own can impact your productivity and gaming experience. This article provides effective methods to resolve this problem, helping you restore normal operation easily.
1. Conduct Basic Mouse Troubleshooting
The cursor may behave erratically if the mouse surface is dirty. Regularly clean the mouse with a cloth to keep the sensor clean.
An old mouse pad might cause the cursor to move inaccurately. Try using a new mouse pad to see if it resolves the issue.
Ensure the mouse is properly connected. For wireless mice, check the battery and receiver; for wired mice, check the port connection.
2. Update Mouse Drivers
Outdated or corrupted mouse drivers can cause the cursor to move on its own. It's recommended to use Driver Sentry to automatically detect and update drivers, saving time and preventing the installation of incorrect drivers.
1). Download and install the latest version of Driver Sentry. Open the software and click "Scan" to check for outdated or missing drivers.
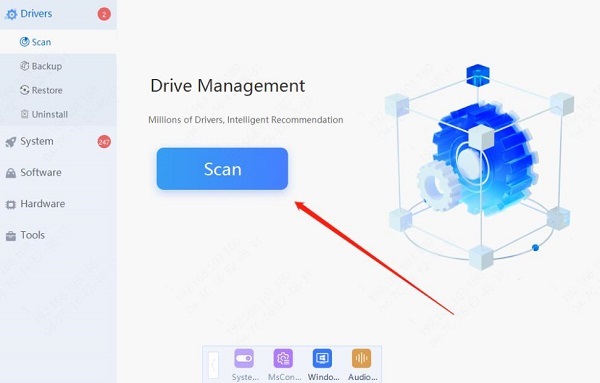
2). Locate the mouse driver in the results list and click "Update".
3). After updating, restart your computer to ensure the new driver is functioning correctly.
3. Adjust System Settings
Modify Mouse Settings:
Open "Settings", select "Devices" > "Mouse" > "Additional Mouse Options".
Click "Pointer Options" and uncheck "Hide pointer while typing", then click "Apply" and "OK".
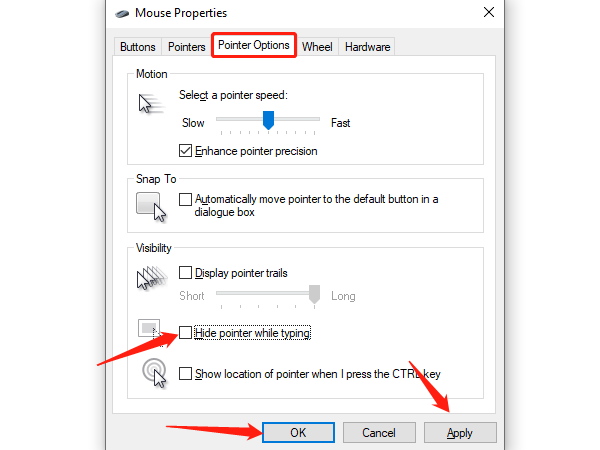
Ensure that the "Enhance pointer precision" option is unchecked and test if this resolves the issue.
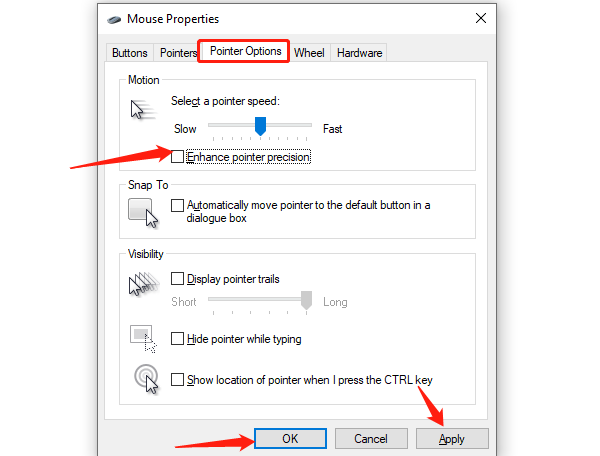
Check for System Updates:
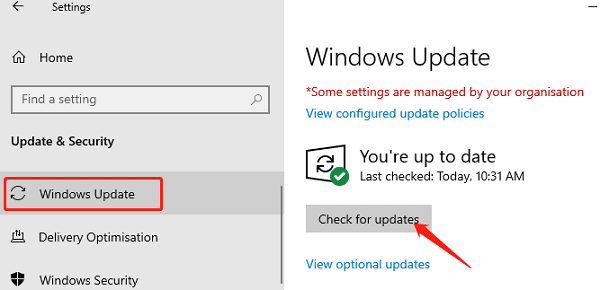
Open "Settings" and select "Update & Security".
Click "Check for updates" and install any available updates.
4. Disable the Touchpad
Press Windows + I to open Windows Settings.
Select "Devices" > "Touchpad".
Toggle off the "Touchpad" switch to disable it.

5. Close Background Programs
Press Ctrl + Shift + Esc to open the Task Manager.
Under the "Processes" tab, find unnecessary or resource-heavy programs, select them, and click "End Task".
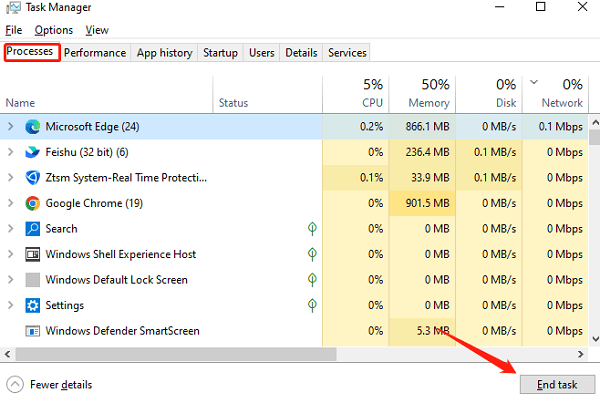
Restart your computer and check if the mouse cursor issue is resolved.
6. Disconnect Game Controllers
Open the Steam client and click "Settings" in the menu.
Select "Controller" from the left pane and click "General Controller Settings".
In the new window, uncheck "PlayStation Configuration Support" and "Xbox Configuration Support".
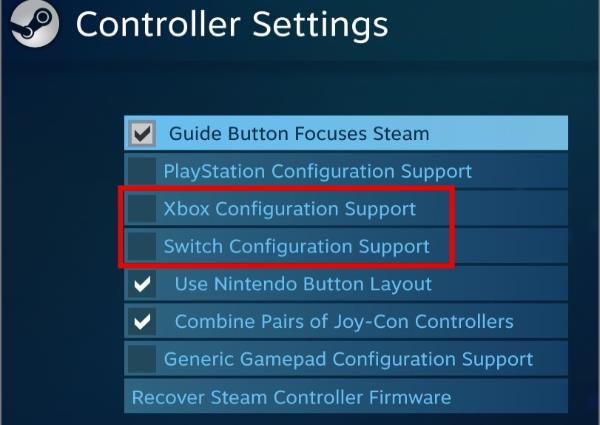
7. Check for Hardware Issues
Check and replace the battery if needed to ensure it has sufficient power.
Ensure the USB connection is secure. Try connecting the mouse to a different USB port to check for port issues.
If the issue persists with a different mouse, it may indicate a hardware fault with the original mouse, which might need to be replaced.
By following these steps, you can effectively fix the issue of a mouse cursor moving on its own. If the problem persists, consider contacting technical support for further assistance.
See also:
Strategy Guide for "World of Warcraft: The War Within"
AMD Releases New Driver: Version 24.7.1 Comprehensive Experience Upgrade