When using the Windows 10 system, many users may encounter the issue of the right mouse button not working, which severely affects productivity. This article will introduce several effective solutions to help you easily fix this problem and restore the normal function of your mouse.
1. Restart the Computer
Click the Start menu, select the "Power" option, and then click "Restart".
Wait for the system to restart, then check if the right mouse button has returned to normal.
2. Check for Driver Updates
Outdated or corrupted drivers are also a common cause of the right mouse button not working. To ensure your mouse functions correctly, it's recommended to check and update the drivers. We recommend using Driver Sentry to automatically detect and update drivers, saving you time and avoiding the risk of downloading or installing incorrect drivers.
Click the download button to get the latest version of Driver Sentry. After installation, open the software and click "Scan".

After the scan is complete, it will show which drivers are missing or need updating. In the result list, find the mouse driver and click the "Upgrade" button.
After updating, it is recommended to restart your computer to ensure the updated drivers take effect.
3. Check for Mouse Hardware Issues
Change USB Port:
First, try plugging the mouse into another USB port on your computer. Sometimes, a specific port may malfunction, causing the mouse to not work properly.
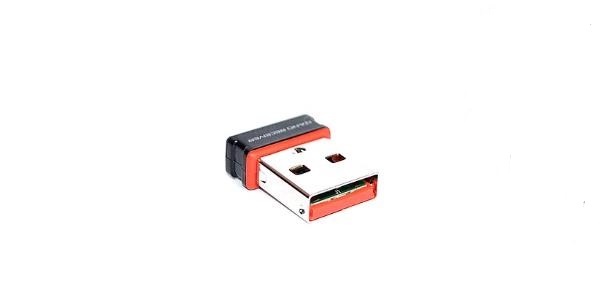
If you are using a wireless mouse, you can try changing the receiver's position or replacing the USB receiver.

Check the Mouse Cable:
For wired mice, check if the connection cable is damaged or has loose connections. Make sure the cable is not bent or broken.
Test with Another Device:
Connect the mouse to another computer to test whether the right-click button works. If it still doesn't work on another computer, the mouse hardware may be damaged and need to be replaced.
If possible, try connecting another mouse to your computer to check if the right-click functionality returns to normal. By changing the mouse, you can rule out hardware failure.
4. Delete Registry Entries
Press the Windows key + R to open the "Run" dialog box, type "regedit", and then click "OK" to continue.
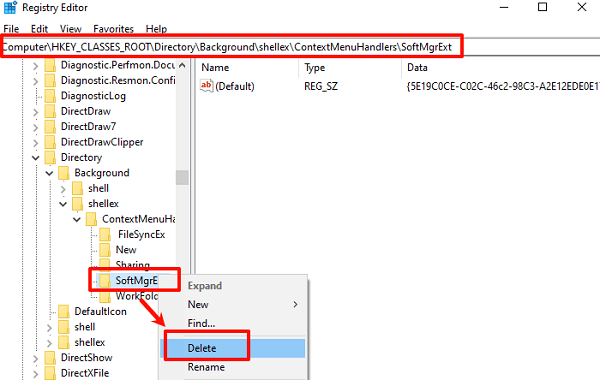
Navigate to the following path: HKEY_CLASSES_ROOT\Directory\Background\shellex\ContextMenuHandlers\SoftMgrExt
Delete all folders except for FileSyncEx, New, Sharing, and WorkFolders.

Note:
After performing these steps, if you lose the desktop and other actions cannot proceed, press Ctrl + Alt + Delete, select "Task Manager", click on the "File" tab, select "Run new task", type "explorer.exe", and click "OK". This will restore the desktop display.
5. Check System Files
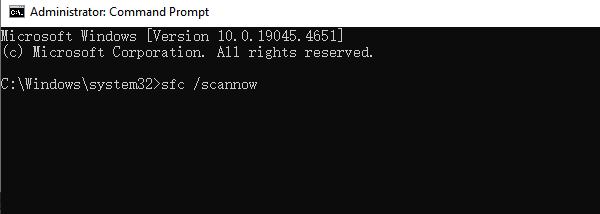
Type "CMD" in the search box and select "Run as Administrator".
In the Command Prompt window, type the following command and press Enter: sfc /scannow

The system will automatically scan and repair any corrupted system files.
After the scan is complete, restart your computer and check if the right mouse button functionality is restored.
6. Change Power Management Settings
Press the Windows key + R to open the Run dialog, type "devmgmt.msc", and click "OK" to continue.
In the Device Manager window that pops up, find and expand "Universal Serial Bus controllers".
Double-click USB Root Hub and uncheck the option "Allow the computer to turn off this device to save power", then click "OK" to continue.
Repeat these steps for all USB Root Hub entries.
By following the above methods, you can systematically troubleshoot and fix the issue of the right mouse button not working. If the problem persists after trying all the methods, it may be necessary to contact professional technical support for further diagnosis and resolution.
See also:
Resolve Bluetooth audio stuttering issue on Windows 10
Ways to resolve the "Audio Device is Disabled" issue
How to fix Marvel Rivals crashing on PC
Methods to resolve the "Vanguard Not Initialized" issue in Valorant