
The network adapter connects your computer to the network, but it can sometimes have issues, causing unstable connections or internet access problems. This article offers quick methods to help you easily fix network adapter issues.
Method 1: Check Physical Connections
Ensure the Ethernet cable is securely plugged into the ports on both the computer and the router. If you have a spare cable, try replacing it to rule out cable faults.
If using Wi-Fi, ensure the device's wireless switch is on. Some laptops have a dedicated switch or a keyboard shortcut (usually marked with a Wi-Fi symbol) to enable it.
Check that the router's indicator lights are functioning properly, especially the internet and Wi-Fi lights. If the lights are off or flashing abnormally, you may need to restart the router.
Method 2: Update Network Adapter Driver
Outdated or corrupted drivers can lead to network adapter issues. Updating your network driver promptly can significantly improve connection stability and performance. It is recommended to use Driver Sentry to automatically detect driver updates, saving time and avoiding the risk of downloading or installing incorrect drivers.
Click the download button to get the latest version of Driver Sentry. After installation, open the software and click "Scan".
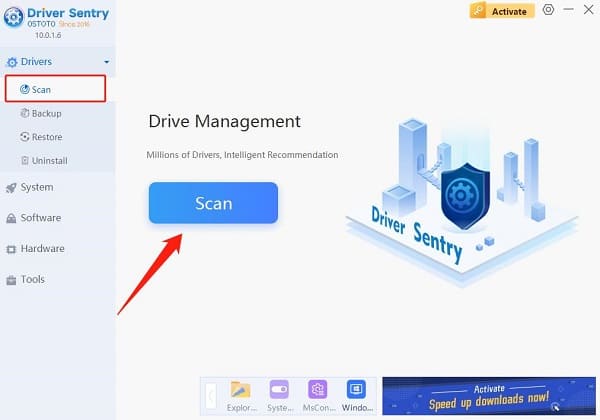
Once the scan is complete, it will display which drivers are missing or need updating. Find the network adapter driver in the results list and click the "Update" button.
After the update is complete, it is advisable to restart your computer to ensure the updated drivers take effect.
Method 3: Restart Devices
Click the "Start" button, select "Power", and then choose "Shut down". Make sure the computer is completely powered off.
Unplug the router's power cord, wait about 30 seconds, then plug it back in and wait for the router to fully start (usually takes a few minutes).
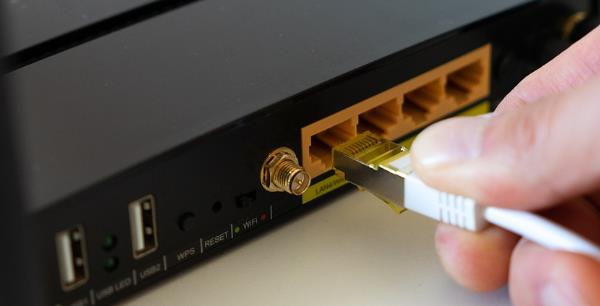
Once the router has restarted, turn on the computer and check if the network connection has been restored.
Method 4: Check Network Services
Press Win + R, type "services.msc", and hit Enter to open the Services Manager window.
In the list of services, find the following:
DNS Client: Handles domain name resolution.
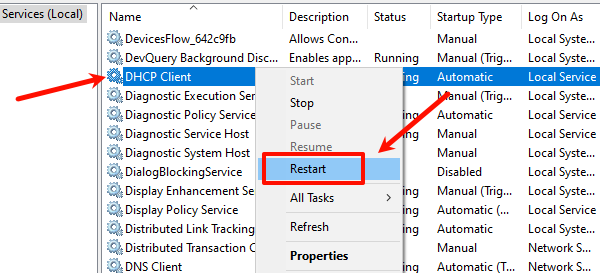
DHCP Client: Responsible for dynamically allocating IP addresses.
Network Connections: Manages network connections.
Right-click each service, select "Start" or "Restart", and ensure these services are running. If they are already running, you may try restarting them.
Method 5: Reset Network Adapter
Click the "Start" button, select "Settings" (or press Win + I).
Select "Network & Internet", then scroll down to find "Advanced Network Settings".
In the "Network Reset" section, click the "Reset Now" button.
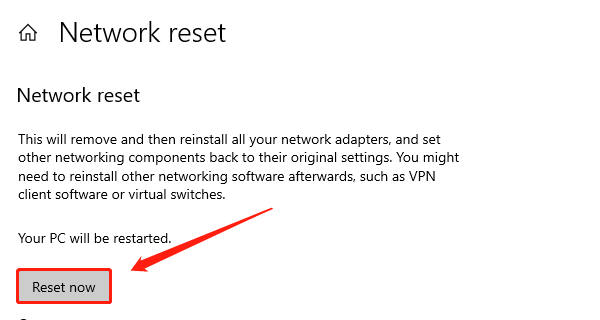
The system will prompt for confirmation; click "Yes" to proceed with the reset. The computer will automatically restart, and the network adapter will revert to its default settings.
Method 6: Use Network Troubleshooter
Click the "Start" button, select "Settings".
Choose "Network & Internet", scroll down to find the "Network Troubleshooter" option.
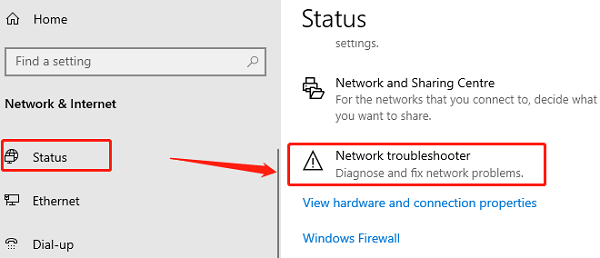
Click "Network Troubleshooter", and the system will begin to automatically detect network adapter issues.
Follow the system prompts to complete the troubleshooting process, and the system will provide repair suggestions or automatically fix the problems.
By following these steps, you can effectively troubleshoot and resolve network adapter issues in Windows. If the problem continues, consider seeking professional support. We hope these methods help you quickly restore your network connection!
See also:
How to Fix Monitor Color Distortion
How to Force Delete Files in Windows That Cannot Be Deleted