Many Windows 10 users experience frequent network disconnections. This article offers solutions to help quickly fix the issue and restore network connectivity.
1. Update Network Adapter Drivers
Outdated or corrupted network adapter drivers are often one of the causes of network disconnections. Ensuring that your network adapter drivers are up to date can improve connection stability. It is recommended to use Driver Sentry to automatically detect and update drivers, saving time and avoiding the risk of downloading or installing incorrect drivers.
Click the download button to get the latest version of Driver Sentry, install it, then open the software and click "Scan".

After scanning, it will show which drivers are missing or need to be updated. Find the network adapter driver in the list and click the "Upgrade" button.
After updating, it is recommended to restart your computer to ensure the updated drivers take effect.
2. Check Physical Connections
Check Wired Connection:
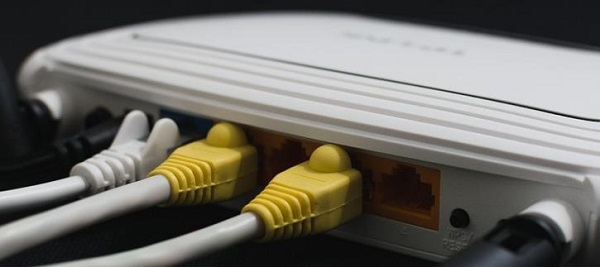
If you are using a wired connection, make sure both ends of the Ethernet cable are correctly plugged in: one end into the computer's Ethernet port, and the other end into the router or switch.
If the cable is loose or damaged, it may cause network disconnections. You can try replacing the cable to rule out physical connection issues.
Check Router and Modem:
Ensure that the router and modem are properly connected, and that the indicator lights are showing normal operation (green or blue). If there are red or blinking lights, refer to the device manual to check the cause.
If the indicator lights are abnormal, try restarting the router and modem, or contact your service provider to resolve the issue.

Check Wireless Connection:
If you are using a wireless network, ensure your computer is connected to the correct Wi-Fi network.
Click the Wi-Fi icon in the taskbar to check if the displayed network is the one you want to connect to and verify if the signal strength is adequate.
If the signal is weak or unstable, try moving closer to the router, or restart the router to restore the connection.
3. Reset TCP/IP Configuration
Press Win + S, type "Command Prompt", then right-click and select "Run as Administrator".
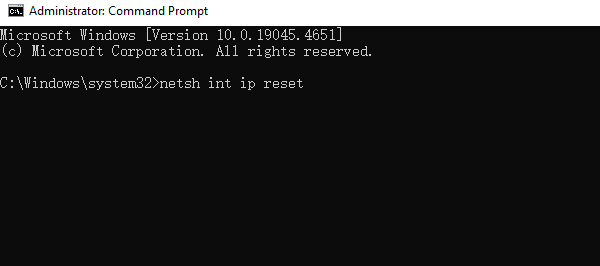
In the Command Prompt window, type the following command and press Enter: netsh int ip reset

After executing the command, restart your computer for the changes to take effect.
This command will reset the TCP/IP protocol stack, which can fix network connection issues caused by configuration errors or corruption.
4. Adjust Power Management Settings
Press Win + X and select "Device Manager".
In Device Manager, expand the "Network Adapters" category and find your network adapter.
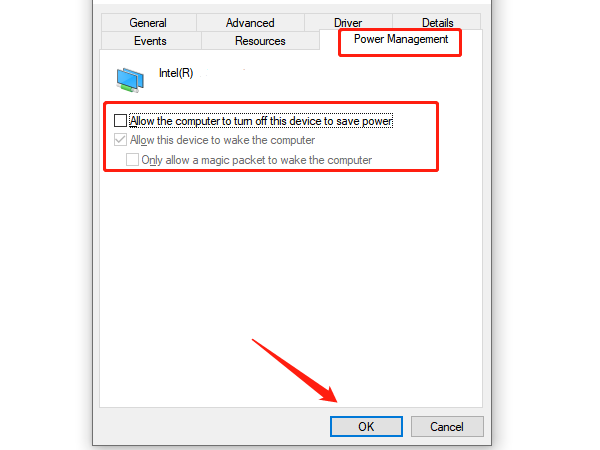
Right-click the network adapter, select "Properties", and in the pop-up window, go to the "Power Management" tab.
On the Power Management page, uncheck "Allow the computer to turn off this device to save power".

Click "OK" to save the settings.
This will prevent the computer from turning off the network adapter to save power, avoiding any interruptions to the network connection.
5. Switch to Google DNS
Press Win + I to open the "Settings" window, and select "Network & Internet".
In the left menu, select "Ethernet" or "Wi-Fi", and then click the current network name.
On the network settings page, scroll down to find "IP Settings" and click the "Edit" button.
In the pop-up window, select "Manual" and enable IPv4.
In the "Preferred DNS" field, enter: 8.8.8.8
In the "Alternate DNS" field, enter: 8.8.4.4
These are Google's public DNS servers, known for faster resolution speeds and higher reliability.
Click "Save", and reconnect to the network to apply the changes.
6. Run Windows Network Troubleshooter
Press Win + I to open the "Settings" window, then select "Update & Security".
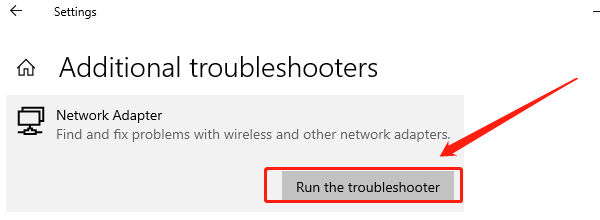
In the left menu, select "Troubleshoot", then click "Additional troubleshooters".
Find the "Network Adapter" option, and click "Run the troubleshooter".

The system will start automatically scanning for network adapter issues.
The system will detect any problems with the network adapter and provide repair options. Follow the on-screen instructions to complete the repair process.
Follow these steps to troubleshoot and fix network connection issues. If the problem continues, contact your network provider or technical support for further help.
See also:
How to Fix Windows 10 Screen Flickering
How to Improve GPU Performance