The error "No Audio Output Device is Installed" can prevent sound on Windows 10. This article offers solutions to fix the issue quickly.
1. Check for Driver Updates
Outdated or corrupted audio drivers are one of the primary causes of the "No Audio Output Device is Installed" error. Updating your drivers promptly can often resolve this issue. We recommend using Driver Sentry to automatically detect and update drivers, saving time and reducing the risk of installing incorrect drivers.
Download the latest version of Driver Sentry, install it, and open the software. Click "Scan".

Once the scan is complete, a list of drivers that need installation or updates will appear. Locate the audio driver in the list and click "Upgrade".
After updating, restart your computer to ensure the updated driver works correctly.
2. Check if Audio Devices Are Disabled
Right-click the Start button and select "Device Manager".
In Device Manager, expand "Sound, Video, and Game Controllers".
Check if there is a down arrow next to any audio devices (e.g., Realtek High Definition Audio), which indicates the device is disabled.
If a device is disabled, right-click it and select "Enable Device".
After enabling the device, restart your computer and check if the audio is working properly.
3. Install Generic Audio Device Drivers
Press Win + X and select Device Manager.
Expand "Sound, Video, and Game Controllers", right-click Realtek High Definition Audio (or other audio devices), and select "Update Driver".
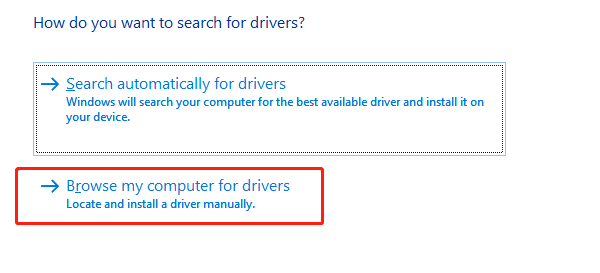
Choose "Browse my computer for drivers".

Click "Let me pick from a list of available drivers on my computer".
Select "High Definition Audio Device" (instead of other Realtek-specific drivers), then click "Next". A warning message may appear; click "Yes" to proceed. The driver will install successfully.
After installation, restart your computer and check if the audio device is functioning properly.
4. Check Windows Audio Services
Press Win + R to open the Run dialog, type "services.msc", and press Enter.
In the Services window, scroll down to find "Windows Audio".
Ensure the service status is "Running". If it is not, right-click Windows Audio and select "Start".
Similarly, check if "Windows Audio Endpoint Builder" is running. If not, right-click and select "Start".
Right-click each service and select Restart, then check if the audio is working.
5. Run the Audio Troubleshooter
Press Win + I to open Settings.
Select "Update & Security", then click "Troubleshoot > Additional Troubleshooters".
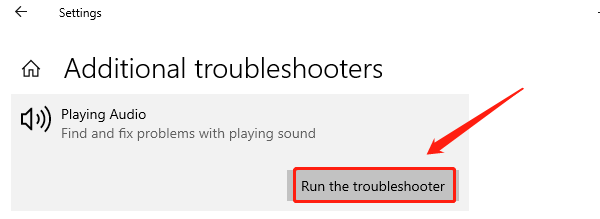
Find "Playing Audio" and click "Run the Troubleshooter".

Windows will scan and attempt to automatically fix any detected audio issues. Follow the on-screen instructions.
After the process is complete, check if the audio is working properly.
6. Repair System Files
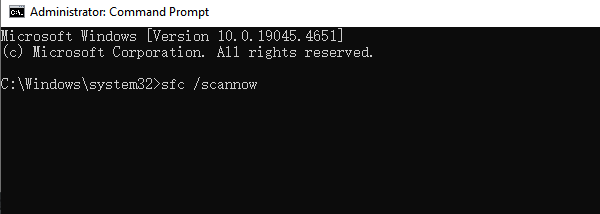
Press Win + S, type "Command Prompt", and run it as an administrator.
In the Command Prompt window, type the following command and press Enter: sfc /scannow

The system will scan and repair any corrupted system files. This may take some time.
Once the scan is complete, restart your computer.
Check if the audio issue is resolved.
7. Reset Windows 10 Audio Settings
Press Win + I to open Settings.
Select "System", then "click Sound".
Scroll down to the bottom of the Sound settings page and click "Advanced Sound Options".
Under "App Volume and Device Preferences", select "Reset". The system will restore audio settings to their default values.
After resetting, restart your computer and check if the audio issue is resolved.
Follow these steps to troubleshoot Windows 10 audio issues. If the problem continues, contact the device manufacturer or technical support.
See also:
Fix Fallout 3 Crashing on Windows 10
Guide to Fixing a Computer That Keeps Crashing