
The NVIDIA graphics card is essential for graphic processing, but some users may face issues where the system fails to detect the card after installing or updating drivers. This article offers several solutions to help resolve the issue quickly.
Method 1: Check Hardware Connections
Power off all devices to prevent electrical damage.
Ensure the graphics card power cables are securely connected, especially for high-end cards that need separate power connections.
If the card is loose, reinsert it and make sure it's fully seated in the slot.
Power on the computer and check if the system detects the graphics card.
Method 2: Update NVIDIA Graphics Driver
Outdated or incorrect graphics drivers are common causes for the NVIDIA card not being detected. Using Driver Sentry to automatically check for driver updates can save time and prevent risks associated with incorrect driver installations.
Download and install the latest version of Driver Sentry, then open the software and click "Scan".
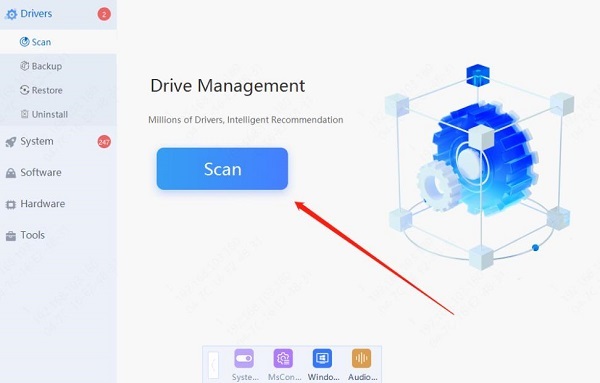
After scanning, it will show any drivers that are missing or need updates. Locate the NVIDIA graphics driver in the list and click "Update".
Once updated, restart the computer to ensure the new driver is properly applied.
Method 3: Show Hidden Devices
Press Win + X and select "Device Manager".
Click "View" in the top menu and choose "Show hidden devices".
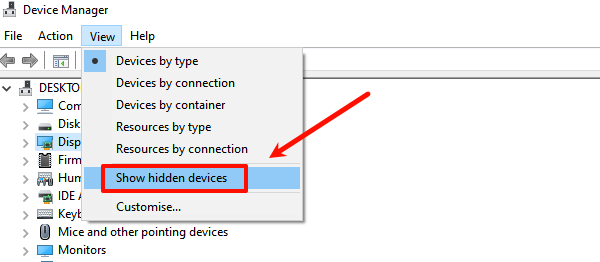
Under "Display adapters", check if the hidden NVIDIA graphics card is visible.
If the card is visible, right-click it and select "Enable device".
Method 4: Enable Graphics Card Device
Press Win + X, select and open "Device Manager".
Under "Display adapters", find your NVIDIA graphics card.
Right-click the card and, if you see the option "Enable device", click it.
Restart the computer and check if the graphics card is functioning properly.
Method 5: Manage Power Settings
Press Win + I to open "Settings", then click "System".
Choose "Power & sleep", then click "Additional power settings" on the right.
Select the "High performance" power plan.
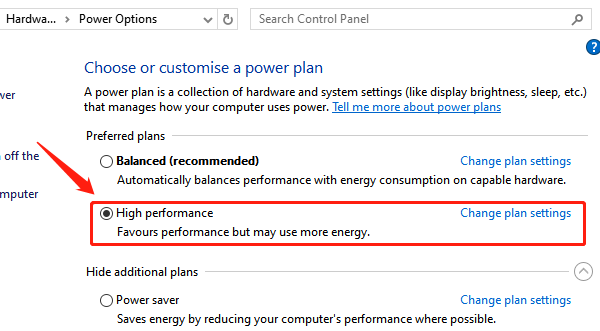
For laptops, ensure the computer is plugged in to allow the graphics card to operate at full performance.
Restart the computer, ensure the power settings are applied, and check if the graphics card issue is resolved.
Method 6: Uninstall and Reinstall NVIDIA Control Panel
Type "Control Panel" into the search box and open it.
Go to "Programs and Features" and click "Uninstall a program".
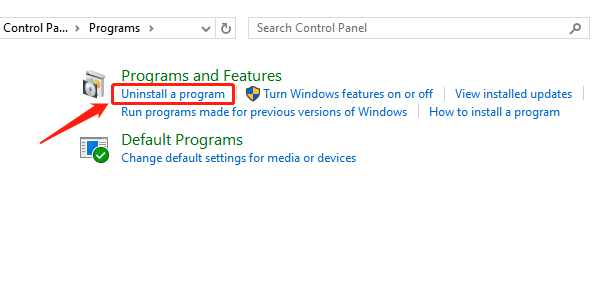
Find the NVIDIA Control Panel in the list and click "Uninstall".
After uninstalling, visit the NVIDIA website to download the latest version of the Control Panel.
Install the downloaded Control Panel, restart the computer, and open the NVIDIA Control Panel to check if the graphics card is detected.
Method 7: Update BIOS Settings
Press Win + R, type "msinfo32", and check the BIOS version and motherboard model.
Visit the motherboard manufacturer's website based on your motherboard model and download the latest BIOS update file.
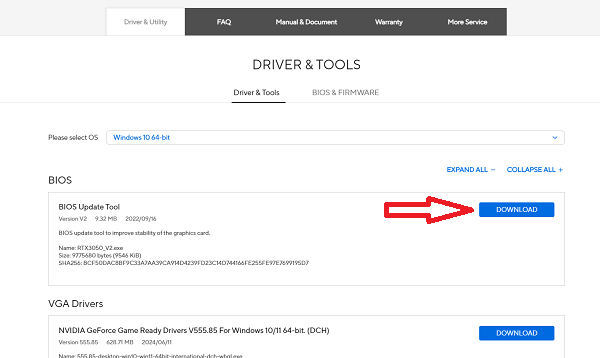
Copy the downloaded BIOS file to a FAT32 formatted USB drive and ensure the computer is connected to a stable power source.
Restart the computer and press F2, Delete, or F10 to enter BIOS.
Find the update option in BIOS, load the file from the USB, and follow the prompts to complete the update.
After updating, restart and check if the graphics card is correctly detected.
Method 8: Check for System Updates
Press Win + I to open "Settings", then select "Update & Security".
Click "Windows Update" and then "Check for updates".
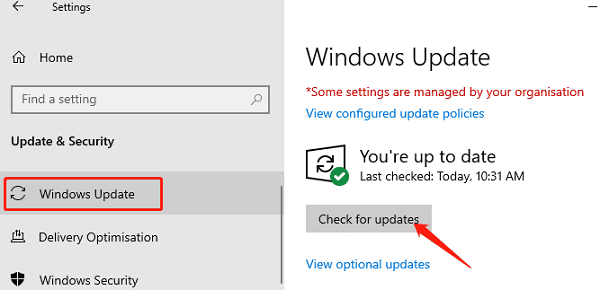
If updates are available, click "Download and install". After installation, restart the computer.
Test if the graphics card is detected by the system.
Using these methods, you can often successfully resolve issues with the NVIDIA graphics card not being detected. If these steps do not resolve the problem, you may need to check for hardware damage or consult a professional technician for further diagnosis.
See also:
How to Fix Star Wars Outlaws Crashing Issues
Guide to Adjusting Logitech Mouse Sensitivity
How to Fix No Sound on an External Monitor Connected via HDMI