Windows 10 users may encounter the nvpcf.sys blue screen error. This article offers effective solutions to quickly fix the issue and restore normal system operation.
1. Check for Driver Updates
Outdated or corrupted graphics drivers are a common cause of blue screen errors. Ensuring that your system has the latest version of the NVIDIA graphics driver can effectively prevent such issues. We recommend using Driver Sentry to automatically detect and update drivers, saving time and avoiding the risk of downloading or installing incorrect drivers.
Click the download button to get the latest version of Driver Sentry. After installation, open the software and click "Scan".

Once the scan is complete, it will display any missing or outdated drivers. Find the NVIDIA graphics driver in the result list and click the "Upgrade" button.
After the update is complete, restart your computer to ensure the updated driver works properly.
2. Reinstall Graphics Driver
Uninstall the graphics driver:
Press Win + X and select "Device Manager".
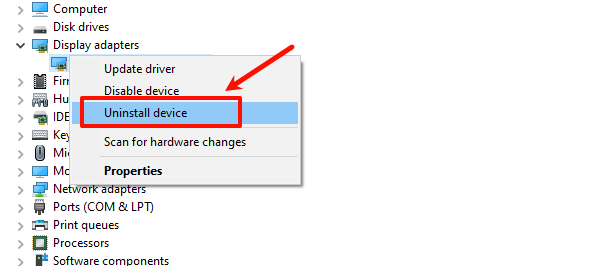
Expand the "Display Adapters" section, right-click your graphics card device, and choose "Uninstall device".

Check "Delete the driver software for this device" and click "Uninstall".
Download and install the latest driver:
Visit the NVIDIA official website and go to the driver download section. Download and install the latest driver suitable for your graphics card model.
After installation, restart your computer to check if the graphics driver works properly.
3. Run SFC and DISM Tools
Run the SFC tool:
Press Win + S, type "Command Prompt", right-click it, and select "Run as administrator".
In the Command Prompt window, type "sfc /scannow" and press Enter.
The system will begin scanning and repairing corrupted system files. This process may take a few minutes. After it completes, restart your computer.
Run the DISM tool:
Open Command Prompt as Administrator again.
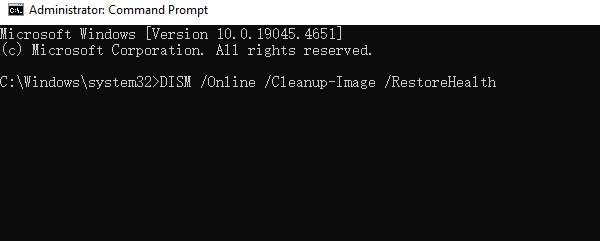
Type the following command and press Enter: DISM /Online /Cleanup-Image /RestoreHealth

The DISM tool will scan and repair Windows image issues. The repair process may take a while, so wait until it's finished and then restart your computer.
4. Run Memory Diagnostic Tool
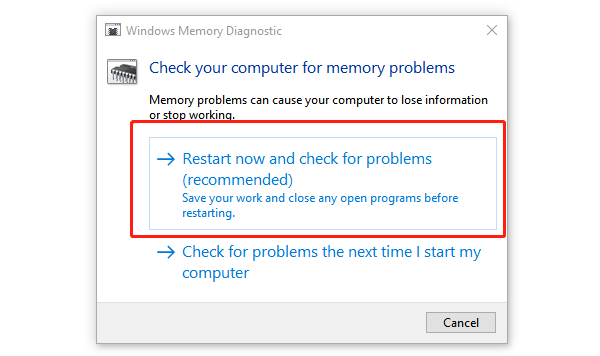
Press Win + S, type "Windows Memory Diagnostic", and select it.
In the window that pops up, choose "Restart now and check for problems".

The system will restart and begin detecting memory issues. This process may take a few minutes. After it's complete, the system will automatically restart and display the diagnostic results upon login.
5. Scan for Malware
Using Windows Defender:
Press Win + I to open Settings, then go to "Update & Security" > "Windows Security".
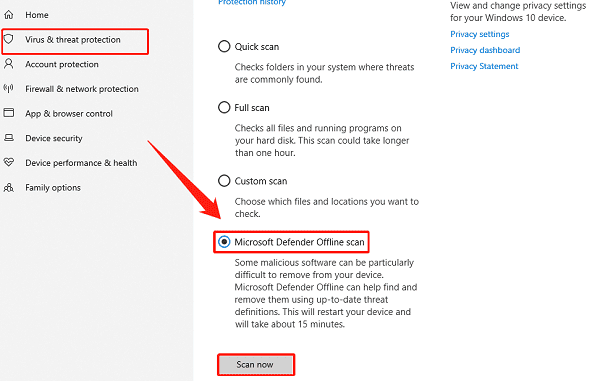
Under "Virus & Threat Protection", click "Quick Scan", "Full Scan", or "Microsoft Defender Offline Scan" to detect and remove malware from your system.

Using third-party antivirus software:
If you have third-party antivirus software installed, run a deep scan to detect and remove any potential viruses or malware.
Ensure that real-time protection is enabled in your antivirus software to prevent further malware infections.
6. Update Windows Operating System
Press Win + I to open Settings, then go to "Update & Security".
In the "Windows Update" section, click "Check for updates".
If updates are available, click "Download and Install".
After the update is complete, restart your computer to ensure the updates take effect.
Follow these steps to resolve the Windows 10 nvpcf.sys blue screen error and improve system stability. If the issue persists, contact technical support or consider reinstalling the operating system.
See also:
Guide to Fixing a Non-Working Mouse