Many people encounter the error "The print spooler service is not running," which stops print jobs. This article offers solutions to quickly restore printing.
1. Check for Driver Updates
Outdated or corrupted drivers are a common cause of the "Print spooler service not running" error. Updating the printer driver in time can effectively prevent this issue. We recommend using Driver Sentry to automatically detect driver updates, saving time and reducing the risk of downloading or installing incorrect drivers.
Download the latest version of Driver Sentry and install it. After installation, open the software and click "Scan".

After the scan is complete, it will display which drivers are missing or need updating. Find the printer driver in the list and click "Upgrade".
After updating, it is recommended to restart your computer to ensure the updated drivers take effect.
2. Clear the Print Queue
In Windows, press Win + R, type "control printers", and press Enter. In the window that pops up, find your printer and double-click to view the print queue.
In the print queue window, select all print jobs, right-click, and select "Cancel".
After canceling the tasks, turn off the printer, then turn it back on to clear any pending tasks.
3. Restart the Print Spooler Service
Press Win + R, type "services.msc", and press Enter.
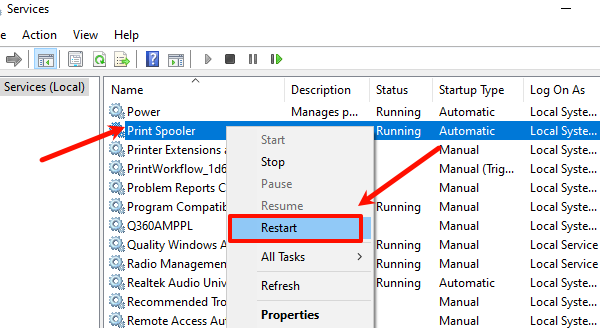
In the service list, find the "Print Spooler" service.
Right-click the service and select "Restart". If the service is stopped, right-click and select "Start".

Ensure the service status is "Running", then close the window.
4. Clear Print Spooler Files
Follow the previous step to open the services manager and find the "Print Spooler" service. Right-click and select "Stop".
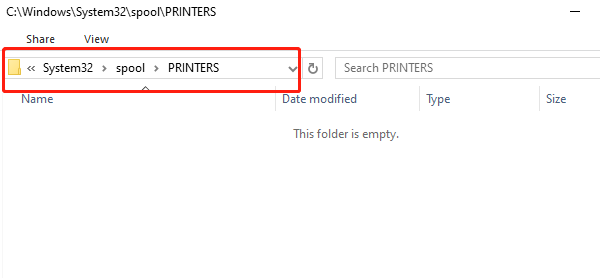
Open File Explorer and go to the path: C:\Windows\System32\spool\PRINTERS
Delete all files in the folder, but do not delete the folder itself.

Go back to the services manager, right-click the "Print Spooler" service, and select "Start".
5. Run the Printer Troubleshooter
Go to "Settings > Update & Security > Troubleshoot".
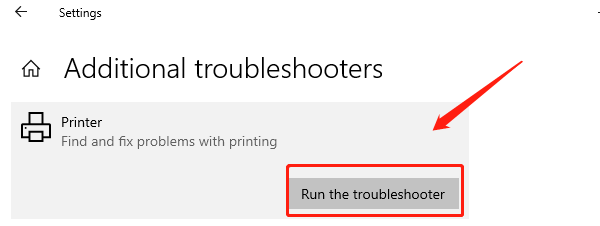
Click "Additional troubleshooters" and find the "Printer" option. Click "Run the troubleshooter", and the system will automatically detect and try to fix printing issues.

Follow the prompts to complete the detection and apply any fixes, then test the printer functionality.
6. Check System File Integrity
In the taskbar search box, type "cmd", right-click on "Command Prompt", and select "Run as administrator".
Type "sfc /scannow" and press Enter. The system will automatically scan and repair any corrupted system files.
After the repair is complete, restart your computer to apply the changes.
7. Reinstall the Printer
Press Win + R, type "control printers", find the target printer, right-click, and select "Remove device".
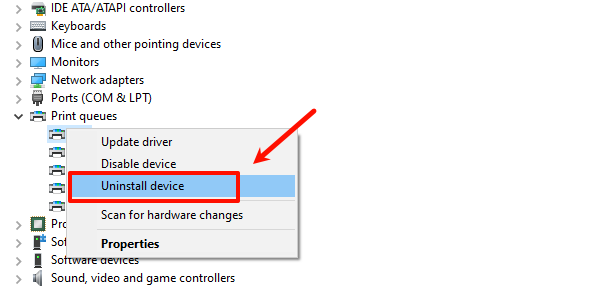
Open Device Manager, find the "Printers" category, right-click the printer device, and select "Uninstall device".

Disconnect the printer from the computer, wait a few minutes, then reconnect.
Visit the printer manufacturer's website, download the latest drivers for your model, and install them.
After completing the driver installation, test the printer functionality.
8. Check System Security
Use Windows Security Center or third-party antivirus software to perform a full system scan to check if there are any viruses or malware interfering with the printer's normal operation.
Open "Control Panel > Windows Defender Firewall" and ensure that printer-related programs or services are not blocked.
If using a third-party firewall, check if it restricts the printer's network access.
By following the steps above, you can troubleshoot and fix printer issues. If the problem continues, contact technical support or the manufacturer for help.
See also:
Guide to Connecting a Laptop to Dual Monitors
8 Ways to Fix Hogwarts Legacy Stuttering