Does your PS5 controller move on its own, cause your character to drift unexpectedly, or make aiming difficult even when you're not touching the analog sticks? Known as PS5 controller stick drift, this frustrating issue can affect the accuracy and responsiveness of your DualSense controller, making games harder to control. Stick drift is commonly caused by dust buildup, worn analog stick components, incorrect dead zone settings, or calibration problems. When using a PS5 controller on a Windows PC, connection or driver-related issues may also contribute to unexpected input behavior. Fortunately, several troubleshooting methods can help reduce or eliminate unwanted stick movement. This guide covers eight practical ways to fix PS5 controller drift, including cleaning the analog sticks, adjusting dead zones, calibrating the controller, updating firmware, resetting the device, and checking PC drivers with Driver Sentry.
1. Update Computer Drivers
Outdated or damaged drivers can lead to system instability, resulting in PS5 controller drift. It's recommended to use Driver Sentry to automatically check for driver updates, saving time and avoiding the risks of downloading incorrect drivers.
Click the download button to get the latest version of Driver Sentry, install it, and open the software to click "Scan".
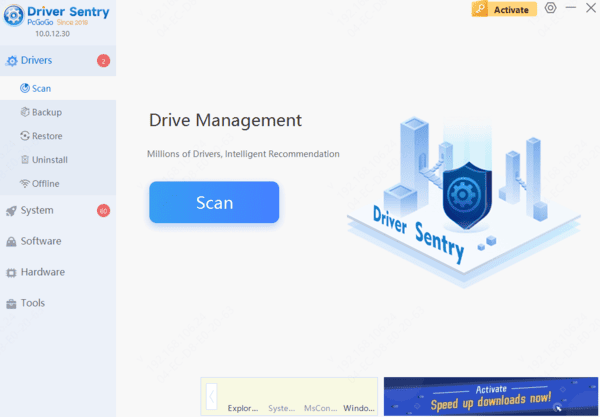
After scanning, it will show which drivers are missing or need updates. Find the necessary drivers in the list and click the "Upgrade" button.
After updating, it's advisable to restart your computer to ensure the new drivers take effect.
2. Clean the Controller
Use a soft brush, cotton swabs, and a small amount of isopropyl alcohol (or a dedicated electronics cleaner).
Gently move the analog stick and use a cotton swab dipped in isopropyl alcohol to clean any dirt accumulated at the base of the stick. Let it dry before using.

Brush off dust around the buttons with a soft brush to ensure smooth button rebound.
Wipe the controller's surface gently with a clean cloth to keep it overall clean.
3. Adjust Input Threshold
Open the game's control settings or controller settings menu.
Increase the dead zone for the analog stick to reduce the impact of minor drift.
Save the settings and test the controller's response to ensure the stick only triggers input when moved significantly.
4. Calibrate the Controller
On Windows:
Open the Control Panel and select "Devices and Printers".

Right-click the controller icon and choose "Game Controller Settings".
In "Properties", find the "Calibrate" option and follow the prompts to complete the calibration.
On other devices:
Calibration steps may vary by platform, so refer to the specific device's manual for guidance.
5. Reconnect Bluetooth
Disconnect the controller in the system's Bluetooth settings.
Hold the pairing button on the controller and search for it in the system to reconnect.
Ensure there's no input delay or loss after reconnecting.
6. Update Controller Firmware
Connect the controller to your computer or console using a USB cable.

In the console's controller settings or through the official software for the controller brand, look for and download the latest firmware update.
Follow the prompts for updating, ensuring the controller remains connected and charged throughout the process.
7. Reset the Controller
There's usually a small hole on the back of the controller. Use a paperclip to gently press and hold it for a few seconds.
Wait a few seconds, then power it back on.
Hold the pairing button to reconnect the controller to the device.
8. Adjust Game Settings
Open the control settings in the game.
Adjust controller sensitivity, vibration intensity, and other settings according to your preferences.
Ensure these settings suit your playstyle for a smoother gaming experience.
By following these steps, you can fix common controller issues and improve your gaming experience. If problems continue, contact the controller's technical support for help.