Some users may experience issues with the Realtek microphone not working properly. This article offers effective solutions to help fix the problem and restore normal microphone functionality.
1. Check the Microphone Connection
Ensure the microphone plug is securely inserted into the computer's audio port.
If you're using a USB microphone, make sure it is properly connected to an available USB port.
Try plugging it into a different port to rule out port issues.
Check the microphone cable and connectors for any signs of damage, such as wear or breakage.
2. Update Realtek Audio Drivers
Outdated or damaged Realtek audio drivers can cause the microphone to malfunction. Regularly updating your drivers is crucial for solving audio device issues. We recommend using Driver Sentry to automatically detect and update drivers, saving time and preventing the risk of downloading or installing incorrect drivers.
Download the latest version of Driver Sentry and open the software after installation. Click "Scan".

Once the scan is complete, it will display the drivers that need to be updated. Locate the Realtek audio driver and click the "Upgrade" button.
After the update, it's recommended to restart your computer to ensure the new drivers take effect.
3. Check if the Microphone is Disabled
Right-click the volume icon in the taskbar and select "Sound settings".
Under the "Input" section, click "Device properties".
Ensure the "Disable" option is not checked. If it shows "Enable", click to enable the microphone.
4. Set Realtek Microphone as Default Device
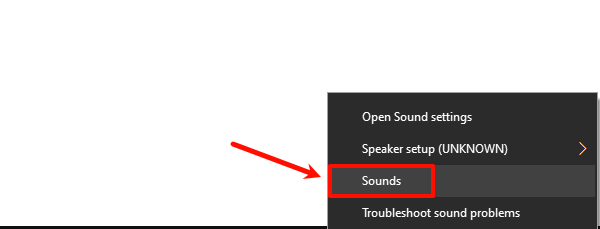
Right-click the volume icon in the taskbar and select "Sounds".

Go to the "Recording" tab and find the Realtek microphone.
Right-click it and select "Set as Default Device".
If multiple microphones are listed, ensure the correct one is selected.
5. Use the Troubleshooter
Open "Settings" and select "Update & Security".
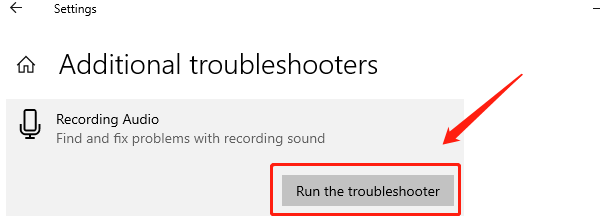
Click "Troubleshoot" and then choose "Additional troubleshooters".
Find "Recording Audio" and click "Run the troubleshooter".

Follow the on-screen instructions to complete the troubleshooting process and apply any suggested fixes.
6. Check Realtek Audio Settings
Search for "Realtek Audio Manager" in the Start menu and open it.
Ensure the microphone is enabled and the volume is set to an appropriate level.
Check the "Input" section for any enhanced options, ensuring no settings are incorrectly selected that could cause audio issues.
7. Check Microphone Privacy Settings
Open "Settings" and click "Privacy".
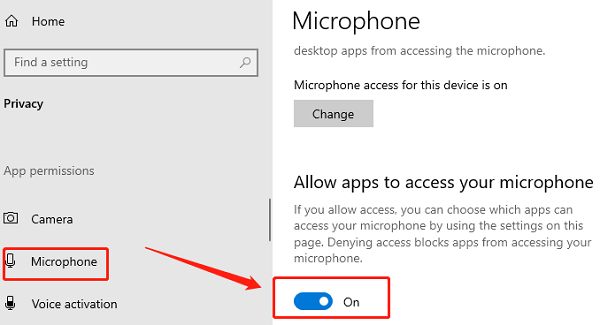
Select "Microphone" from the left-hand menu.
Ensure "Allow apps to access your microphone" is turned on, and scroll down to check which apps have permission.

Make sure apps that need microphone access are enabled.
8. Check for System Updates
Open "Settings" and select "Update & Security".
Click "Windows Update" and then click "Check for updates".
If updates are available, download and install them.
After updating, restart your computer and check if the microphone issue is resolved.
By following these steps, you should be able to fix the Realtek microphone issue and ensure smooth audio input. If the problem continues, contact technical support or consider hardware replacement.
See also:
How to Fix Black Screen of Death in Windows 10
7 Ways to Fix Helldivers 2 Black Screen on Startup