
If you encounter a blue screen error in Windows related to the rtkvhd64.sys file, it usually points to an issue with the audio driver. This article will guide you on how to fix blue screen problems caused by rtkvhd64.sys and help restore your system's stability.
What is rtkvhd64.sys?
rtkvhd64.sys is part of the Realtek High Definition Audio driver, responsible for handling the computer's audio functionality. If there is a problem with this file, it can cause a blue screen of death (BSOD), affecting the normal use of your computer.
Steps to Fix rtkvhd64.sys Blue Screen of Death:
1. Update Realtek Audio Drivers
Outdated or corrupted drivers are common causes of BSOD. It's recommended to use Driver Sentry to automatically detect and update drivers, saving time and avoiding the risk of downloading or installing incorrect drivers.
Click the download button to get the latest version of Driver Sentry, install it, and open the software, then click "Scan".
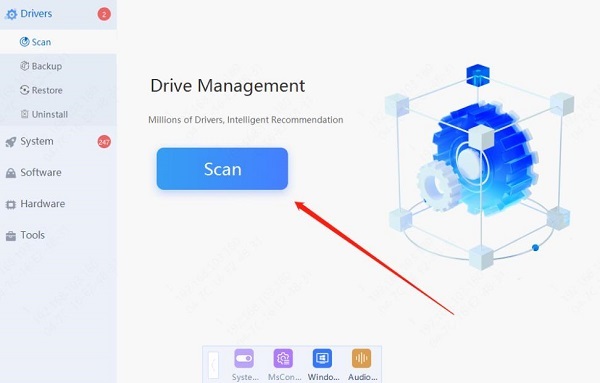
After scanning, it will show which drivers are missing or need updating. Find the Realtek audio driver in the results list and click the "Update" button.
After updating, it is recommended to restart your computer to ensure the updated driver takes effect.
2. Uninstall and Reinstall Realtek Audio Drivers
Press Windows + X keys, then select and open "Device Manager".
Expand the "Sound, video, and game controllers" section, and find the "Realtek High Definition Audio" driver.
Right-click on the "Realtek High Definition Audio" driver and select "Uninstall device". Confirm the removal and check "Delete the driver software for this device" (if available).
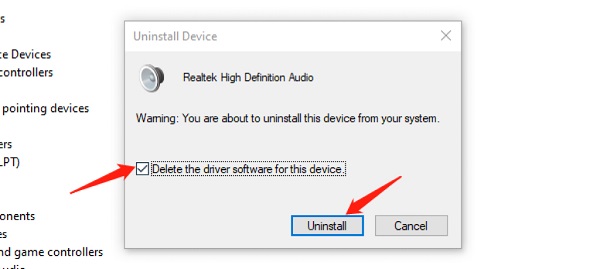
After uninstalling, restart your computer. Windows will attempt to automatically reinstall the default audio driver.
If it is not automatically installed, visit the official Realtek website or the computer manufacturer's website to download and manually install the latest audio driver.
3. Run System File Checker
Press Windows + R keys, type "cmd", and then press Ctrl + Shift + Enter to run the Command Prompt as an administrator.
In the Command Prompt, type "sfc /scannow" and press Enter.
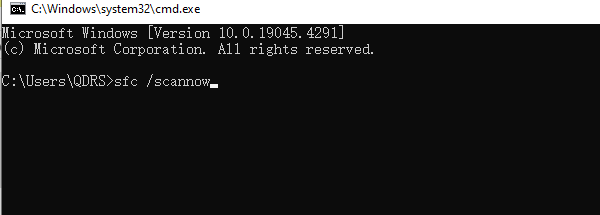
The System File Checker will scan all protected system files and replace corrupted files. This process may take a few minutes.
Once complete, the Command Prompt will display the scan results. Depending on the message, you may need to restart your computer to complete the repair.
4. Check for Windows Updates
Use the shortcut Windows key + I to open the Settings window, then click "Update & Security".
In the left menu, click on "Windows Update", then click "Check for updates".
If updates are available, click "Download and install", and the system will start downloading.
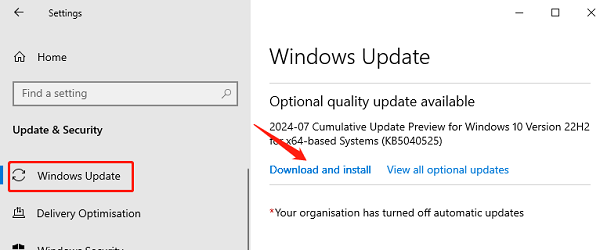
The installation process may require you to restart your computer. Click the restart button or follow the prompts to complete the update installation process.
5. Perform a Clean Boot
Press Windows + R keys, type "msconfig", and press Enter.
Under the "General" tab, select "Selective startup", and uncheck "Load startup items".
Switch to the "Services" tab, check "Hide all Microsoft services", then click "Disable all".
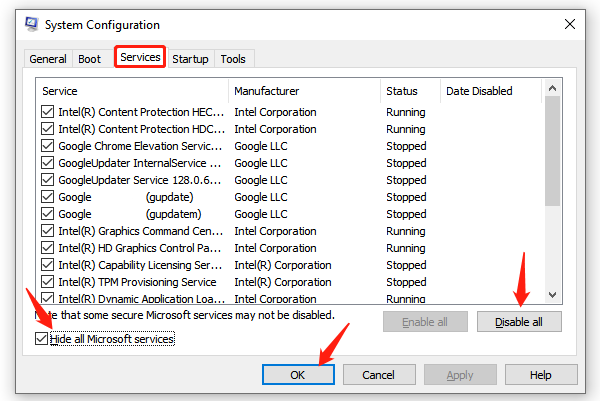
Press Ctrl + Shift + Esc keys to open Task Manager, switch to the "Startup" tab, right-click and disable all startup items.
Click "OK" and restart your computer to see if the issue persists.
6. Check for Hardware Issues
Ensure all audio devices (like headphones or speakers) are correctly connected and functioning properly.
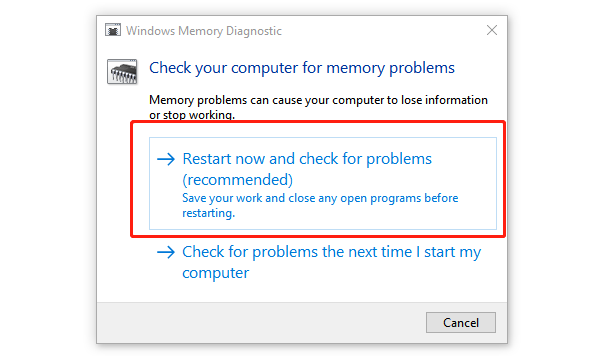
Use Windows' built-in "Memory Diagnostic Tool" to check for memory issues. Press Windows + R keys, type "mdsched.exe", then press Enter and choose "Restart now and check for problems".
If alternative hardware is available, try replacing the audio device or related hardware to see if the issue persists.
If you're unsure about the hardware status or don't have the appropriate tools and spare parts, consider contacting professional technical support or computer repair services.
By following these steps, you should be able to effectively fix the blue screen issues caused by rtkvhd64.sys. We hope this article helps you restore your computer to normal and stable operation.
See also:
How to Quickly Resolve Logitech Keyboard Lag Issues
How to Update Sound Card Drivers on Windows 10