Scanners can sometimes have issues that stop them from working, impacting efficiency and convenience. This article offers several methods to fix a malfunctioning scanner and restore its normal operation.
1. Check Power and Connections
First, ensure that the scanner's power cable and adapter are securely connected. If using a power adapter, check its connection to the scanner.
Verify that the power indicator light is on, confirming that the power is functioning properly.
Check if the USB or network cable between the scanner and the computer is securely connected. If needed, reconnect or try a different port.
2. Update Scanner Drivers
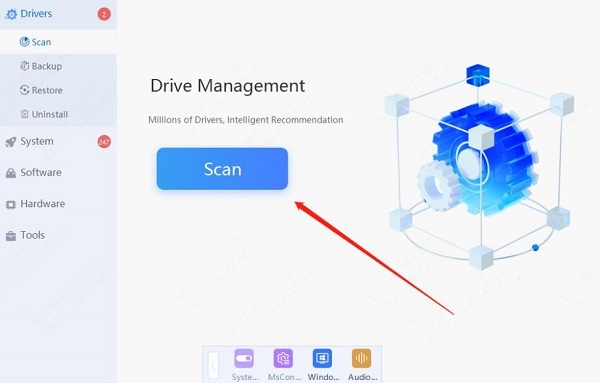
Scanner issues are often caused by outdated or corrupted drivers. Using Driver Sentry to automatically detect and update drivers can save time and avoid the risk of downloading or installing incorrect drivers.
Download and install the latest version of Driver Sentry, then open the software and click "Scan".

After the scan, identify any drivers that need updating from the list, find the scanner driver, and click "Update".
After the update, restart your computer to ensure the new drivers take effect.
3. Restart the Scanner and Computer
Turn off the scanner, wait for 10-15 seconds, and then turn it back on. This can clear the cache and reset the internal state, resolving temporary issues.
Completely shut down your computer, wait a few seconds, then restart it. This refreshes the system state and addresses system faults or software conflicts.

Try powering on the scanner after the computer starts, or vice versa, as different startup sequences might affect device recognition and connection.
4. Check Scanner Software Settings
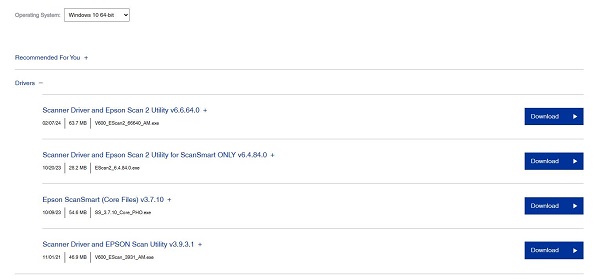
Ensure that the official drivers and scanning software are installed. Visit the scanner manufacturer's website to download and reinstall the latest drivers and software.

Open the scanning software and verify that the correct scanner device is selected. If multiple scanners are installed, the software might default to the wrong device. Manually select the correct scanner.
Check the scanning settings in the software, such as resolution, color mode, and file format, to ensure they match your scanning needs. Incorrect settings may cause scanning failures or errors.
5. Check Firewall and Security Software
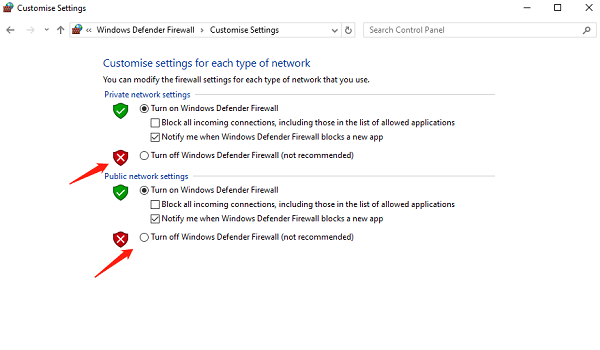
1). Temporarily disable firewall and security software
Some firewalls and security software might block communication between the scanner and the computer. Try temporarily disabling these programs to see if the issue is resolved. If the scanner works after disabling them, the software might be blocking the connection.

2). Add the scanner software to the trusted applications list
In the settings of your firewall and security software, add the scanner's drivers and software to the trusted applications list or exclusions. This prevents the firewall and security software from blocking legitimate scanner communication.
6. Try Another Computer or Device
Connect the scanner to another computer to test if it works there. If the scanner functions properly on another computer, the issue may lie with the original computer's configuration or settings.

If the scanner supports Wi-Fi or network connections, try different connection methods to rule out USB port or cable issues. Changing the connection method can help identify if the problem is related to the computer's USB port or network configuration.
7. Restore Default Settings
If your scanner has an option to restore factory settings, you might try resetting it to default.
Follow the instructions in the user manual to perform a "factory reset". Restoring factory settings can resolve issues caused by incorrect configurations or firmware problems.
Restoring factory settings will erase all personalized settings, so be sure to understand its impact and back up important settings or data if needed.
8. Clean Scanner Hardware
1). Clean the scanner glass
Turn off the scanner and use a lint-free cloth to gently wipe the scanner glass, removing dust, fingerprints, or smudges. Scratches or severe contamination on the glass can also affect scan quality.
2). Clean the rollers and internal components
If the scanner has a paper feeder or rollers, check for paper dust or dirt. Use appropriate cleaning tools to remove debris and ensure smooth operation of internal parts.
3). Maintenance tip
Regular cleaning can extend the scanner's lifespan and ensure optimal performance. It's advisable to perform basic cleaning monthly, depending on usage frequency.
By following these methods, you can effectively address scanner issues and restore normal operation. Regular checks and maintenance of the scanner's hardware and software can help prevent such problems.
See also:
How to Easily Upgrade Your PC to Windows 11
7 Ways to Fix High Latency and Slow Speed on Your Computer