Slow printing speed is a common issue, especially with large files or high-resolution prints. This article offers solutions to improve print speed.
1. Restart the Printer
Press the power button on the printer to ensure the device is fully turned off.
Disconnect the printer from the power source and wait for a few minutes.
Reconnect the power cable to the printer and turn the power on.
Try printing a test page to check if the issue is resolved.
2. Update Printer Drivers
Outdated or corrupted drivers are common causes of slow printing speeds. Timely driver updates can effectively prevent this issue. We recommend using Driver Sentry to automatically detect and update drivers, saving time and reducing the risk of downloading or installing incorrect drivers.
Click the download button to get the latest version of Driver Sentry, install it, then open the software and click "Scan".

After the scan, the software will display which drivers are missing or need updating. Find the printer driver in the list and click the "Upgrade" button.
After the update, it is recommended to restart your computer to ensure the updated driver works properly.
3. Check Network Connection
Ensure the printer is connected to the correct Wi-Fi network. The printer screen usually displays the current network status.
Check if the network cable is securely connected and ensure network devices (such as the router) are functioning properly.
Press Win + S, type "cmd", and run Command Prompt as administrator. Type "ping [printer IP address]" to check if it responds successfully.
If the network connection is unstable, reset the printer's network settings and ensure it is on the same network as the computer.
4. Adjust Print Quality
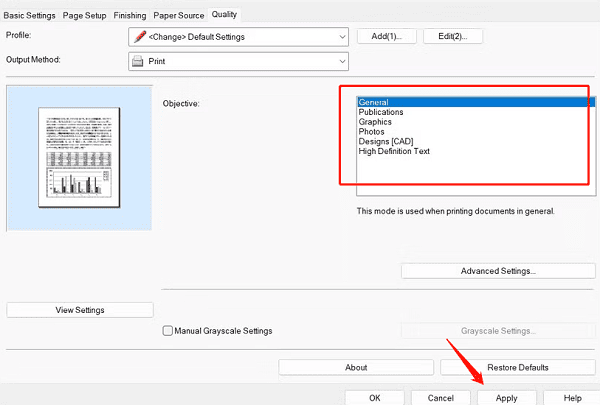
Open Control Panel, click "Devices and Printers", right-click on the target printer, and select "Printer Preferences".
Under the "Quality" tab, choose the preferred print quality.

If the print speed is slow or printing is not occurring, try selecting a lower resolution print quality mode.
After adjustment, test print a page to observe if the issue improves.
5. Clear Print Queue
Press Win + R, type "control printers", and hit Enter. Double-click the target printer to view its print queue.
In the print queue window, select all tasks, right-click, and choose "Cancel".
After clearing the queue, turn off the printer and restart the device.
Send a new print job and check if it works correctly.
6. Restart Print Spooler Service
Press Win + R, type "services.msc", and hit Enter.
In the list of services, locate the "Print Spooler service", right-click it, and select "Stop".
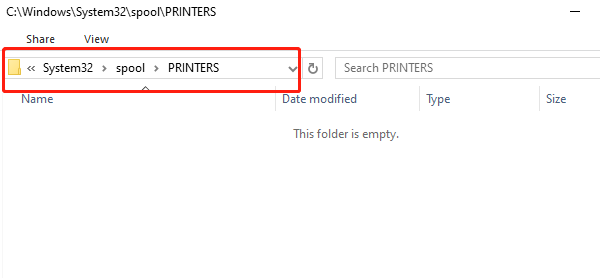
Open File Explorer and go to the path: C:\Windows\System32\spool\PRINTERS
Delete all files in this folder but do not delete the folder itself.

Return to the Services Manager, right-click Print Spooler and select Start.
7. Disable Quiet Mode
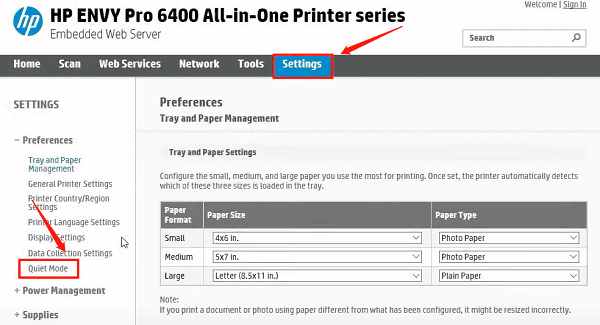
Some printers have a "Quiet Mode" option that may limit printing speed. Check the printer's display or control panel to see if Quiet Mode is enabled.
If Quiet Mode is on, turn off this option. Refer to the printer manual or the brand's official website for specific steps.

After disabling Quiet Mode, resend the print job and check if the print speed and response improve.
8. Re-add the Printer
Go to "Control Panel > Devices and Printers", right-click the target printer, and select Remove device.
Click "Add a printer or scanner", and the system will automatically search and list available printers.
If the system prompts for driver installation, ensure you use the latest version from the brand's official website.
After re-adding the printer, try printing a test document to confirm whether the printer is working correctly.
By following these steps, you can systematically troubleshoot and resolve slow printing issues. If the problem persists, it is recommended to contact the printer brand's technical support for further assistance.
See also:
Guide to Connecting a Laptop to Dual Monitors
8 Ways to Fix Hogwarts Legacy Stuttering