When using a computer, unstable Wi-Fi connections or the "Disabled" issue can often be frustrating. This article provides effective solutions to quickly resolve the Wi-Fi disabled issue and restore normal internet access.
1. Restart Devices
Click the "Start" menu in the lower left corner of your computer, select "Power", and then click "Restart".
Locate the power button on your router or modem, turn off the device, wait for 10-30 seconds, then turn it back on. This usually takes a few minutes to restart.
After restarting, check if the device has restored the network connection.
2. Update Network Drivers
Outdated network drivers can cause Wi-Fi issues, so regularly checking and updating drivers is essential for a stable connection. It's recommended to use Driver Sentry to automatically detect driver updates, saving time and avoiding risks of downloading or installing incorrect drivers.
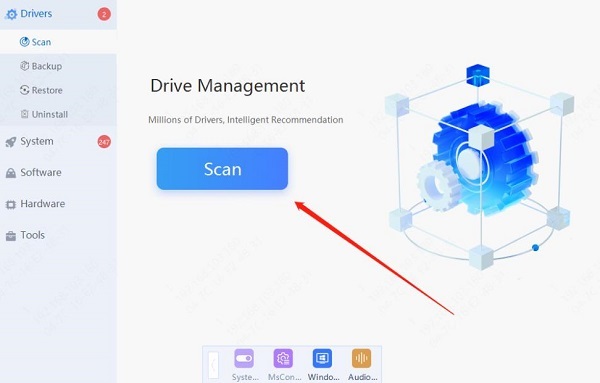
Click the download button to get the latest version of Driver Sentry, install it, and then open the software to click "Scan".

After scanning, it will display any drivers that need installation or updates. Find the network driver in the results list and click the "Update" button.
After the update, it's advisable to restart your computer to ensure the updated drivers work properly.
3. Check Network Adapter Settings
Press Windows + X keys and select "Device Manager".
In the Device Manager window, find "Network adapters", expand it to view the installed network adapters.
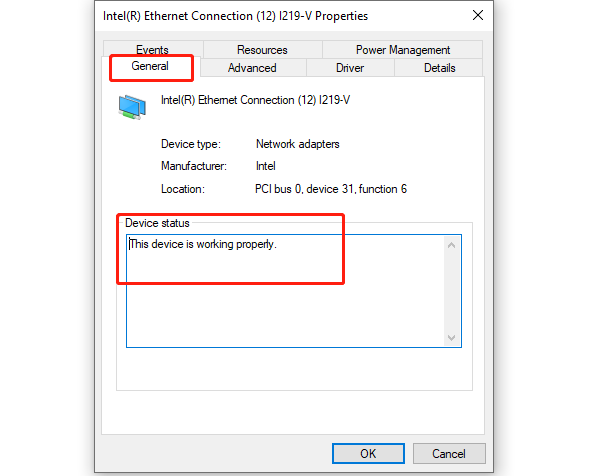
Right-click the network adapter icon, select "Properties", and check the description under "Device status".
If it shows "This device is working properly", the adapter has no hardware issues; if there are error codes or problem descriptions, you may need to update or reinstall the drivers.

4. Reset Network Settings
Press Windows + I keys to open the "Settings" window.
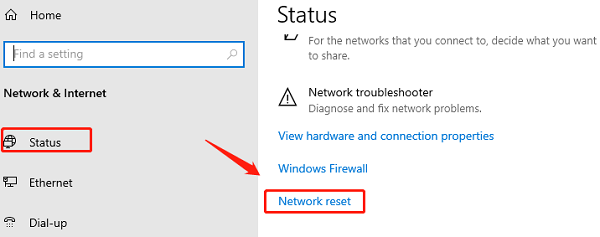
In the settings page, click on "Network & Internet".
Scroll down in the "Status" page to find the "Network reset" option and click it.

The system will prompt that this operation will remove all network adapters and reset the network settings to default. Confirm by clicking "Reset now".
After the reset, follow the prompts to restart your computer, and the network settings will be completely reset. You'll need to reconnect to Wi-Fi or other networks after rebooting.
5. Use Network Troubleshooter
Press Windows + I keys to open the "Settings" window.
In the settings page, click on "Update & Security".
In the left menu, find and click "Troubleshoot", then click "Additional troubleshooters".
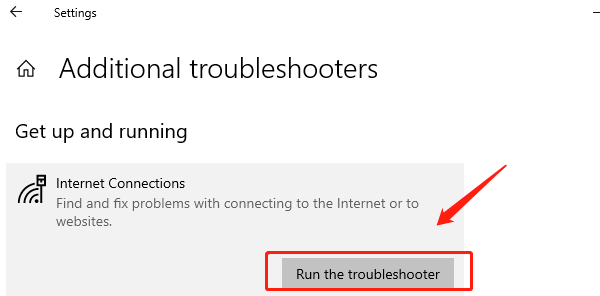
Locate the "Internet Connections" option and click the "Run the troubleshooter" button.

The system will begin to detect and attempt to fix network-related issues. Follow the on-screen instructions, and after the detection is complete, the system will display the repair results and provide further solutions.
6. Check Router Settings
Open a browser, enter the router's IP address (usually 192.168.1.1 or 192.168.0.1) in the address bar, and press enter.
On the login page, enter the router's username and password (usually found on a label on the back of the router or in the manual). If you don't know the password, try the default username and password, or reset the router to factory settings.
Once in the router's management page, find the "Network Settings" or "Internet Settings" section to confirm your network connection configuration is correct, including WAN and LAN settings.
If using a wireless connection, ensure the Wi-Fi name (SSID) and password are set correctly, and verify that the wireless network is enabled.
If you make any changes, click save and restart the router to apply the changes.
By following these steps, you can effectively troubleshoot and resolve most network connection issues. If the problem persists, you may need to contact your internet service provider or seek professional technical support.
See also:
7 Ways to Maximize GPU Performance
How to Fix Wireless Mouse Connection Failure