Many Windows users encounter the "Video Memory Management Internal" error. This guide helps you resolve the issue quickly.
1. Update Graphics Drivers
Outdated or corrupted drivers may cause the "Video Memory Management Internal" error in Windows. Updating the graphics driver promptly can effectively prevent such errors. Using a tool like Driver Sentry can save time and help you avoid downloading or installing incorrect drivers.
Click the download button to get the latest version of Driver Sentry, install it, and open the software. Then, click "Scan".

After scanning, the tool will display drivers that need updates. Locate the graphics driver in the list and click the "Upgrade" button.
Once updated, restart your computer to ensure the new driver works properly.
2. Run Hardware Diagnostic Tools
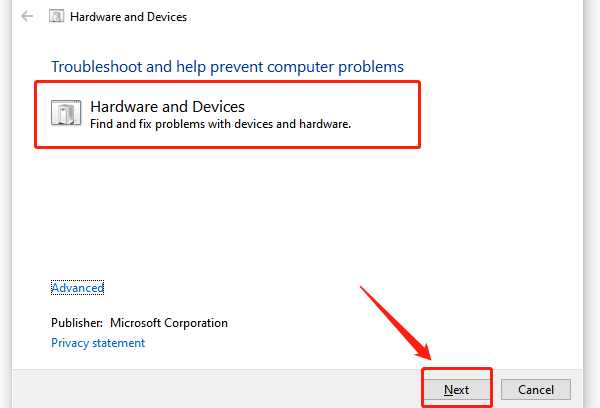
Press Win + R to open the Run dialog box, type "msdt.exe -id DeviceDiagnostic", and press Enter.
Click Next to start the Hardware and Devices Troubleshooter. Follow the on-screen instructions to complete the scanning process.

If issues are detected, the tool will offer repair suggestions or solutions.
3. Check System File Integrity
Press Win + S, type "Command Prompt", and run it as an administrator.
Enter the command "sfc /scannow" and press Enter.
The system will begin scanning and repairing corrupted files, which may take a few minutes.
After the scan completes, restart your computer and check if the error is resolved.
4. Test RAM
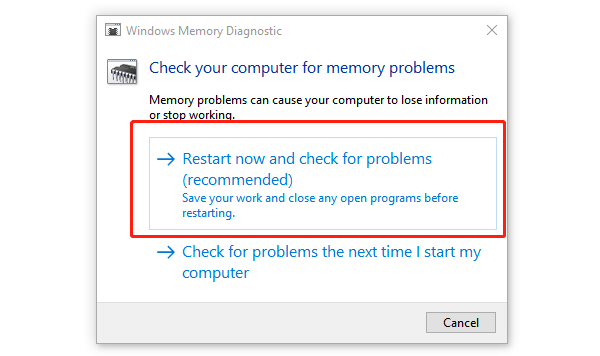
Press Win + R, type "mdsched.exe", and press Enter.
In the pop-up window, choose "Restart now and check for problems".

The system will reboot and automatically run the Memory Diagnostic Tool.
Once completed, results will be displayed after the next boot.
If RAM issues are detected, consider replacing the faulty memory sticks.
5. Check for Windows Updates
Press Win + I to open Settings.
Navigate to "Update & Security > Windows Update > Check for updates".
If updates are available, download and install them.
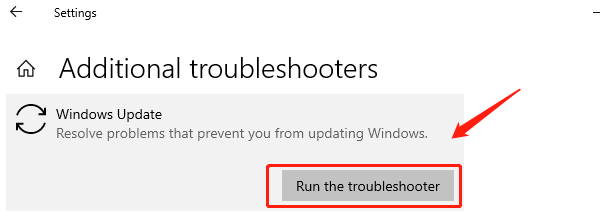
If updates fail, run the Windows Update Troubleshooter:
Under "Update & Security", select "Troubleshoot", then "Additional troubleshooters".
Choose "Windows Update", click "Run the troubleshooter", and follow the prompts.

Restart your computer after updates are installed and verify if the issue is resolved.
6. Clean System Cooling Components
Shut down your computer and disconnect it from the power source.
Using anti-static gloves, an air blower, or a soft brush, clean internal components, particularly the CPU cooler and fans, to remove dust.
Ensure fans are functioning correctly and that the heat sink is unobstructed.
Check if the thermal paste has dried out or degraded; if so, replace it with fresh thermal paste.
Reassemble the computer and power it on to see if the problem is resolved.
7. Reset Windows
Press Win + I to open Settings.
Navigate to "Update & Security > Recovery".
Under the "Reset this PC section", click "Get started".
Choose "Keep my files"; this option will remove installed applications but retain personal files while resetting Windows.
Follow the on-screen instructions to complete the reset process.
After the reset, verify if the error has been resolved.
Follow these steps to diagnose and fix the "Video Memory Management Internal" error. If the issue continues, contact technical support or reinstall the operating system.
See also:
How to Fix Slow Printing Issues
Guide to Fixing Printer Not Printing in Color