Some Windows users may experience mouse lag when playing games or using graphics-intensive apps. This article offers effective solutions to quickly resolve the issue and restore normal mouse functionality.
1. Update Drivers
Outdated or corrupted mouse drivers may be one of the causes of mouse lag. Updating the drivers can resolve compatibility issues and improve mouse performance. It is recommended to use Driver Sentry to automatically detect and update drivers, saving time and avoiding the risk of downloading or installing incorrect drivers.
Click the download button to get the latest version of Driver Sentry. After installation, open the software and click "Scan".

Once the scan is complete, it will display the drivers that are not installed or need updating. Find the mouse driver in the results list and click the "Upgrade" button.
After the update is complete, restart the computer to ensure the updated driver works properly.
2. Check Hardware Connections
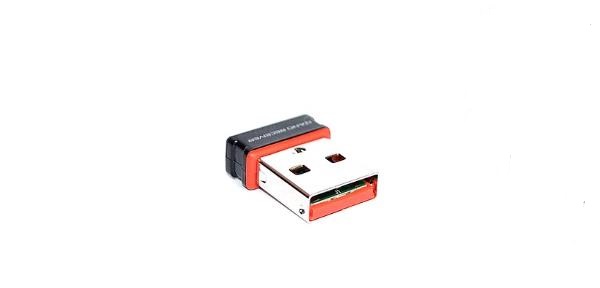
Ensure that the wireless mouse's USB receiver is securely connected to the computer's USB port. If the mouse is Bluetooth-enabled, make sure Bluetooth is enabled, and there are no signal obstructions between the mouse and the computer.
If you are using a USB receiver, try plugging it into another USB port on the computer, especially one directly connected to the computer's mainboard rather than through a USB hub.

If other USB devices are connected, try disconnecting them to see if the mouse starts working again.
3. Adjust Mouse Settings
Open the "Settings" menu by pressing Win + I.
Select "Devices", then click on "Mouse".
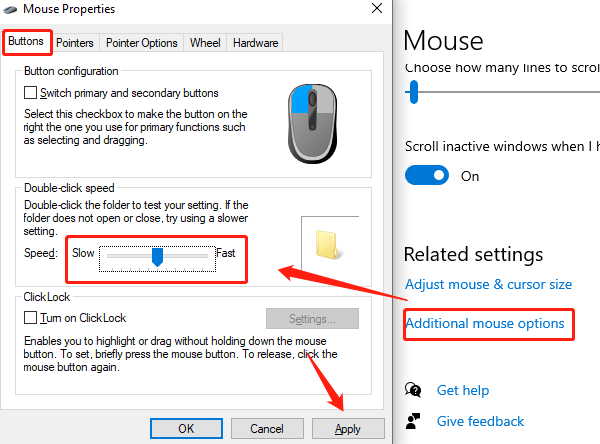
Click "Additional mouse" options where you can adjust the following options:
Pointer speed: Adjust the pointer speed to ensure it matches your usage habits.
Double-click speed: Adjust double-click speed to avoid unresponsive clicks.
Other settings: If there are any advanced options, adjust them according to your personal preferences.

After making adjustments, click "Apply" and test whether the mouse returns to normal operation.
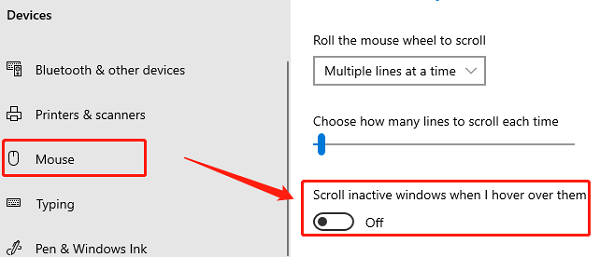
4. Disable Scroll Inactive Windows
Press Win + I to open Settings.
Select "Devices", then click "Mouse".
Find and uncheck the option "Scroll inactive windows when I hover over them".

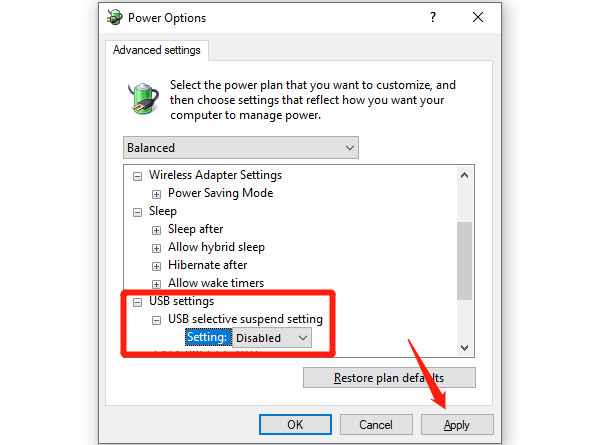
5. Disable USB Selective Suspend
Press the Windows logo key + R to open the Run dialog, type "powercfg.cpl", and select the appropriate result.
Click "Change plan settings", then choose "Change advanced power settings".
Expand "USB settings", find "USB selective suspend setting".

Change this setting to "Disabled", then click "OK".
6. Run Hardware Troubleshooter
Press Win + S, type "cmd".
In the search results, right-click "Command Prompt" and select "Run as Administrator".
Type the following command and press Enter: msdt.exe -id DeviceDiagnostic
This will open the "Hardware and Devices Troubleshooter" window.
Click "Next" to start the detection process, and the system will automatically scan and detect device issues.
Follow the on-screen instructions to complete the troubleshooting process.
If the system detects any problems, it will show repair options. Select "Apply this fix" to resolve the issue.
By following these steps, you can fix most mouse lag or connection issues. If the problem persists, consider replacing the mouse or contacting technical support.
See also:
How to Fix Corrupted System Files in Windows 10
Fixing Windows 11 Keeps Crashing