The Start menu in Windows 10 is essential for accessing apps and settings, but it can sometimes become unresponsive, disrupting daily tasks. This article presents effective methods to quickly resolve this issue.
1. Log Out and Log Back In
Click the "Start" button in the lower right corner of the taskbar.
Select your username, then click "Log out".
Log back into your account. This can refresh system settings and may resolve the Start menu issue.
2. Improve System Performance
Outdated, corrupted, or incompatible drivers can lead to decreased performance, hardware malfunctions, or system crashes. We recommend using Driver Sentry to automatically detect and update drivers, saving time and avoiding the risks of downloading or installing incorrect drivers.
Click the download button to get the latest version of Driver Sentry, then open the software after installation and click "Scan".

Once the scan is complete, it will show which drivers are missing or need updating. Find the driver that needs updating in the result list and click the "Upgrade" button.
After the update is complete, it is recommended to restart your computer to ensure the updated drivers function properly.
3. Run the System File Checker (SFC)
Press Win + R to open the Run dialog.
Type "cmd", then press Ctrl + Shift + Enter to run the command prompt as an administrator.
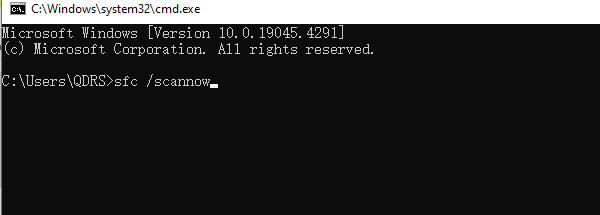
In the command prompt window, type "sfc /scannow", then press Enter.

The system will automatically scan and repair any corrupted system files. After the scan is complete, restart your computer to apply the changes.
4. Reset the Start Menu
Press Win + R to open the Run dialog.
Type "powershell", and press Ctrl + Shift + Enter to run Windows PowerShell as an administrator.
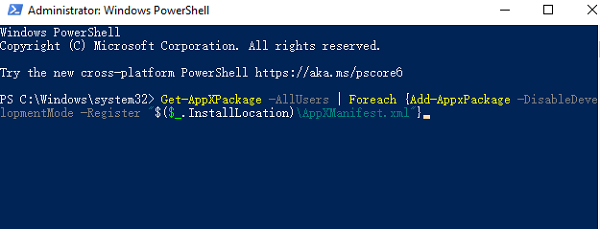
In the PowerShell window, enter the following command:
Get-AppXPackage -AllUsers | Foreach {Add-AppxPackage -DisableDevelopmentMode -Register "$($_.InstallLocation)\AppXManifest.xml"}

Press Enter to execute the command. This process may take some time; once completed, restart your computer.
5. Create a New XAML Start Menu Value
Press Win + R, type "regedit", and press Enter to open the Registry Editor.
Navigate to the following path:
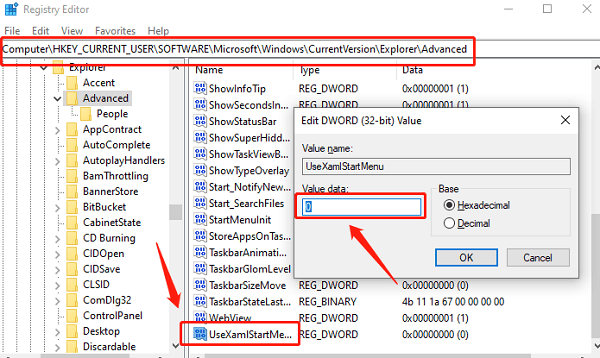
HKEY_CURRENT_USER\Software\Microsoft\Windows\CurrentVersion\Explorer\Advanced
In the right pane, right-click in an empty space and select "New" > "DWORD (32-bit) Value".
Name the new value "UseXamlStartMenu", double-click it, and set its data to 0.

Close the Registry Editor and restart your computer.
6. Use the Windows Troubleshooter
Open the "Settings" app and click "Update & Security".
Select "Troubleshoot" from the left menu.
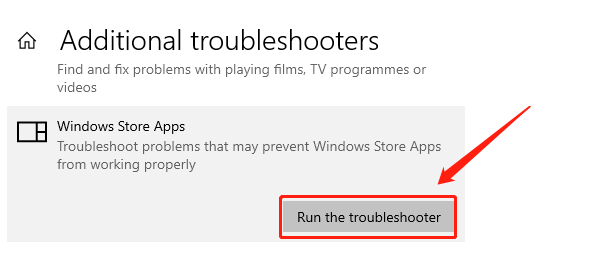
Click "Additional troubleshooters", then find "Windows Store Apps".
Click "Run the troubleshooter" and follow the on-screen instructions to complete the troubleshooting process.

7. Create a New User Account
Open the "Settings" app and click "Accounts".
Select "Family & other users" from the left menu.
Click "Add someone else to this PC".
Follow the prompts to create a new user account. Once completed, log into the new account to see if the Start menu functions properly.
8. Check for Windows Updates
Open the "Settings" app and click "Update & Security".
In the "Windows Update" tab, click "Check for updates".
If updates are available, download and install them, then restart your computer.
By following these steps, you can effectively resolve the issue of the Start menu not working in Windows 10. If the problem persists, it is advisable to seek professional technical support.
See also:
6 Ways to Fix Network Adapter Not Working in Windows
Methods to Reset Network Adapter