Many Windows 10 users face low volume issues, even at maximum settings. This article offers effective solutions to improve your computer's sound.
1. Update Audio Drivers
Outdated or damaged audio drivers can be a common cause of low volume on your computer. Updating the drivers can often resolve the issue and improve sound performance. We recommend using Driver Sentry to automatically detect and update drivers, saving time and avoiding the risk of downloading or installing incorrect drivers.
Download the latest version of Driver Sentry, install it, and open the software. Click "Scan".

After the scan is complete, the software will show which drivers are missing or need updates. Locate the audio driver in the list and click "Upgrade".
After updating, restart your computer to ensure the updated driver functions properly.
2. Check Volume Settings
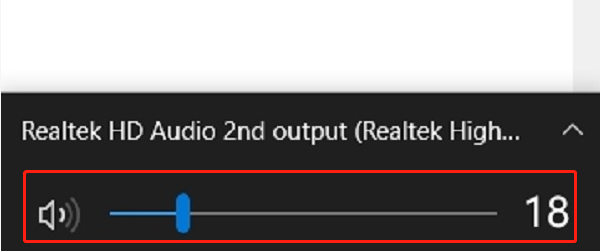
Click the volume icon in the lower-right corner of the taskbar and ensure the volume is not muted or set to the minimum level.
If the volume appears normal, try adjusting the volume slider to increase the level.

If the volume is muted, click the mute icon to unmute.
Additionally, check the Windows sound settings. Open "Settings > Sound" and ensure the system volume level is appropriately set.
3. Change Audio Format
Right-click the volume icon in the taskbar and select "Sounds".
Go to the "Playback" tab, select the current audio device (e.g., speakers or headphones), and click "Properties".
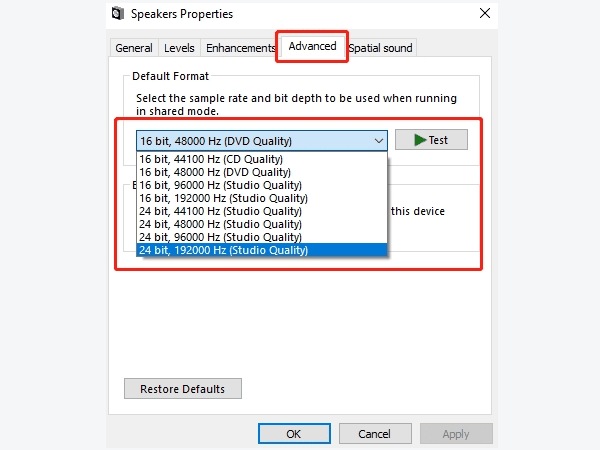
In the new window, switch to the "Advanced" tab and locate the "Default Format" section.
From the dropdown menu, select a higher audio format (e.g., 24-bit, 48000 Hz).

Click "Apply" and "OK", then restart your computer and check if the volume has improved.
4. Enable Loudness Equalization
Right-click the volume icon in the taskbar and select "Sounds".
Go to the "Playback" tab, select your audio device (e.g., speakers or headphones), and click "Properties".
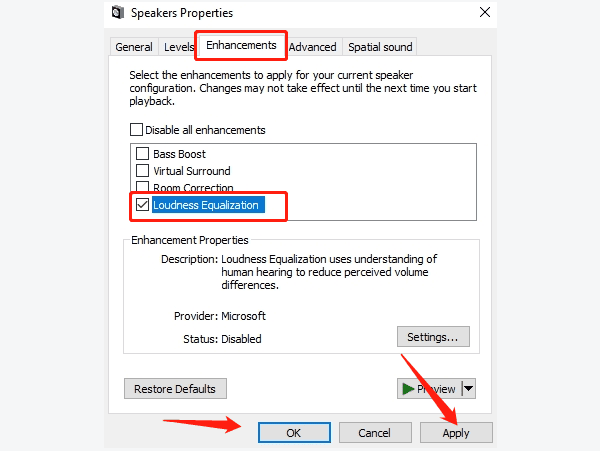
Switch to the "Enhancements" tab.
Check the box for "Loudness Equalization", which can help boost volume and improve sound quality.

Click "Apply" and "OK", then test if the volume has increased.
5. Check Volume Mixer
Right-click the volume icon in the taskbar and select "Open Volume Mixer".
In the volume mixer, check the volume levels for each application.
Ensure all applications that need sound are appropriately set and not muted.
If an application's volume is too low, adjust it to meet your needs.
Play audio again to see if the issue is resolved.
6. Run Audio Troubleshooter
Press Win + I to open Settings and select "Update & Security".
In the left menu, click "Troubleshoot".
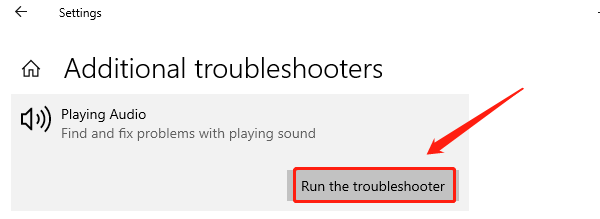
Under "Additional Troubleshooters", find "Playing Audio" and click "Run the Troubleshooter".

The system will automatically detect and fix audio issues. Follow the prompts and wait for the process to complete.
Once finished, check if the volume issue is resolved.
7. Check Hardware Issues
Verify that your audio device (headphones, speakers, etc.) is properly connected to the computer's audio jack. Ensure the connection is secure and not loose.
For external devices, try using a different audio cable or another audio device to test.
If possible, connect the audio device to another computer or phone to check if it works normally.
Ensure the audio device is not physically damaged. For built-in audio devices, check if the sound card or audio hardware is functioning correctly.
If using USB headphones or speakers, try plugging them into a different USB port to rule out connection problems.
Follow these steps to fix low-volume issues in Windows 10. If the problem continues, contact the device manufacturer or technical support.
See also:
Fix Fallout 3 Crashing on Windows 10
Guide to Fixing a Computer That Keeps Crashing