In Windows 11, microphone issues can affect audio input and output. This article offers solutions to help you quickly fix the problem and restore normal microphone use.
1. Check Microphone Hardware Connection
Ensure the microphone plug is correctly inserted into the computer's microphone port. If using a wired microphone, make sure the plug is fully seated. For a USB microphone, confirm the USB port is secure.
For external microphones, check the cable for damage or loose connections. If it's a wireless microphone, ensure the wireless receiver is correctly connected, and the microphone's battery is sufficiently charged.
If your computer has multiple audio jacks (like front and rear jacks), try connecting the microphone to a different jack to see if it improves performance.
2. Check Audio Drivers
Outdated or corrupted audio drivers can cause microphone issues. Timely driver updates are essential to avoid such problems. We recommend using Driver Sentry to automatically detect and update drivers, saving time and reducing the risk of incorrect installations.
Click the download button to get the latest version of Driver Sentry. After installation, open the software and click "Scan".

After scanning, the tool will show which drivers are missing or need updates. Find the audio driver in the list and click "Upgrade".
Once the update is complete, restart your computer to ensure the new driver takes effect.
3. Ensure the Microphone Is Not Muted
Some microphones have a physical mute switch or button—make sure it's in the "on" position and not set to mute.
Right-click the volume icon in the Windows taskbar and select "Sound Settings".
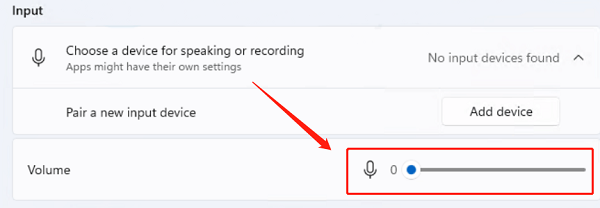
Under the "Input" section, make sure the microphone isn't muted. If you see a mute icon, click to unmute it.

In the "Sound Settings" page, click "Device Properties" and ensure the volume is turned up and not muted.
4. Enable Microphone Permissions in Settings
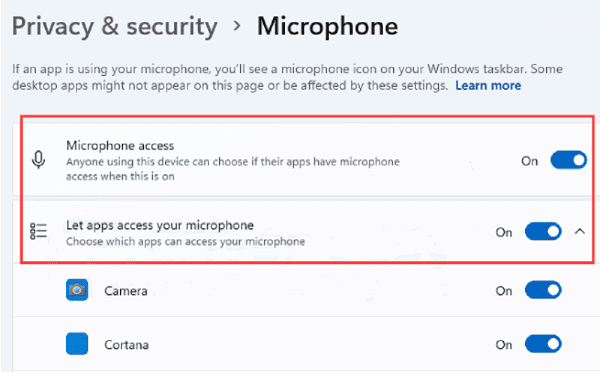
Open "Settings" and go to "Privacy" settings.
In the left menu, select "Microphone" and ensure that "Let apps access your microphone" is turned on.

In the list of apps, make sure that the app you want to use with the microphone (e.g., Skype, Zoom) has microphone access enabled.
After changing permissions, restart the application to apply the new settings.
5. Select the Correct Input Device
Right-click the volume icon in the taskbar and select "Sound Settings".
Under "Input", make sure the correct microphone device is selected as the default. If multiple microphones are connected, ensure the one you're using is chosen.
If you're using an external USB microphone, confirm it's set as the default input device.
In "Device Properties", check advanced settings for quality and gain options to optimize your microphone input.
6. Run Windows Audio Troubleshooter
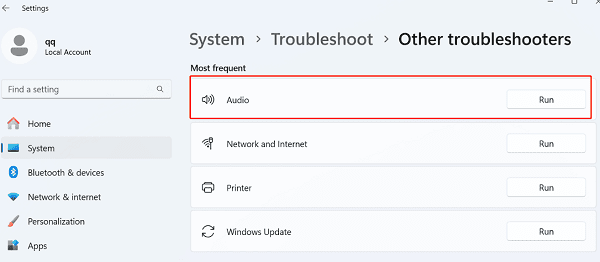
Open "Settings", select "System", then click "Troubleshoot".
In "Other troubleshooters", find "Audio" and click "Run".

Windows will automatically detect and attempt to resolve microphone issues.
If the troubleshooter identifies an issue, it may offer suggestions or apply fixes automatically. Follow the prompts.
7. Reset Audio Settings
Reset sound settings:
Go to "Settings" > "System" > "Sound".
If other steps haven't resolved the issue, click the "Reset" button to restore default audio settings.
Restart audio services:
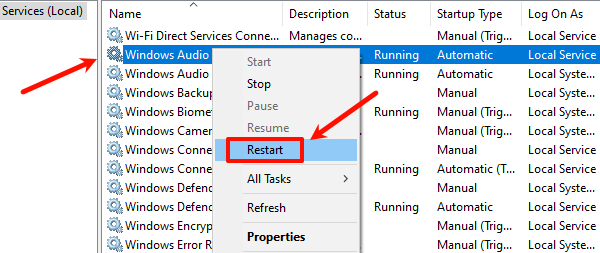
Press "Win + R", type "services.msc", and press Enter to open the Services Manager.
Find "Windows Audio", right-click, and select "Restart".

Alternatively, right-click to "Stop" and then "Start" to ensure the audio service runs properly.
8. Check Windows Updates
Open "Settings" and go to "Update & Security".
Click "Check for updates" to see if there are system updates available. If updates are available, click "Install".
After updating, restart your computer and check if the microphone issue is resolved.
These steps should help fix microphone issues in Windows 11. If the problem continues, it may be a hardware issue, or you may need to contact technical support.
See also:
Fix a Crashed Windows Computer
8 Methods to Fix Windows 10 Taskbar Not Working