A Windows 10 startup black screen can prevent access to the desktop, disrupting work and usability. This guide offers solutions to quickly resolve the issue and restore functionality.
1. Check External Monitor and Connections
Ensure the monitor is properly powered on and connected.
For laptops, make sure the brightness settings are appropriately adjusted.
Verify that the cable connecting the monitor to the computer, such as HDMI or VGA, is secure and undamaged.
If using an external monitor, try using a different cable or port.
If possible, connect the computer to another monitor or TV to rule out display hardware issues.
2. Update Graphics Drivers
Corrupted or outdated graphics drivers can cause black screen problems. Updating them promptly can help prevent such issues. A tool like Driver Sentry can automatically detect and update drivers efficiently while minimizing errors.
Download and install the latest version of Driver Sentry. Open the software and click "Scan".

After the scan, locate the graphics driver in the results and click "Upgrade".
Restart your computer after the update to ensure the driver works correctly.
3. Perform Windows Startup Repair
Forcefully shut down your computer during startup three times. This will trigger the "Repair your computer" interface.
Select Advanced "Options > Startup Repair". Windows will automatically detect and repair any startup issues.
4. Enter Safe Mode
Force Restart to Access Safe Mode:
Start the computer, then force it to shut down by holding the power button for 10 seconds until it turns off.
Repeat the process 3 times to trigger Windows startup repair.
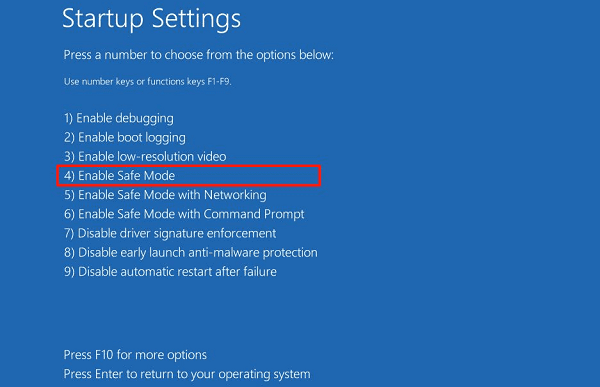
In the repair interface, choose "Advanced Options > Startup Settings > Restart".
Once the menu appears, press 4 or F4 to enter "Safe Mode".

Use F8 Key to Access Safe Mode:
Repeatedly press F8 during startup until the Advanced Boot Options menu appears.
Select Safe Mode from the list.
5. Repair System Files
Using SFC to Repair System Files:
In Safe Mode, press Win + X and select Command Prompt (Admin).
Enter the following command and press Enter: sfc /scannow
Wait for the scan to repair corrupted system files. Restart your computer and check if the issue is resolved.
Using the DISM Tool:
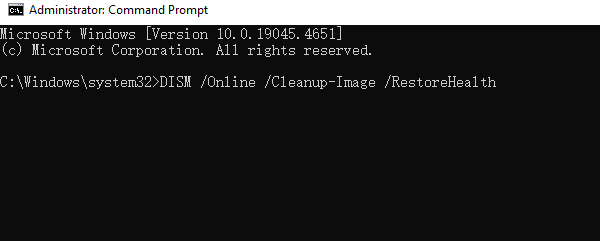
If SFC does not resolve the issue, use DISM for further repair:
In Command Prompt, enter the following command: DISM /Online /Cleanup-Image /RestoreHealth

Press Enter and wait for the repair process to complete. Restart your computer afterward.
6. Check Hard Drive for Errors
In Command Prompt (Admin), enter the following command: chkdsk C: /f /r
Replace C: with the appropriate drive letter if Windows is installed on a different partition.
Press Enter, and when prompted, confirm with Y to schedule the disk check for the next restart.
Restart your computer and let the check complete.
7. Uninstall Recent Windows Updates
In Safe Mode, press Win + I to open Settings.
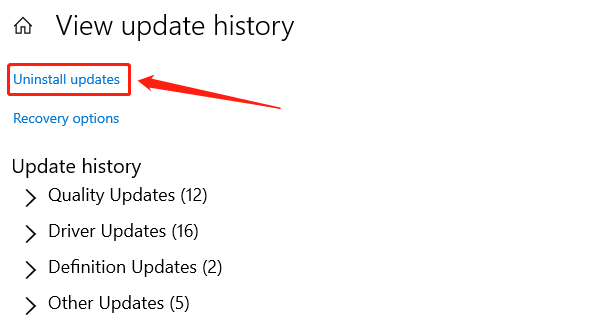
Navigate to "Update & Security > View Update History".
Click "Uninstall Updates".

Select the most recent update and click "Uninstall".
Restart your computer and check if the issue is resolved.
8. Reset Your PC
In the "Repair your computer" interface, select "Advanced Options > Reset this PC".
Choose "Keep my files" or "Remove everything" based on your preference.
Follow the on-screen instructions to complete the reset process, which reinstalls Windows.
These steps can help resolve the Windows 10 startup black screen issue. If it persists, contact technical support or seek professional help.
See also:
Guide to Fix Low Volume in Windows 10